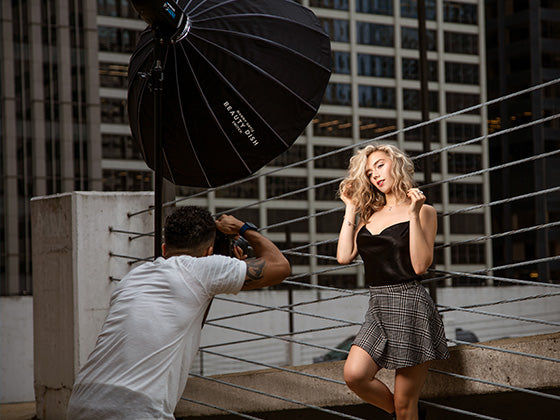
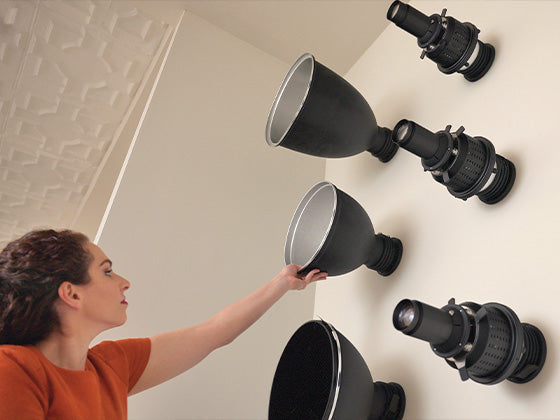
This video shows how to attach a Pocket Box softbox to a speedlite. This setup is the same for both on-camera and off-camera flash.
"},"name":"How do I attach a Pocket Box softbox to a speedlite?"},{"@type":"Question","acceptedAnswer":{"@type":"Answer","text":"
\n\n\n
\n
\n
\n
This optional hardware provides locking support for Switch modifiers.
"},"name":"How do I assemble the Switch modifier locking hardware?"},{"@type":"Question","acceptedAnswer":{"@type":"Answer","text":"
Yes, that is normal. You should see 3 to 4 threads extending through the arm rods enabling you to securely attach the arms and tighten the thumbscrews without fear of over tightening or stripping the threads. If you find it difficult to extend the spine mounting bolts through the curved arms, mount the curved arms to the spine after placing the fabric on the arms but before attaching the end tension rods between the arms.
"},"name":"The screw mounting location on the spine, by which the curved arms attach, barely extend through the curved rod during assembly. Is that normal?"},{"@type":"Question","acceptedAnswer":{"@type":"Answer","text":"
Yes, the new Westcott H2Pro bladder fits an original HurleyPro H2Pro bag. The Westcott H2Pro bladder warranty is limited to use with the Westcott H2Pro.
"},"name":"Does a Westcott H2Pro bladder fit an original HurleyPro weight bag?"},{"@type":"Question","acceptedAnswer":{"@type":"Answer","text":"
\n
Colors viewed on a screen typically appear more intense or brighter than printed hues. Your screen is composed of pixels, which emit light and can display over 16 million colors. Printers can only reproduce a few thousand colors.
\n
\n
Unfortunately, we cannot print colors exactly as you see them on your screen. The printing process takes our digital artwork and produces backdrops using a combination of inks that most closely approximate the colors you see online. Our printed backdrops are often slightly darker, simply because backdrops do not emit light (unlike your computer, phone, or tablet).
\n
\n
The appearance of color on the pictures of our backdrops can also vary from screen to screen based upon brightness settings and color calibration. We do our best to ensure that the images on our website match our printed backdrops as much as possible. If you are concerned about the color that you might receive, feel free to give us a call for more information.
\n
"},"name":"Why Don't Printed Colors Match What I See on my Screen?"},{"@type":"Question","acceptedAnswer":{"@type":"Answer","text":"\n
This video covers how to use a mono arm within a Westcott Apollo Orb to mount a strobe.
"},"name":"How to Mount a Strobe in an Apollo Orb"},{"@type":"Question","acceptedAnswer":{"@type":"Answer","text":"\n
\n
Watch as Kelly demonstrates the simplicity of setting up Westcott's Illusions uLite Green Screen Video Lighting Kit.
"},"name":"How to Setup your Green Screen Video Lighting Kit"},{"@type":"Question","acceptedAnswer":{"@type":"Answer","text":"
Brandon at Westcott discusses how to assemble the Rapid Box light modifier for speedlights.
This easy-to-use softbox sets up easily by mounting on a light stand with the attached adjustable bracket. Simply push the Rapid Box's center shaft toward the box and twist to lock. Now, you can add your deflector plate or diffusion panel.
"},"name":"How to Assemble the Westcott Rapid Box for Speedlights"},{"@type":"Question","acceptedAnswer":{"@type":"Answer","text":"
Brandon from Team Westcott discusses mounting a reflector with the Illuminator Arm. The Illuminator Reflector arm has a durable all-metal construction and can mount reflectors from 30" to 6'. By simply tightening onto a light stand, the Illuminator Arm allows for precise reflector positioning without an assistant.
"},"name":"Using the Westcott Illuminator Reflector Arm"},{"@type":"Question","acceptedAnswer":{"@type":"Answer","text":"\n
The Westcott Basics D5, the newest continuous light to enter the Westcott Basics line. The D5 offers 5 individual lamp sockets allowing for use with up to 5 50-watt daylight fluorescent lamps. These compact sockets are constructed with a heavy-duty ceramic base and are UL and CE certified for safety.
To begin assembly, locate the D5's softbox rods and thread the larger end through the rod sleeves and into the rod pockets located within the interior of the softbox. The smaller end of each rod should be exposed at the end of the box.
Place the softbox on a flat surface and begin inserting opposite rods into the D5's corresponding built-in rod receptacles until all rods are securely in place. You can now mount the D5 and D5 softbox to your preferred light stand with the D5's built-in thumb screw.
From there, bulbs may be installed (up to 50-watts in each socket) and the D5's placement may be adjusted via the built-in tilter bracket. Ensure that the back flaps are closed to prevent light spill and start shooting!
"},"name":"How to Set Up the Westcott Basics D5"},{"@type":"Question","acceptedAnswer":{"@type":"Answer","text":"\n
Westcott Top Pro photographer Eric Eggly discusses the large variety of mounting options available with Westcott's Zeppelin Deep Parabolic softbox series.
Your light source can be mounted to the rear of the Zeppelin Deep Parabolic softbox via the Zeppelin Yoke-Style Speedring Bracket. This will result in a soft, wraparound output.
Your light source can be mounted internally with a 2nd light stand via the Zeppelin's zippered entry point that is located on the bottom of the assembled softbox. Internal mounting gives a wide range of possibilities, with a more specular and direct output.
Your light source can also be mounted internally with the Zeppelin Mounting Arm. This preferred mounting method eliminates the use of a 2nd light stand and allows for easy light source adjustments.
Each Zeppelin Deep Parabolic softbox comes standard with both an inner and an outer diffusion panel. Experimenting with both the diffusion and the mounting of your light source can lead to a vast range of output styles.
"},"name":"Mounting Options for Portrait Lighting with the Zeppelin"},{"@type":"Question","acceptedAnswer":{"@type":"Answer","text":"
The Scrim Jim Cine is a compete modular framework designed for filmmakers and photographers. The Scrim Jim Cine is the ultimate light control system, giving users the ability to build and create whatever tool they need for whatever lighting they encounter.
This system's durable frames are designed to configure in sizes from 1'x 1' up to 8' x 8'. Frame pieces vary in size from 10" tubes and upward, giving filmmakers the ability to fit an entire scrim system into a carry-on or backpack.
A variety of connection pieces creates endless frame possibilities, allowing filmmakers to construct diffusion boxes, book lights, v-flats, floppy cutters, and more with ease. This frame set is interchangeable with all Scrim Jim Cine Frame sets and with Scrim Jim Cine tubes, connectors, and fabrics sold separately.
All Scrim Jim Cine frames and connectors are proudly built in the U.S.A. Product inspection and touch fastener installation is completed at Lott Industries in Toledo, Ohio
"},"name":"Scrim Jim Cine Light Control System: Book Light Configurations"},{"@type":"Question","acceptedAnswer":{"@type":"Answer","text":"\n
\n
The Ice Light 2 is the new and improved handheld LED light source for photographers and filmmakers. Designed by world-renowned photographer Jerry Ghionis and manufactured by Westcott, the Ice Light is a must-have light for on-the-go professionals.
With a 1740 lumen output, the Ice Light 2 is 50% bright than the original thanks to cutting-edge daylight-balanced LEDs. This portable light source weighs under 20 ounces for easy handheld use and features a removable lithium ion battery.
The Ice Light 2 has a built-in diffused front for soft, glamorous lighting. Its continuous output fully-dimmable with easy-to-use controls and a sleek digital display.
In this Westcott Gear Guide, Brandon discusses how to mount and store collapsible backdrops used for photography backgrounds.
Westcott's line of collapsible backdrops are currently available in Chroma-key Green/Neutral Gray and Black / White options. These convenient backdrops are available in a 5' x 6.5' size.
Westcott collapsible backgrounds are constructed with riveted solid steel frames that are backed with a lifetime warranty.
"},"name":"How to Use a Westcott Collapsible Backdrop"},{"@type":"Question","acceptedAnswer":{"@type":"Answer","text":"
Skylux owners can utilize our Bowens speedring to properly mount almost any square, rectangular, and/or octagonal softboxes.
\n
"},"name":"What speedring would I use with the Skylux to mount the Pro Softboxes?"},{"@type":"Question","acceptedAnswer":{"@type":"Answer","text":"
The flags in the kit are not able to be switched out, however, you may purchase additional Fast Flags and frames separately to create your own unique set.
\n
"},"name":"Can I exchange/switch the flags for different ones than what are included in the Fast Flag Kit?"},{"@type":"Question","acceptedAnswer":{"@type":"Answer","text":"
The FJ200 features an optical sensor that allows it to be triggered remotely by another flash or strobe unit fired nearby. This sensor is located just above the LCD screen on the back face. It’s important to know the location of the optical sensors as they need line of sight of the triggering flash. It is only available when units are set to Manual mode, as TTL and HSS data cannot be transmitted.
Enabling optical triggering with the FJ200
Enter Settings Menu: Press in on the control dial/select button.
Enable Optical Sensor: Navigate down until you see the “Optical” setting. Press in on the control dial to select it, and rotate the dial to change “OFF” to “ON”. Press in on the control dial again to confirm your selection.
Exit The Menu: Press the modeling lamp/return button to exit the menu.
With the optical sensor activated, units will fire simultaneously with an initial flash from any make or model, provided the flash output is sufficient and the sensor detects the signal.
FJ200 Resuming Normal Function: When you revert the “Optical” setting to “OFF” you must also re-enable “TTL-ALL” in the “Wireless” setting to resume normal wireless flash functionality.
We attempt to fulfill orders as quickly as possible based on the customer's selected delivery method or if not specified, the method we conclude is the most expedient; however, events such as holidays, severe weather conditions, and other unforeseen circumstances beyond our control can force exceptions to delivery estimates.
Orders are shipped on regular business days only, including Monday-Friday, and excluding US Federal holidays.
Free shipping is available to addresses in the Contiguous United States on most orders of qualifying products over $100. Customers shipping to anywhere outside the contiguous United States are responsible for shipping costs and any additional taxes, duties, or fees that may be incurred.
Lithium-Ion batteries are subject to additional shipping fees or restrictions, and may not qualify for free shipping. Please reference the International Civil Aviation Organization Council for the most up-to-date rules and regulations.
We have partnered with a third-party service to calculate and collect duties, taxes, and shipping costs for most of our international customers. You will be provided with international shipping costs at checkout based on the delivery address of your order.
More information regarding our shipping policies is available here.
We will email you a Return Authorization (RA) Number. We do not accept shipments without an RA Number.
Properly package the item(s) to ensure protection from damage in shipping. Include the RA Number on the outside of the box.
We strongly recommend shipping merchandise via FedEx, UPS, or another delivery service that provides tracking information and insurance. You are responsible for return shipping charges and any international fees.
Ship your return to:
F.J. Westcott Co. Attn: RA #0000000 ← Use your RA number 1425-B Holland Road Maumee, Ohio 43537
More information regarding our product warranty and repair policies is available here.
"},"name":"How can I get service for my Westcott product?"},{"@type":"Question","acceptedAnswer":{"@type":"Answer","text":"
This page is your gateway to a comprehensive collection of quick start guides and manuals for all our products. Maybe you're setting up a new device or looking to get the most out of your existing gear, our guides are here to help.
This guide covers the basic setup, controls, and operation of the FJ80 II Speedlight, including differences between the M and S models, powering on/off, attaching to a camera or mount, and recommended camera settings. For a complete user manual, visit the Westcott Product Manuals & Support Videos page.
FJ80 II M: Features a universal mount compatible with most camera brands. Sony cameras can be used in a manual mode although require an adapter for TTL and HSS use.
FJ80 II S: Designed specifically for Sony cameras and does not require an adapter.
Both models are compatible with the FJ Wireless Flash System.
Charging the FJ80 II Lithium Polymer Battery
Ensure the FJ80 II is OFF by long-pressing the Power button until the LCD screen turns off.
Remove the battery by pressing the release buttons on the sides and pulling it away from the battery port.
Connect the USB-C cord to the FJ80 II Battery Charger, and plug the AC adapter into a wall outlet.
Align the metal contacts on the battery with the contacts on the charger. Insert the battery into the charger and press down until it locks into place.
The battery is charged when all LED indicator lights turn green.
Remove the battery from the charger by pressing the release buttons and pulling it away from the charger.
Battery Charger LED Indicator Lights
Green
No Battery Inserted: Indicates the charger is ready.
Battery Inserted: Indicates the battery is fully charged.
Orange
Battery Inserted: Indicates the battery is charging.
Attaching the Lithium Polymer Battery
Insert the battery into the FJ80 II by squeezing the side tabs and snapping it into place. Ensure the battery contacts align with the speedlight contacts, and that the Westcott logo is right reading.
Detaching from a Camera Hot Shoe or Cold Shoe Stand
Ensure the FJ80 II is OFF.
Rotate the locking dial to the right, counterclockwise, to loosen.
Gently slide the speedlight towards the rear of the camera or cold shoe stand to remove it.
IMPORTANT: Always ensure the locking pin is fully retracted before attaching or detaching the speedlight to avoid damage.
Best Camera Settings for FJ80 II
Sony Cameras
The FJ80II M can be used in Manual mode for basic functionality. For TTL and HSS, use the dedicated Sony adapter (#4711) or the FJ80II S model specifically designed for Sony.
Turn off red-eye reduction.
Disable the electronic front curtain shutter.
Turn off silent shooting.
Set the flash mode to "Fill-In."
Ensure wireless flash is turned off.
Fuji Cameras
Set the shutter type to "Mechanical."
Turn off red-eye removal.
Nikon Cameras
For DSLRs: Set the shutter to "Mechanical." In the E1 Flash Sync menu, select "Auto FP 1/250th" if available.
For Mirrorless Cameras: Ensure the shutter is set to "Mechanical," silent photography is turned off, and flash mode is set to "Fill-In." Set the E1 Flash Sync menu to "Auto FP 1/200th" or "1/250th."
Canon Cameras
For DSLRs: Disable silent live view, enable flash, and turn off red-eye reduction.
For Mirrorless Cameras: Disable silent shutter and silent live view, and set the shutter to "Mechanical" if possible.
The FJ80 II is equipped with a USB-C port for both charging and firmware updates. Keeping your speedlight updated ensures you have the latest performance enhancements and features. The firmware version is displayed on the start-up screen.
To update your FJ80 II firmware, visit the Westcott Firmware Downloads and follow the provided instructions.
Important Notes
If the FJ80 II doesn’t display as an external device after connecting to a computer, disconnect the USB cable from both devices, restart the computer, and then restart the firmware update process.
Ensure your computer's power level is less than 25% before beginning the firmware update. Power loss during this process could render the FJ80 II inoperable, requiring professional repair.
Always properly eject the FJ80 II from your computer before removing the USB cable to avoid potential damage to the device.
If the firmware copying process is interrupted, close the progress window and try again. If issues persist, restart your computer.
"},"name":"FJ80 II Quick Start Guide"},{"@type":"Question","acceptedAnswer":{"@type":"Answer","text":"
Overview
This article offers a variety of basic advice and methods to help you get the most out of your Westcott equipment. Look through the sections below for insightful information and practical suggestions.
The FJ Wireless System is compatible with the following cameras using the latest firmware updates. Additional camera models are likely compatible and will be added to this list as they are tested and confirmed. Updated: 08/14/2023
For DSLRs: Set the shutter to "Mechanical." In the E1 Flash Sync menu, select "Auto FP 1/250th" if available.
For Mirrorless Cameras: Ensure the shutter is set to "Mechanical," silent photography is turned off, and flash mode is set to "Fill-In." Set the E1 Flash Sync menu to "Auto FP 1/200th" or "1/250th."
Because FJ wireless systems use a universal hot shoe mount, it's important to ensure the trigger is set to the appropriate camera manufacturer and that all pins are properly aligned.
Inspecting the Trigger's Locking Pin:
With the unit detached and the LCD screen facing away, loosen and tighten the shoe lock.
Observe the pin closest to you moving up and down. This is the locking pin that matches a port on your camera's hot shoe.
Ensure this pin is aligned with the port on your camera's hot shoe.
Attaching to a Camera Hot Shoe or Cold Shoe Stand
Ensure the unit is OFF and rotate the locking nut to the right, counterclockwise.
Slide the unit onto the camera’s hot shoe or cold shoe stand with the touchscreen facing the rear of the camera and facing you.
Rotate the locking dial left, clockwise, until securely mounted. Do not over-tighten.
Detaching from a Camera Hot Shoe or Cold Shoe Stand
Ensure the unit is OFF.
Rotate the locking dial to the right, counterclockwise, to loosen.
Gently slide the unit towards the rear of the camera or cold shoe stand to remove it.
Note: Never force the speedlight or trigger into or out of the camera’s hot shoe.
Battery Information
Charging:
Charge Before Empty: To maximize battery life, avoid fully depleting FJ batteries; recharge before they are 75% depleted.
Avoid Full Depletion: Lithium Polymer batteries lack memory effect and shouldn't be fully discharged. Westcott’s system has built-in protection against complete discharge, but long-term storage after heavy use can still cause damage.
Temperature Considerations: Avoid charging batteries below 10ºC/50ºF, and let batteries cool after use to prevent overheating, which can reduce lifespan and performance.
Storage:
Optimal Charge Levels: Store batteries between 50% and 75% charge to avoid chemical expansion that can render them unusable. Long-term full charge storage is not recommended.
Follow Proper Charging Instructions: Adhere to guidelines in the FJ product manual. Avoid attempting additional flashes when the battery is depleted, as this can damage the safety reserve and the battery itself. Consider having a backup battery for frequent high-demand use.
By keeping your Westcott FJ system products updated, you can take advantage of the latest features and maintain compatibility with other gear.
Important Instructions Before Updating
Use the Correct USB Cable: Always use the USB-A to USB-C cable included with your strobe and trigger for firmware updates. Using other connectors may result in error messages.
Check Firmware Compatibility: Ensure you are loading the correct firmware version for your specific FJ system product. Using incorrect firmware can lead to errors.
Troubleshooting Errors: If the latest firmware update causes malfunctions, try the following steps:
Re-download the firmware from the Westcott website.
Best Practice: Please wait until a Westcott firmware update is available before applying any camera firmware changes that impact hot shoe and flash functions. It is possible to roll back Westcott firmware to earlier versions, however most camera firmware cannot be undone once updated.
Quick Links
Click the link below to jump to your desired section.
Download the latest firmware ZIP file. (Note: Various browsers may automatically unzip the ZIP file. In this scenario, skip to Step #3.)
Unzip the file and open the extracted folder.
IMPORTANT: Read ALL FILES located in the extracted folder (i.e. README, Changelog).
Ensure the FJ80 II is OFF and cooled before installing the firmware.
Remove the FJ80 II battery.
Connect the USB-A to USB-C cable to the FJ80 II’s USB-C port.
Common operating systems will present the strobe as an external drive device. (Note: MacOS may display the external device on the desktop or in the Finder window.)
Locate the .BIN file on your computer and drag the file to the FJ80 II (external device). (Note: The file ending in .BIN will be the ONLY filed copied to the FJ80 II.)
Once the file has been completely copied to the FJ80 II, EJECT the FJ80 II from the computer.
Remove the USB-C cable from the FJ80 II and reattach the battery.
Long press the Power | Test button on the FJ80 II, tap the blue power logo on the screen to initiate the firmware update. Finally, confirm installation was successful by locating the firmware text in the bottom right corner of the screen during the start-up process.
IMPORTANT
If the FJ80 II doesn’t display as an external device after being connected to the computer, disconnect the USB cable from both devices, restart the computer, and restart the firmware installation process.
It’s recommended that the firmware update installation process be completed only when the connected computer’s power level is ≥ 50%. Loss of power of any type during this process could render the FJ80 II inoperable and require professional repair.
Removing the USB-A to USB-C cable from the FJ80 II without properly ejecting the FJ80 II from your computer could render the speedlight inoperable and require professional repair.
Depending on the operating system and the applications running, copying the firmware from your computer to the FJ80 II may take a few minutes and/or halt the copying process. Should this happen, close the copy progress window and try again. Further copying issues may require the computer to be restarted.
FJ80 II S
Firmware Links:
Note: Only download the previous firmware version if you are experiencing issues with the current version.
Download the latest firmware ZIP file. (Note: Various browsers may automatically unzip the ZIP file. In this scenario, skip to Step #3.)
Unzip the file. Open the extracted folder.
IMPORTANT: Read ALL FILES located in the extracted folder (i.e. README, Changelog).
Ensure the FJ-X2m is OFF.
Connect the USB-A to USB-C cable to the FJ-X2m’s USB-C port.
On the FJ-X2m, press and hold the far-right button below the screen under the C.Fn title (Menu Selection button 3).
While holding the button, connect the USB-A to USB-C cable into your computer’s USB-A port. The Wireless Signal Indicator light on FJ-X2m will illuminate red when your computer has recognized the connection to the FJ-X2m. You may release the button at this time. Most operating systems will present the FJ-X2m as an external device. MacOS may display an icon on the desktop or in a Finder window.
Locate the .BIN file on your computer and drag the file to the FJ-X2m (external device).
Once the file has copied to the FJ-X2m, EJECT the external device from the computer.
Unplug the USB-A to USB-C cable cable from your computer and the FJ-X2m.
Long press the Power | Menu button on the FJ-X2m to initiate the firmware update.
IMPORTANT
If the FJ-X2m doesn’t display as an external device after connecting to a computer, disconnect the USB cable from both devices and restart the computer and firmware update process.
It’s recommended that the firmware update installation process be completed only when the connected computer’s power level is ≥ 25%. Loss of power of any type during this process could render the FJ-X2m inoperable and require professional repair.
Removing the USB cable from the FJ-X2m without properly ejecting the device from your computer could render the trigger inoperable and require professional repair.
Copying the firmware from your computer to the FJ-X2m may take a few minutes and/ or halt the copying process. Should this happen, close the copy progress window and try again. Further copying issues may require the computer to be restarted.
FJ80 SE M
Firmware Links:
Note: Only download the previous firmware version if you are experiencing issues with the current version.
Download the latest firmware ZIP file. (Note: Various browsers may automatically unzip the ZIP file. In this scenario, skip to Step #3.)
Unzip the file and open the extracted folder.
IMPORTANT: Read ALL FILES located in the extracted folder (i.e. README, Changelog).
Ensure the FJ80-SE is OFF and cooled before installing the firmware.
Remove the FJ80-SE battery.
Connect the USB-A to USB-C cable to the FJ80-SE’s USB-C port.
Common operating systems will present the strobe as an external drive device. (Note: MacOS may display the external device on the desktop or in the Finder window.)
Locate the .BIN file on your computer and drag the file to the FJ80-SE (external device). (Note: The file ending in .BIN will be the ONLY filed copied to the FJ80-SE.)
Once the file has been completely copied to the FJ80-SE, EJECT the FJ80-SE from the computer.
Remove the USB-C cable from the FJ80-SE and reinsert the battery.
Slide up the Power button on the FJ80-SE to initiate the firmware update. Finally, confirm installation was successful by locating the firmware text in the bottom right corner of the screen during the start-up process.
IMPORTANT
If the FJ80-SE doesn’t display as an external device after being connected to the computer, disconnect the USB cable from both devices, restart the computer, and restart the firmware installation process.
It’s recommended that the firmware update installation process be completed only when the connected computer’s power level is ≥ 50%. Loss of power of any type during this process could render the FJ80-SE inoperable and require professional repair.
Removing the USB-A to USB-C cable from the FJ80-SE without properly ejecting the FJ80-SE from your computer could render the speedlight inoperable and require professional repair.
Depending on the operating system and the applications running, copying the firmware from your computer to the FJ80-SE may take a few minutes and/or halt the copying process. Should this happen, close the copy progress window and try again. Further copying issues may require the computer to be restarted.
FJ80
Firmware Links:
Note: Only download the previous firmware version if you are experiencing issues with the current version.
Download the latest firmware ZIP file. (Note: Various browsers may automatically unzip the ZIP file. In this scenario, skip to Step #3.)
Unzip the file and open the extracted folder.
IMPORTANT: Read ALL FILES located in the extracted folder (i.e. README, Changelog).
Ensure the FJ80 is OFF and cooled before installing the firmware.
Connect the USB-A to USB-C cable to the FJ80’s USB-C port.
Common operating systems will present the strobe as an external drive device. (Note: MacOS may display the external device on the desktop or in the Finder window.)
Locate the .BIN file on your computer and drag the file to the FJ80 (external device). (Note: The file ending in .BIN will be the ONLY filed copied to the FJ80.)
Once the file has been completely copied to the FJ80, EJECT the FJ80 from the computer.
Remove the USB-C cable from the FJ80 and reattach the battery.
Long press the Power | Test button on the FJ80, tap the blue power logo on the screen to initiate the firmware update. Finally, confirm installation was successful by locating the firmware text in the bottom right corner of the screen during the start-up process.
IMPORTANT
If the FJ80 doesn’t display as an external device after being connected to the computer, disconnect the USB cable from both devices, restart the computer, and restart the firmware installation process.
It’s recommended that the firmware update installation process be completed only when the connected computer’s power level is ≥ 50%. Loss of power of any type during this process could render the FJ80 inoperable and require professional repair.
Removing the USB-A to USB-C cable from the FJ80 without properly ejecting the FJ80 from your computer could render the speedlight inoperable and require professional repair.
Depending on the operating system and the applications running, copying the firmware from your computer to the FJ80 may take a few minutes and/or halt the copying process. Should this happen, close the copy progress window and try again. Further copying issues may require the computer to be restarted.
FJ400
Firmware Links:
Note: Only download the previous firmware version if you are experiencing issues with the current version.
Download the latest firmware ZIP file. (Note: Various browsers may automatically unzip the ZIP file. In this scenario, skip to Step #3.)
Unzip the file and open the extracted folder.
IMPORTANT: Read ALL FILES located in the extracted folder (i.e. README, Changelog).
Ensure the FJ400 is OFF and cooled before removing the battery from the strobe.
Connect the USB-A to USB-C cable to the FJ400’s USB-C port.
Common operating systems will present the strobe as an external drive device. (Note: MacOS may display the external device on the desktop or in the Finder window.)
Locate the .BIN file on your computer and drag the file to the FJ400 (external device). (Note: The file ending in .BIN will be the ONLY filed copied to the FJ400.)
Once the file has been completely copied to the FJ400, EJECT the FJ400 from the computer.
Remove the USB-C cable from the FJ400 and reattach the battery.
Press the Power | Model button on the FJ400 to initiate the firmware update and confirm the firmware version. The firmware version can be found at the bottom right of the screen while it turns on.
IMPORTANT
If the FJ400 doesn’t display as an external device after being connected to the computer, disconnect the USB cable from both devices, restart the computer, and restart the firmware installation process.
It’s recommended that the firmware update installation process be completed only when the connected computer’s power level is ≥ 50%. Loss of power of any type during this process could render the FJ400 inoperable and require professional repair.
Removing the USB-A to USB-C cable from the FJ400 without properly ejecting the FJ400 from your computer could render the strobe inoperable and require professional repair.
Depending on the operating system and the applications running, copying the firmware from your computer to the FJ400 may take a few minutes and/or halt the copying process. Should this happen, close the copy progress window and try again. Further copying issues may\nrequire the computer to be restarted.
FJ200
Firmware Links:
Note: Only download the previous firmware version if you are experiencing issues with the current version.
Download the latest firmware ZIP file. (Note: Various browsers may automatically unzip the ZIP file. In this scenario, skip to Step #3.)
Unzip the file and open the extracted folder.
IMPORTANT: Read ALL FILES located in the extracted folder (i.e. README, Changelog).
Ensure the FJ200 is OFF and cooled before removing the battery from the strobe.
Connect the USB-A to USB-C cable to the FJ200’s USB-C port.
Common operating systems will present the strobe as an external drive device. (Note: MacOS may display the external device on the desktop or in the Finder window.)
Locate the .BIN file on your computer and drag the file to the FJ200 (external device). (Note: The file ending in .BIN will be the ONLY filed copied to the FJ200.)
Once the file has been completely copied to the FJ200, EJECT the FJ200 from the computer.
Remove the USB-C cable from the FJ200 and reinsert the battery.
Long press the Power | Test button on the FJ200 to initiate the firmware update and confirm installation was successful by locating the firmware text in the bottom right corner of the screen during the start-up process.
IMPORTANT
If the FJ200 doesn’t display as an external device after being connected to the computer, disconnect the USB cable from both devices, restart the computer, and restart the firmware installation process.
It’s recommended that the firmware update installation process be completed only when the connected computer’s power level is ≥ 50%. Loss of power of any type during this process could render the FJ200 inoperable and require professional repair.
Removing the USB-A to USB-C cable from the FJ200 without properly ejecting the FJ200 from your computer could render the strobe inoperable and require professional repair.
Depending on the operating system and the applications running, copying the firmware from your computer to the FJ200 may take a few minutes and/or halt the copying process. Should this happen, close the copy progress window and try again. Further copying issues may require the computer to be restarted.
FJ-X3 M
Firmware Links:
Note: Only download the previous firmware version if you are experiencing issues with the current version.
Download the latest firmware ZIP file. (Note: Various browsers may automatically unzip the ZIP file. In this scenario, skip to Step #3.)
Unzip the file. Open the extracted folder.
IMPORTANT: Read ALL FILES located in the extracted folder (i.e. README, Changelog).
Ensure the FJ-X3 is OFF.
Connect the USB-A to USB-C cable to the FJ-X3’s USB-C port.
On the FJ-X3, press and hold the SYNC•MENU button below the screen.
While holding the button, connect the USB-A to USB-C cable to your computer’s USB-A port. The Wireless Signal Indicator light on FJ-X3 will illuminate red when your computer has recognized the connection to the FJ-X3. You may release the button at this time. Most operating systems will present the FJ-X3 as an external device. MacOS may display an icon on the desktop or in a Finder window.
Locate the .BIN file on your computer and drag the file to the FJ-X3 (external device).
Once the file has copied to the FJ-X3, EJECT the external device from the computer.
Unplug the USB-A to USB-C cable from your computer and the FJ-X3.
Long press the Power button on the FJ-X3 to initiate the firmware update.
IMPORTANT
If the FJ-X3 doesn’t display as an external device after connecting to a computer, disconnect the USB cable from both devices and restart the computer and firmware update process.
It’s recommended that the firmware update installation process be completed only when the connected computer’s power level is ≥ 25%. Loss of power of any type during this process could render the FJ-X3 inoperable and require professional repair.
Removing the USB cable from the FJ-X3 without properly ejecting the device from your computer could render the trigger inoperable and require professional repair.
Copying the firmware from your computer to the FJ-X3 may take a few minutes and/or halt the copying process. Should this happen, close the copy progress window and try again. Further copying issues may require the computer to be restarted.
FJ-X3 S
Firmware Links:
Note: Only download the previous firmware version if you are experiencing issues with the current version.
Download the latest firmware ZIP file. (Note: Various browsers may automatically unzip the ZIP file. In this scenario, skip to Step #3.)
Unzip the file. Open the extracted folder.
IMPORTANT: Read ALL FILES located in the extracted folder (i.e. README, Changelog).
Ensure the FJ-X3 is OFF.
Connect the USB-A to USB-C cable to the FJ-X3’s USB-C port.
On the FJ-X3, press and hold the SYNC•MENU button below the screen.
While holding the button, connect the USB-A to USB-C cable to your computer’s USB-A port. The Wireless Signal Indicator light on FJ-X3 will illuminate red when your computer has recognized the connection to the FJ-X3. You may release the button at this time. Most operating systems will present the FJ-X3 as an external device. MacOS may display an icon on the desktop or in a Finder window.
Locate the .BIN file on your computer and drag the file to the FJ-X3 (external device).
Once the file has copied to the FJ-X3, EJECT the external device from the computer.
Unplug the USB-A to USB-C cable from your computer and the FJ-X3.
Long press the Power button on the FJ-X3 to initiate the firmware update.
IMPORTANT
If the FJ-X3 doesn’t display as an external device after connecting to a computer, disconnect the USB cable from both devices and restart the computer and firmware update process.
It’s recommended that the firmware update installation process be completed only when the connected computer’s power level is ≥ 25%. Loss of power of any type during this process could render the FJ-X3 inoperable and require professional repair.
Removing the USB cable from the FJ-X3 without properly ejecting the device from your computer could render the trigger inoperable and require professional repair.
Copying the firmware from your computer to the FJ-X3 may take a few minutes and/or halt the copying process. Should this happen, close the copy progress window and try again. Further copying issues may require the computer to be restarted.
FJ-X2 M
Firmware Links:
Note: CHECK SERIAL NUMBER BEFORE UPDATING Only download the previous firmware version if you are experiencing issues with the current version.
Download the latest firmware ZIP file. (Note: Various browsers may automatically unzip the ZIP file. In this scenario, skip to Step #3.)
Unzip the file. Open the extracted folder.
IMPORTANT: Read ALL FILES located in the extracted folder (i.e. README, Changelog).
Ensure the FJ-X2m is OFF.
Connect the USB-A to USB-C cable to the FJ-X2m’s USB-C port.
On the FJ-X2m, press and hold the far-right button below the screen under the C.Fn title (Menu Selection button 3)
While holding the button, connect the USB-A to USB-C cable into your computer’s USB-A port. The Wireless Signal Indicator light on FJ-X2m will illuminate red when your computer has recognized the connection to the FJ-X2m. You may release the button at this time. Most operating systems will present the FJ-X2m as an external device. MacOS may display an icon on the desktop or in a Finder window.
Locate the .BIN file on your computer and drag the file to the FJ-X2m (external device).
Once the file has copied to the FJ-X2m, EJECT the external device from the computer.
Unplug the USB-A to USB-C cable cable from your computer and the FJ-X2m.
Long press the Power | Menu button on the FJ-X2m to initiate the firmware update.
IMPORTANT
If the FJ-X2m doesn’t display as an external device after connecting to a computer, disconnect the USB cable from both devices and restart the computer and firmware update process.
It’s recommended that the firmware update installation process be completed only when the connected computer’s power level is ≥ 25%. Loss of power of any type during this process could render the FJ-X2m inoperable and require professional repair.
Removing the USB cable from the FJ-X2m without properly ejecting the device from your computer could render the trigger inoperable and require professional repair.
Copying the firmware from your computer to the FJ-X2m may take a few minutes and/ or halt the copying process. Should this happen, close the copy progress window and try again. Further copying issues may require the computer to be restarted.
When working with the FJ Wireless system, ensuring proper functionality and connectivity is essential for a seamless shooting experience. This guide will walk you through troubleshooting steps with your FJ80, FJ80 II M, FJ80 II S, FJ80 SE M, and FJ80SE S.
By following these steps, you can quickly identify and resolve any challenges, helping you maintain consistent performance across your FJ Wireless Speedlights. This comprehensive guide is designed to educate and assist you with your FJ Wireless gear.
Standby mode disables the hot shoe on the flash. This is useful for moments when you need a quick photo with natural light and you want your camera to react as it does when a flash is not attached without actually powering off the flash or detaching it.
FJ80II
In Speedlight Mode, notice the STDBY button at the top right of the screen.
Green: The unit is in standby mode and will not fire.
Gray: Standby mode is disabled and flash will resume normal function.
FJ80 SE
In Speedlight Mode, If STDBY is enabled it will be displayed under the camera manufacturer in the top left. To toggle this setting, navigate to menu 2 and press the button corresponding to STDBY.
When in speedlight mode, CH and GR will not displayed at the top of the screen.
2. Test Fire
When the unit is on and STDBY is disabled, press the test fire button, the button with a lightning bolt icon. This button will be green when it's ready to test fire. This will test-fire the flash at the selected power output.
If the FJ80 does not test fire or if the test fire button never turns green, Contact Westcott support.
3. Verify Mounting
In some instances, the manufacturing of a particular model or camera unit can result in the need for the user to pay special attention to the mounting process when attaching an FJ trigger or speed light to that camera's hot shoe.
Checking The Quality of Connection
FJ80 & FJ80II When autofocusing or metering for exposure with your camera, the manufacturer selection at the top left of the screen should be solid green. This signals there is a good connection between the camera and flash.
FJ80II SE When autofocusing or metering for exposure with your camera, a "link" or "chain link" icon (two circles intertwined) will be displayed under the selected manufacturer in the top right.
Positioning Tips
Fuji: A small lip at the hot shoe may need a little extra force forward to mount fully.
Canon R series: Added pins at the front of the hot shoe may give the impression that the FJ gear is fully mounted when in fact a small nudge forward may be needed to ensure a full mount and proper contact
Nikon Z series: These issues rarely occur, but older DSLRs may need a backward nudge before locking down.
Sony: Align the pins at the base and the front of the hot shoe with the contacts and ensure they are clean. The Sony pins at the front of hot shoes can become dirty over time and prevent proper connections. Check that the pins are free of dirt and grime
The FJ80 II is equipped with a self-monitoring system ensuring safe operation during continued full-power use during a short timeframe.
Stage 1: Once the speedlight reaches an internal operating temperature of 212°F (100°C), the screen will display a yellow [OH]. The recycle time will also increase by 2 seconds to cool the unit while allowing for continued operation.
Stage 2: Once the strobe reaches an internal operating temperature of 266°F (130°C), the screen will display a red [OH] icon. The recycle time will increase an additional 2 seconds in efforts to cool the unit while allowing for further operation. Once the unit has cooled, the yellow or red [OH] will disappear from the touchscreen, it will then be safe to continue operation.
NOTE: The LED modeling lamp will be disabled during OH to assist in minimizing the internal temperature.
FJ80 SE
The FJ80-SE is equipped with a self-monitoring system ensuring safe operation during continued full-power use during a short timeframe.
Stage 1: Once the speedlight reaches an internal operating temperature of 185°F (85°C), the screen will display [OH]. The recycle time will also increase by 3.2 seconds to cool the unit while allowing for continued operation.
Stage 2: Once the speedlight reaches an internal operating temperature of 215oF (102ºC), the screen will display [OH]. The recycle time will also increase by an additional 3 seconds to cool the unit while allowing for continued operation.
Stage 3: Once the speedlight reaches an internal operating temperature of 221oF (105ºC), the screen will display [OH]. The recycle time will also increase by an additional 8 seconds to cool the unit while allowing for continued operation.
NOTE: The LED modeling lamp will be disabled during OH to assist in minimizing the internal temperature.
FJ80
The FJ80 is equipped with a self-monitoring system ensuring safe operation during continued full-power use during a short timeframe. The monitoring system provides a staged automatic shutoff scenario;
Stage 1: Once the speedlight reaches an internal operating temperature of 131°F (55°C), the screen will display a yellow [OH]. The recycle time will also increase to 2 seconds to cool the unit while allowing for further operation.
Stage 2: Once the strobe reaches an internal operating temperature of 167°F (75°C), the screen will display a red [OH] icon. The unit will be inoperable for an estimated 10 minutes until an adequate internal temperature has been reached to continue operation. Once the unit has cooled, the red [OH] will disappear from the touchscreen, and it will then be safe to continue operation.
5. Not firing From The Host: Client Mode
Ensure Client Mode is Activated
Verify that the speed light is correctly set to Client Mode. When in Client Mode, the speedlight is designed to be triggered by a host (trigger or another speedlight).
FJ80 and FJ80 IIPress the home button and select Client Mode.
FJ80 SE Press the mode button until you enter Client mode. You will know you are in client mode when the camera manufacturer in the top left is replaced by the Group selection “GR” followed by the group letter.
Enable TTL-ALL
When TTL-ALL is enabled, the unit will be utilizing the FJ Wireless System as opposed to C-RT (Canon Radio Transmission)
FJ80 and FJ80 II In Client mode, touch the furthest top right button toggling from TTL-ALL and C-RT.
FJ80 SE In Client mode, press the furthest left button below the LCD screen corresponding with Menu 1 to display Menu 2. When Menu 2 is displayed, press the furthest right button corresponding with TTL-ALL or C-RT until TTL-ALL is displayed
Check Group and Channel
The speed light you desire to trigger must be on the same channel as the host unit and in a group that isn't in SLP or OFF.
FJ80 and FJ80II
In client mode, the channel can be changed by touching the CH button at the top of the screen until the channel matches the channel on your host unit
FJ80SE
in client mode, the channel can be changed in menu 1 and pressing the 2 button from the right corresponding with CH
the channel number will start to blink at the top of the screen, use the wheel to change the channel until it matches the channel on your host unit. Press the center wheel button to confirm your selection
Check Host unit settings
Check settings on the host unit are appropriate. Typically, the group that your speed light is assigned to can accidentally be set to SLP. Causing it to not fire.
If your speedlight is not receiving signals from the host trigger, try adjusting to a different channel on all units, as wireless interference might be affecting communication.
You can use channels 5 and above to avoid interference with other wireless devices.
Distance from Host
Ensure that the speedlight is within range of the host trigger or master unit. The effective wireless range can vary depending on your shooting environment, and obstructions like walls can reduce the signal strength.
6. Update Firmware
Check Firmware
Ensure all your FJ Wireless gear and camera are running the latest firmware. You can check what version your equipment is on by looking at the bottom right of the screen when powering on. To download the latest firmware and follow along with detailed instructions, refer to our Firmware page.
Reinstall firmware
In some cases, firmware can be uploaded to your unit with an error causing odd issues like the screen powering on but using the touch screen to power it on does nothing.
Delete any downloaded firmware on your computer
Restart your computer
Redownload the current firmware version and follow firmware installations as instructed.
"},"name":"FJ80 Not Firing"},{"@type":"Question","acceptedAnswer":{"@type":"Answer","text":"
When working with the FJ Wireless system, ensuring proper functionality and connectivity is essential for a seamless shooting experience. This guide will walk you through troubleshooting steps with your FJ Strobes.
By following these steps, you can quickly identify and resolve any challenges, helping you maintain consistent performance across your FJ Wireless Strobes. This comprehensive guide is designed to educate and assist you with your FJ Wireless gear.
On your host unit, trigger or speedlight, press the test fire button to test fire all connected strobes. Test firing will fire the strobes at the designated power outputs. If you find one of your strobes is not firing from the host, press the on-board test fire button on that strobe.
If your strobe does not test fire from the host unit but does fire when pressing the onboard test fire button, consider all the sections below.
If your strobe does not test fire when pressing the onboard test fire button, Contact Westcott support.
2. Understanding Over-Heating Modes
Understand using strobes extensively or in hot, humid or direct sunlight conditions will cause the unit to become hot and can trigger overheating safety protocols. When these overheating stages are activated, performance will slow down in an attempt to protect the unit while allowing it to still be used. Handle the unit with care and do not touch the bulb, glass dome, or metal modifiers until cooled to a safe temperature.
FJ400ii & FJ800
Stage 1: When the internal temperature reaches 149°F (65°C), the strobe’s display will show [OH] to indicate overheating. At this point, the unit automatically increases its recycle time by 1 second. This controlled delay allows the internal components to cool while still enabling the user to continue shooting safely.
Stage 2: If the internal temperature rises to 167°F (75°C), the [OH] indicator remains on, and the strobe will further extend the recycle time by an additional 4 seconds. This precautionary step helps further cool the unit without requiring a complete shutdown.
Stage 3: When the strobe reaches a critical temperature of 176°F (80°C), the [OH] warning remains on, and the unit will automatically disable its flash function to prevent damage. During this stage, the strobe will remain inactive until it cools down to a safe operating temperature, at which point normal operation will resume.
FJ400
The FJ400 is equipped with self-monitoring cooling fans to ensure safe operation. When the unit reaches hot operating temperatures, its performance will slow down in an attempt to protect the unit. It is also equipped with an automatic shutoff feature.
In the rare event that the strobe has reached an unsafe operating temperature, the screen will display OH (overheat) and stop firing.
Once the unit has cooled, the OH will disappear from the screen and it will then be safe to continue operation.
FJ200
Stage 1: Once the strobe reaches an internal operating temperature of 131°F (55°C) the screen will display a red [Bulb Icon] and the recycle time will increase to 2 seconds to cool the unit while allowing for further operation.
Stage 2: Once the strobe reaches an internal operating temperature of 167°F (75°C) the screen will display a red [OH] icon and the unit will be inoperable for an estimated 10 minutes until an adequate internal temperature has been reached to continue operation.
Once the unit has cooled, the [OH] will disappear from the screen and it will then be safe to continue operation.
In order to trigger the strobes wirelessly, it is important the channel (CH) matches on both your host unit and the strobe.
Note: Wescott suggests using channels 5 and above to avoid interference with other radio devices.
FJ400ii and FJ800
Under menu 1, touch the CH tab and use the slider or -+ buttons to select the desired channel.
FJ400
Under menu 2, press the CH button and then rotate the control dial until the desired channel is selected
FJ200
Quick press the center Control Dial once to enter the Settings menu.
Rotate the Control Dial until the Channel is selected.
Quick press the center Control Dial again and rotate the dial until the desired channel is selected
Group
Once the channel is confirmed, you can specify want group you would like the strobe to be on. Having each unit in different groups will allow you to control each one individually. Alternatively, having all your strobes on the same channel will result in them having the same output setting.
FJ400ii and FJ800
Under menu 1, touch the GR tab and use the slider or -+ buttons to select the desired group.
FJ400
Under menu 2, press the GR button and then rotate the control dial until the desired group is selected
FJ200
Quick press the center Control Dial once to enter the Settings menu.
Rotate the Control Dial until Group is selected. Quick press the center Control Dial again and rotate the dial until the desired group is selected
6. Check the Host Unit
Oftentimes, failure to fire wirelessly can be traced back to the host unit. Please refer to our FJ80 Speedlights and FJ Triggers troubleshooting sections.
7. Update Firmware
Check Firmware
Ensure all your FJ Wireless gear and camera are running the latest firmware. You can check what version your equipment is on by looking at the bottom right of the screen when powering on. To download the latest firmware and follow along with detailed instructions, refer to our Firmware page.
Reinstall firmware
In some cases, firmware can be uploaded to your unit with an error causing odd issues like the screen powering on but using the touch screen to power it on does nothing.
Delete any downloaded firmware on your computer
restart your computer
redownload the current firmware version and follow firmware installations as instructed.
"},"name":"FJ Strobes Are Not Firing"},{"@type":"Question","acceptedAnswer":{"@type":"Answer","text":"
When working with the FJ Wireless system, ensuring proper functionality and connectivity is essential for a seamless shooting experience. This guide will walk you through troubleshooting steps with your FJ-X3 M, FJ-X3 S, and FJ-X2 M.
By following these steps, you can quickly identify and resolve any challenges, helping you maintain consistent performance across your FJ Wireless Triggers and Speedlights. This comprehensive guide is designed to educate and assist you with your FJ Wireless gear.
Press the "Test" button on the trigger to test-fire the other FJ Wireless flashes connected. Confirm all connected flashes are firing. If you find one of your units is not firing, press the onboard test fire button on that unit. If it is not firing via the onboard test fire button, select the FJ Wireless gear you want to troubleshoot.
If the unit is firing with the onboard test fire button but is not firing from the trigger, continue through this article.
2. Check Wireless Connections and Group Modes
Channel
Confirm what channel the units are on. This is displayed at the top of the triggers LCD screen labeled "CH". Then, confirm the other FJ Wireless flashes you wish to control are on the same channel.
FJ-X2
Quick press the menu button until you see "CH" as the center option of the 3 options at the bottom of the LCD screen.
Press the center button corresponding with "CH", this will highlight the channel number at the top of the LCD screen.
Use the control scroll wheel to change the desired channel. Press and click in the wheel to confirm your selection.
FJ-X3
Quick press the far left circular button labeled "CH - Lock"
The channel number at the top of the LCD screen will be selected. Use the up and down arrows on the directional pad to change to the desired channel.
Note: We suggest using channels 10 or higher to avoid interference from other devices
Group
Once all the units you wish to control are on the same channel, notice what flashes are connected to what group (GR) or designate each flash to a group of your choice. For example, All flashes connected to group A will fire at the designated setting in group A on the FJ-X trigger. Ideally, every flash will be on a different group for individual control. If you know you want multiple flashes to fire at the same power or setting, put them in the same group.
Modes
You will be able to cycle between M, TTL, and SLP within the groups. You must put the group into M or TTL mode for a fire signal to be sent. To change this on FJ-X Triggers, press the square button next to the group to cycle through the options.
Sleep mode (SLP)
This will keep the units connected but connected flashes in that group will not fire.
3. Verify Mounting
In some instances, the manufacturing of a particular model or camera unit can result in the need for the user to pay special attention to the mounting process when attaching an FJ trigger or speed light to that camera's hot shoe.
With the trigger attached to your camera, both the camera and trigger are powered on and the trigger is set to Fuji, when autofocusing or metering with your camera you should notice a little LED light above the LCD screen flashing green. This signals you have a good connection between the trigger and your camera.
A small lip at the hot shoe may need a little extra force forward to mount fully.
All Other Camera Manufacturers
With the trigger attached to your camera, both the camera and trigger are powered on and the trigger is set to your desired camera manufacturer, when autofocusing or metering with your camera you should notice a little LED light above the LCD screen is solid green. This signals you have a good connection between the trigger and your camera.
Positioning Tips
Canon R series: added pins at the front of the hot shoe may give the impression that the FJ gear is fully mounted when in fact a small nudge forward may be needed to ensure a full mount and proper contact
Nikon Z series: Rarely have issues, but older DSLRs may need a backward nudge before locking down.
Sony: Align the pins at the base and the front of the hot shoe with the contacts and ensure they are clean. The Sony pins at the front of hot shoes can become dirty over time and prevent proper connections. Check that the pins are free of dirt and grime
Ensure that the flash you desire to trigger is within range of the host trigger or master unit and consider objects or walls that might interfere with the wireless signal. The effective wireless range can vary depending on your shooting environment, and obstructions like walls can reduce the signal strength.
5. Firmware Updates
Check Firmware
Ensure all your FJ Wireless gear and camera are running the latest firmware. You can check what version your equipment is on by looking at the bottom right of the screen when powering on. To download the latest firmware and follow along with detailed instructions, refer to our Firmware page.
Reinstall firmware
In some cases, firmware can be uploaded to your unit with an error causing odd issues like the screen powering on but using the touch screen to power it on does nothing.
Delete any downloaded firmware on your computer
Restart your computer
Redownload the current firmware version and follow firmware installations as instructed.
"},"name":"FJ Triggers Not Triggering Other FJ Wireless flashes"},{"@type":"Question","acceptedAnswer":{"@type":"Answer","text":"
The FJ400 features an optical sensor that allows it to be triggered remotely by another flash or strobe unit fired nearby. This sensor is located near the mini plug and air intake at the bottom of the unit. It’s important to know the location of the optical sensors as they need a line of sight of the triggering flash. It is only available when units are set to Manual mode, as TTL and HSS data cannot be transmitted.
Enabling optical triggering with the FJ400
Set to Manual Mode: Ensure the FJ400 is in Manual mode by going to Menu 1 and changing the mode to Manual. (M)
Enable Optical Sensor: Enter Menu 3 and press the button next to the Eye icon to activate the optical sensor. The Eye icon will appear on the screen and CH and GR will disappear when optical triggering is enabled.
With the optical sensor activated, units will fire simultaneously with an initial flash from any make or model, provided the flash output is sufficient and the sensor detects the signal.
Preventing Sleep Mode:
FJ400: Enter Menu 6 by long-pressing the top menu button and set the Auto-off option to "OFF."
If this option is not available, check your firmware version for updates, as early firmware versions may not include this setting.
Occasionally, it may be necessary to reset your FJ system lighting and triggering devices to the factory defaults. A reset will not affect the firmware version and may maintain other customized settings such as language choice. Channel, group, and camera brand choices will often need to be readjusted after a factory reset.
FJ-X3m (X3s)
Press and hold the Sync.Menu button for approximately 3 seconds.
Press the down arrow on the control dial to highlight the RESET option near the bottom of the list.
Press the center button to select the NO option and use the up and down arrows to toggle between NO and YES.
Press the center button when YES is selected to apply the reset. You will be returned to the main menu.
Re-enter the Settings menu to adjust the camera choice (default is Canon) and other settings such as Canon RT-ID # for personal preferences.
Return to the main menu and adjust the channel choice (default is 1) and Sync (default is HSS).
FJ-X2m (X2s)
Locate the three round buttons under the LCD screen.
Press and hold both the 2nd (middle) and 3rd (far right) buttons (under the C.Fn) simultaneously for approximately 3 seconds to enter the settings menu.
Once in the settings menu, press the 1st (far left) button below the Reset button to perform the reset. The screen will flash briefly.
Press the 3rd (far right) button "OK" to return to the regular menu.
Occasionally, it may be necessary to reset your FJ system lighting and triggering devices to the factory defaults. A reset will not affect the firmware version and may maintain other customized settings such as language choice. Channel, group, and camera brand choices will often need to be readjusted after a factory reset.
FJ80 and FJ80 II M (FJ80II S)
Press the Home button and select Settings.
Press the down arrow until you see Factory Reset.
Select it by touching it and then press OK.
When the reset is complete, you will be brought back to the home menu. Channel, group, and camera choice may need to be adjusted after a reset.
FJ80 SE M (FJ80 SE S)
Simultaneously press both center buttons (settings button with a gear icon) just below the screen.
Press the leftmost button just below the screen reset icon. You will hear two soft beeps.
Reset your camera choice (default is Canon) as needed.
Press the rightmost button below the screen return icon.
Adjust your channel and group as needed. The reset will default to channel 1 and group A.
"},"name":"Factory Resetting Your FJ80"},{"@type":"Question","acceptedAnswer":{"@type":"Answer","text":"
The Westcott StudioLink app is a fantastic tool for both photographers and videographers. With this application, you can connect your L series LED lights straight to your phone controlling all its functions in the palm of your hand. Photographers can also connect to their FJ-X3 trigger, control lights, create and save scenes, and more.
Check out "Connecting the FJ-X3 trigger to the StudioLink app" to control your flashes and strobes.
This guide will walk you through connecting your Studiolink app to the L60 and L120 LED light. You can follow along with our Connecting the L60-B to the StudioLink App Video
Launch the Westcott Studio Link app on your mobile device.
2. Ensure Bluetooth is On
Make sure Bluetooth is enabled on your mobile device.
Verify that the Bluetooth icon is present on your light
Press the dimming knob once to display the Bluetooth icon on the screen.
2. Adding a Light
From the main screen, tap on the LED selection.
Tap on "Add a Light or Group"
When prompted, select Add a Light.
5. Put the L60B into Pairing Mode
Hold down the dimming knob on the until the Bluetooth symbol starts blinking. This indicates it is in pairing mode.
6. Complete Pairing
Once the L60 or L120 appears on your screen, tap on it to start pairing.
Wait a moment for the app to pair the device. Once paired, you will be taken back to the main LED screen.
8. Verify and Test
Your light will now appear in the app. Tap on it to access its controls.
Change CCT (Color Temperature).
Adjust the Intensity.
Add special FX.
Turn the light on or off
Additional Support
If you have questions or need further assistance, please contact Customer Support
"},"name":"Connecting the L60B and L120 to the Westcott StudioLink App"},{"@type":"Question","acceptedAnswer":{"@type":"Answer","text":"
What modifiers can be used with the L60
"},"name":"What modifiers can be used with the L60"},{"@type":"Question","acceptedAnswer":{"@type":"Answer","text":"
What modifiers can be used with the L120
"},"name":"What modifiers can be used with the L120"},{"@type":"Question","acceptedAnswer":{"@type":"Answer","text":"
To Our Valued FJ Wireless Customers,
At F.J. Westcott, we are committed to delivering innovative and dependable lighting solutions for photographers and videographers. To uphold our commitment to quality and reliability, we’ve made the difficult decision to discontinue support for the Canon RT wireless communication protocol in the FJ Wireless Flash System, effective January 16, 2025.
This decision was not made lightly. Extensive research coupled with persistent and widespread connectivity challenges with the Canon RT system have made it increasingly difficult to maintain the level of reliability and performance you expect from Westcott's FJ Wireless products.
Here’s what to know:
Only users selecting Canon RT on FJ Wireless Triggers and FJ80 Speedlights will be affected.
Canon cameras will continue to be fully supported through our native integration, alongside Nikon, Sony, Fuji, Panasonic, and Olympus.
This change allows us to focus on delivering the best possible performance for the camera systems most trusted by professionals and enthusiasts alike.
If you have any questions or need assistance, our customer support team is here to help.
Thank you for your understanding and continued trust in Westcott. We are excited to continue lighting the way for your creativity.
"},"name":"Important Update on Canon RT Compatibility in the FJ Wireless Flash System"},{"@type":"Question","acceptedAnswer":{"@type":"Answer","text":"
The FJ400ii and FJ800 feature an optical sensor that allows it to be triggered remotely by another flash or strobe unit fired nearby. This sensor is located near the mini plug and USB-C input at the bottom of the unit. It’s important to know the location of the optical sensors as they need a line of sight of the triggering flash. It is only available when units are set to Manual mode, as TTL and HSS data cannot be transmitted.
Enabling optical triggering with the FJ800 and FJ400ii
Enter the Settings Menu: Press and hold the Menu button on the touch screen until you enter the settings menu.
Enable Optical Sensor: On the settings page 2/4 turn Optical Sensor "ON"
With the optical sensor activated, units will fire simultaneously with an initial flash from any make or model, provided the flash output is sufficient and the sensor detects the signal.
Preventing Sleep Mode:
Press and hold the Menu button on the touch screen until you enter the settings menu.
On the settings page 2/4 set Sleep to "Off" or your desired setting.
"},"name":"Optically Triggering FJ800 and FJ400ii"},{"@type":"Question","acceptedAnswer":{"@type":"Answer","text":"
"},"name":"FJ400 v2 and FJ800 - User Manual - OCR"},{"@type":"Question","acceptedAnswer":{"@type":"Answer","text":"
Similar to other roundhead flashes, the FJ80 and FJ80 II flashes do not list a guide number in their specifications. This is because regular speed lights and round head flashes deliver light in different ways. Standard speed lights with rectangular Fresnel lenses focus light into a beam that corresponds to
How do standard speed lights use guide numbers?
Using a Fresnel lens, standard speed lights concentrate light into a rectangular frame that resembles the form of the film plane or sensor on a camera. The guide number shows the effective range of the flash, which is determined by its focussed beam and rectangular light shape. It is useful to compare the power and effectiveness of different standard speed lights.
How does the FJ80's round head affect light output?
With 80W of power (as opposed to the usual 65W of high-end OEM speed lights), the round head of the FJ80 distributes light more evenly over a circular region. This shape simulates a smoother, more natural light distribution, more in line with real-world lighting situations, and is perfect for use with spherical modifiers. Because of this, guide numbers do not directly compare to round head flashes like the FJ80, even if they can be helpful for comparing regular speed lights..
What advantages come with using a flash with a round head like the FJ80?
Improved Light Quality:
Round heads are great for round or octagonal softboxes. The FJ80's round head design creates a more natural and even light distribution. As a result, the subject is illuminated in a more consistently.
Greater Output:
The FJ80 is an 80ws speedlight and will produce more light than a conventional speedlight due to its higher watt-second power, especially when combined with round modifiers.
Versatile Use:
The round head can be modified with a long throw reflector to deliver more light over longer distances, making it suitable for a variety of shooting scenarios.
When should I use a standard speed light over a round-head flash?
Without the need for extra modifiers, standard speed lights may be more effective at producing maximum output at longer distances due to their longer Fresnel focusing range and rectangular light pattern. They are an excellent option when you need to distribute light in a targeted region, particularly when the light needs to go farther.
"},"name":"Guide Numbers and the FJ80 *Old"},{"@type":"Question","acceptedAnswer":{"@type":"Answer","text":"
The Circular Modifier, when used without the modifier’s fabric diffusion front and mounted properly to the Solix Bi-color, will narrow the beam angle.This narrowing results in greater light control and an increase in the intensity of light projected over a smaller surface area. When used with the included diffusion, the modifier offers a slightly larger softer diffused light source.
"},"name":"What is the purpose of the Collapsible 45° Circular Modifier that comes with the Solix Bi-color?"},{"@type":"Question","acceptedAnswer":{"@type":"Answer","text":"
A good standard for most lights is to place them one to one and-a-half times the diameter of the light from your subject. The Westcott Ring Light measures 18 inches in diameter (45 centimeters), so positioning the light 18 to 27 inches (45 to 68 centimeters) from the subject should create a nice quality of light with flattering falloff. This falloff will be more noticeable at close distances.
"},"name":"How far from my subject should I place the Ring Light?"},{"@type":"Question","acceptedAnswer":{"@type":"Answer","text":"
The soft white surface of the reflective fabric offers a smoother and less specular bounced light compared to the Eyelighter’s high fashion specular look from the silver fabric.
"},"name":"What is the difference between the White and Silver Fabrics?"},{"@type":"Question","acceptedAnswer":{"@type":"Answer","text":"
Yes, the Switch mounts are designed to allow easy adjustment to the angle of the rectangular modifiers including the Rapid Box Switch 1x2, 1x3, 1x4, 2x3, and 3x4.
"},"name":"Do Switch Inserts allow the rectangular Rapid Box Switch modifiers to rotate?"},{"@type":"Question","acceptedAnswer":{"@type":"Answer","text":"
Westcott offers a Lifetime Limited Warranty for Flex LED Mats, providing protection against defects in materials and manufacturing. This warranty aims to ensure peace of mind for the original purchaser. Below are the details regarding warranty coverage, the process for initiating a repair claim, and the necessary documentation to facilitate the process.
Warranty Coverage
The warranty applies exclusively to Westcott Flex LED Mats and does not extend to accessories or controllers associated with the Flex system. It is valid only for the original purchaser, as long as they own the product and Westcott continues to manufacture the Flex LED Mat.
What is Covered:
Defects in materials and manufacturing.
What is Not Covered:
Normal wear and tear.
Damage caused by misuse, neglect, abuse, accidents, overloading, or alterations to the product.
Improper operation, installation, cleaning, handling, maintenance, or repair.
Incidental or consequential damages.
Your Responsibilities
To maintain warranty coverage for your Flex LED Mat, please follow these steps:
Product Registration:
If purchased through a third-party retailer, register the product with Westcott using the Product Warranty Registration Form within one year of the original purchase date.
Proof of Purchase:
Retain the original proof of purchase, as it will be required for any warranty claims.
Describe the Issue:
Clearly describe the defect. If possible, include photos or videos to assist Westcott’s team in assessing the issue.
How to Initiate a Repair Claim
Contact Westcott Support:
Begin the warranty process by contacting Westcott through their support page or by phone.
Submit Required Documentation:
Provide your proof of purchase and product registration details.
Attach any photos or videos of the defect to expedite the evaluation process.
Shipping Instructions:
After your claim is reviewed, Westcott will provide detailed instructions on how to ship your Flex LED Mat for inspection or repair. Please follow these guidelines carefully to avoid further damage during transit.
Warranty Service Options
Westcott will determine, at their discretion, whether your Flex LED Mat qualifies for repair or replacement. Based on the assessment, one of the following options will apply:
Repair: If the issue is repairable, Westcott will fix your Flex LED Mat and return it to you.
Replacement: If the product cannot be repaired, Westcott may replace it with a new or refurbished unit.
Limitations of Liability
The warranty covers only defects in materials and manufacturing. It excludes coverage for damage resulting from improper installation, overloading, misuse, improper operation, cleaning, handling, maintenance, or repair. Normal wear and tear, as well as incidental or consequential damages, are not covered.
Exclusions
The warranty does not cover:
Accessories or controllers associated with the Flex system.
Damage caused by misuse, neglect, abuse, accidents, overloading, or product alterations.
Improper operation, cleaning, handling, maintenance, or repair.
Normal wear and tear.
Any incidental or consequential damages.
Conclusion
Westcott’s Lifetime Limited Warranty ensures that your Flex LED Mat is protected against defects in materials and manufacturing for as long as you own the product and Westcott continues to manufacture it. To initiate a claim, ensure your product is registered, provide proof of purchase, and follow the shipping instructions for inspection or repair.
"},"name":"Lifetime Limited Warranty on Flex LED Mats"},{"@type":"Question","acceptedAnswer":{"@type":"Answer","text":"\n
This is a quick tip video describing how to put a Westcott 7' Parabolic Umbrella back into the included carry case.
"},"name":"How to Put a Parabolic Umbrella in a Case"},{"@type":"Question","acceptedAnswer":{"@type":"Answer","text":"\n
Brandon from Team Westcott demonstrates how to use an L-Bracket to mount speedlites in the Apollo Mini.
"},"name":"Product Quick Tip - L-Bracket"},{"@type":"Question","acceptedAnswer":{"@type":"Answer","text":"\n
Westcott is proud to introduce the 32” Rapid Box Octa Duo. This light modifier offers all the same amazing features as our other Rapid Boxes with the added ability to mount up to two speedlites. These features include a highly-reflective silver interior, durable umbrella-style frame, lightweight construction, and an included travel case.
"},"name":"How To Set Up Rapid Box Duo"},{"@type":"Question","acceptedAnswer":{"@type":"Answer","text":"\n
Brandon from Team Westcott shows the simple step-by-step process for folding down and storing the Omega Reflector. The Omega Reflector by Westcott is the world’s first 10-in-1 shoot-through reflector. The 38\" x 45\" Omega Reflector was designed by renowned photographer Jerry Ghionis. The Omega combines the effect of a traditional reflector with the luxury of a beauty dish and a ring flash. This innovative reflector instantly produces a main light and backlight with a single light source, while also keeping the reflector out of frame. The Omega offers the ultimate portrait lighting control for both natural light and speedlite photographers.
"},"name":"How to Collapse or Fold Down the Omega Reflector"},{"@type":"Question","acceptedAnswer":{"@type":"Answer","text":"
To attach the #2198 Dual-Joint Tilter Bracket to the Scrim Jim Cine frame, the 3/8"-16 adapter is necessary. This can be found in the body of the tilter - take the circular cover off of the area with the 1/4 - 3/8 label.
Do not screw the adapter on too far, only screw far enough to be flush with the original 1/4"-20 thread. You then need to bring the black dial up against that the adapter for snug fit. Attached is a completed example of such.
Mounting a large octagonal softbox can be difficult. This tutorial demonstrates the easiest way to mount a traditional octabank onto a speedring.
Westcott's Octabank softboxes are available in 5' and 7' options. They're designed with solid steel assembly rods, dual-layered corners, heat shield fabric, and tent-style vents. These durable light modifiers are backed by a 7-year warranty.
"},"name":"How to Assemble & Mount an Octabank Softbox"},{"@type":"Question","acceptedAnswer":{"@type":"Answer","text":"\n
The uLite is a compact 500-watt constant light that offers a low price tag. Unlike the competition, the uLite is extremely durable and compatible with both incandescent and compact fluorescent bulbs. It is constructed on a nylon-based polycarbonate with built-in tilter bracket. This is an ideal light source for working in small or cramped spaces.
"},"name":"Overview of the Westcott uLite Two-light Umbrella Kit"},{"@type":"Question","acceptedAnswer":{"@type":"Answer","text":"\n
The Westcott Basics D5 offers 5 individual lamp sockets allowing for use with up to 5 50-watt daylight fluorescent lamps. These compact sockets are constructed with a heavy-duty ceramic base and are UL and CE certified for safety.
\n
To begin assembly, locate the D5's softbox rods and thread the larger end through the rod sleeves and into the rod pockets located within the interior of the softbox. The smaller end of each rod should be exposed at the end of the box.
\n
Place the softbox on a flat surface and begin inserting opposite rods into the D5's corresponding built-in rod receptacles until all rods are securely in place. You can now mount the D5 and D5 softbox to your preferred light stand with the D5's built-in thumb screw.
\n
From there, bulbs may be installed (up to 50-watts in each socket) and the D5's placement may be adjusted via the built-in tilter bracket. Ensure that the back flaps are closed to prevent light spill and start shooting!
"},"name":"How to Set Up the Westcott Basics D5 with Softboxes"},{"@type":"Question","acceptedAnswer":{"@type":"Answer","text":"
The knit bag that the X-drops arrive in when purchased as a kit is just for initial protection to get it to you in the best condition. That bag requires the X-drop to be tightly folded which causes deep creases that have to be removed for best results in using.
The best way to store any background is lightly wadded up into a loose bag where only small creases and wrinkles can result. Those small creases and wrinkles are easier pulled out when setup on the X-drop frame.
"},"name":"Do the individually sold X-drops come with a carry bag like the one that is included in the kit?"},{"@type":"Question","acceptedAnswer":{"@type":"Answer","text":"
The Skylux utilizes a built-in Bowens S-Type mount.
"},"name":"What style mount for modifiers does the Skylux have?"},{"@type":"Question","acceptedAnswer":{"@type":"Answer","text":"
No. Each Pocket Box mounts directly over the face of your speedlite and fastens around the head of the flash using an elastic band with Velcro.
\n
"},"name":"Do I need an adapter to attach a Pocket Box to my speedlite?"},{"@type":"Question","acceptedAnswer":{"@type":"Answer","text":"
Jerry Ghionis, considered one of the finest wedding photographers in the world, is the creator and designer of the Ice Light and Ice Light 2. Visit Westcott University to see the Ice Lights being used by Jerry and other renowned photographers.
\n
"},"name":"Are there any pro photographers currently using the Ice Light? Where can I see the Ice Light being used?"},{"@type":"Question","acceptedAnswer":{"@type":"Answer","text":"
Yes, there is space in the Fast Flag Carry Case for additional flags and frames.
\n
"},"name":"Will additional flags and frames fit in the carry case that comes with the Flag kit?"},{"@type":"Question","acceptedAnswer":{"@type":"Answer","text":"
At this time we do not offer custom printed backgrounds.
We only offer the print-on-demand backgrounds showcased on our website as a better alternative for the style trends changing so often. As we offer so many product lines already, we cannot focus on a custom printing service to the level of satisfaction our customers tend to expect from Westcott.
"},"name":"Can Westcott make a custom background from my image?"},{"@type":"Question","acceptedAnswer":{"@type":"Answer","text":"
This is a very simple task with a little bit of practice!
Meet opposite corners, then grab one open end while twisting your wrist. The collapsible backdrop practically wants to collapse into the circle form by itself, you're simply guiding it. Collapsing the backdrop is covered around the 1:00 mark in this video.
"},"name":"How do I fold a collapsible backdrop?"},{"@type":"Question","acceptedAnswer":{"@type":"Answer","text":"
To apply a gift card to your order:
Proceed to the checkout page and enter your gift card code in the ['Discount or Gift Card Code'] field in the upper, right side of the checkout page.
Click ['Apply'] to see your new total before finalizing your order. Applied Gift Cards will be shown directly below the code entry field and itemized in your order subtotals to confirm that the discount has been applied.
Multiple Gift Card codes can be used on the same order. Unused balances and refunded amounts will remain available on the Gift Card until the expiration date.
If you’re having trouble entering your Gift Card code, please try clearing the cache on your web browser or trying on a different device.
"},"name":"How do I pay with a gift card?"},{"@type":"Question","acceptedAnswer":{"@type":"Answer","text":"
Shipping Charges
Shipping charges are calculated at time of checkout based on the delivery address and the chosen delivery service. You will be presented with multiple delivery options at checkout to reflect the shipping carrier and delivery speed options available to your delivery address.
Free shipping is available to addresses in the Contiguous United States on most orders of qualifying products over $100. Customers shipping to anywhere outside the contiguous United States are responsible for shipping costs and any additional taxes, duties, or fees that may be incurred.
Some orders that contain Lithium-ion batteries or exceptionally large or heavy products are subject to additional shipping fees or restrictions, and may not qualify for free shipping.
Products delivered to locations outside the United States may be subject to additional duties, taxes and/or other fees. These are disclosed at checkout and, in most cases, are collected with your purchase.
More information regarding our shipping policies is available here.
"},"name":"How much does shipping cost?"},{"@type":"Question","acceptedAnswer":{"@type":"Answer","text":"
The Westcott Rewards Program is a loyalty program offered by F.J. Westcott Co. that allows website customers to earn Westcott Reward Points for eligible purchases through our website and other qualifying activities. These points can be redeemed for Westcott gift cards exclusively for use on fjwestcott.com.
More information regarding the Westcott Rewards Program is available here.
"},"name":"What is the Westcott Rewards Program?"},{"@type":"Question","acceptedAnswer":{"@type":"Answer","text":"
Product Warranties
At Westcott, we treat our customers like family and only produce products that we are proud to use ourselves. Our team takes extra steps manufacturing products to ensure quality and longevity. Shop Westcott with confidence knowing that our products are made to withstand years of use.
If you purchased through another retailer, be sure to register your Westcott purchase for instant assurance of your new gear.
Warranty Service
We promise that your product will be defect-free in materials and workmanship. No warranty, expressed or implied, is made regarding any product's merchantability or fitness for a particular purpose.
What Is Not Covered
The warranty does not cover normal wear and tear; damage through abuse, neglect, misuse; or as a result of any accident, overloading, improper installation/misapplication, product alteration, improper operation, improper cleaning, improper handling, or improper maintenance and repair.
The warranty does not cover incidental or consequential damages, except in the case that Accidental Damage Protection has been purchased. The warranty will not cover product failure because you broke it (any defect or malfunction that is caused as a result of misuse, failure to follow operating instructions, abuse, or use with improper or faulty equipment). The warranty is no longer valid after anyone, not authorized by Westcott, opens up, disassembles, repairs, or modifies any product in a way that it isn't intended to be done by an end user. Please don't try to fix anything yourself.
Customers are responsible for return shipping charges, duties, and taxes. We strongly recommend shipping merchandise via FedEx, UPS, or other delivery service that provides tracking information and insurance.
A product warranty is exclusively provided to the original purchaser and remains valid for the duration of the warranty period, as long as they own the product and Westcott continues to manufacture it.
More information regarding our product warranty and repair policies is available here.
"},"name":"Is my product covered by warranty?"},{"@type":"Question","acceptedAnswer":{"@type":"Answer","text":"
(All information regarding the Nikon Z9 and using Westcott gear will be here)
Overview
Welcome to the Z9 camera guide! Here, we will share helpful tips and educational information related to specifically the Nikon Z9.
Topics on This Page
Importance of Firmware Updating
Recommended Settings and Important Information
Related Videos
Example & Inspiration Photos
Educational Articles
Importance of Firmware Updating
Updating firmware is crucial to ensure your gear performs at its best, as it improves functionality, fixes bugs, and adds new features. Regular updates also maintain compatibility with newer camera models and other equipment, helping you avoid technical issues during shoots.
If your Westcott equipment is not working as expected, please review our troubleshooting guide before contacting Westcott Support.
Recommended Settings and Important Information
Camera Settings to Consider Adjusting
High Speed Sync To enable High-Speed Sync (HSS) Set the flash sync speed to 1/250 sec (Auto FP) in the E1 menu.
Screen or View Finder is Dark To avoid a dark viewfinder while using flash, adjust the D8 setting. Apply Settings to Live View under the Shooting/Display settings. This will allow you to see your subject clearly even in low-light conditions where the ambient light is dark. For flash photography or situations where the preview should not reflect the exposure settings, turning this feature Off is recommended. With "Off", the viewfinder will provide a bright view regardless of the camera’s exposure settings, making it easier to compose the shot when working with flash or strobes. Note:You can add this setting to the "i" quick menu found in the F1 submenu to quickly toggle the setting
Color with FJ80s, FJ200s and FJ400s set your white balance to 5500K or Daylight to match the color temperature of the Westcott flashes and strobes for more consistent color results. Note: The FJ80 SE color temperature is 6500K
Important Information Regarding The Z9
Z9 and The Electronic Shutter.
The Nikon Z9 does not feature a mechanical shutter, which means all operations rely on the electronic shutter. During testing with Westcott flashes, High-Speed Sync (HSS) has been shown to work seamlessly up to 1/2000th of a second. As Westcott continually strives for improvement, future firmware updates may enhance compatibility and performance, particularly for higher shutter speeds and other advanced features.
Related Videos
Below are videos created by Westcott Top Pros using the Nikon Z9. You can find more photography content in our Community Page.
Example & Inspiration Photos
Below are photos created by Westcott Top Pros and enthusiasts using the Nikon Z9. You can find more photography content in our Community Page.
(insert image here)
Have you taken photos or know someone who has using the Z9 and Westcott equipment and you think it would inspire or help others? Share them on our Community Page to help others learn and grow!
Have you created or found an article that includes the Z9 and Westcott equipment and you think it would inspire or help others? Share them on our Community Page to help others learn and grow!
This guide covers the essential features, setup, and operation of the FJ80-SE Speedlight, including charging the battery, powering on and off, mounting the speedlight, safety precautions, and firmware updates. For more detailed information, please refer to the complete user manual on the Westcott Product Manuals & Support Videos page.
FJ80-SE M: Features a universal mount compatible with most camera brands. Sony cameras can be used in a manual mode although require an adapter for TTL and HSS use.
FJ80-SE S: Designed specifically for Sony cameras and does not require an adapter.
Both models are compatible with the FJ Wireless Flash System.
Charging the FJ80-SE Lithium-Ion Battery
Ensure the FJ80-SE is powered OFF by sliding the power slider down until the screen turns off.
Press the release button on the side of the speedlight to remove the battery.
Connect the USB-A to USB-C cable to the battery charger, then plug the AC adapter into a wall outlet.
Align the gold contacts on the battery with those on the charger and insert the battery until it locks into place.
The battery charger’s LED indicator will illuminate red during charging.
Once the LED indicator turns solid green, the battery is fully charged and can be safely removed.
Battery Charger LED Indicator Light Colors:
Blinking Green: No battery inserted; charger ready
Solid Green: Battery fully charged
Solid Yellow: Battery at 50% charge
Solid Red: Battery charging
Attaching the Battery:
Align the gold contacts on the battery with the contacts in the speedlight's battery bay. Ensure the battery contacts align with the speedlight contacts. Gently press the battery back into the FJ80-SE until it clicks into place.
Power On: Slide the power slider upwards. The FJ80-SE will turn on, and the startup screen will appear.
Power Off: Slide the power slider down to turn off the unit.
Mounting
Attaching to a Camera Hot Shoe or Cold Shoe
Ensure the FJ80-SE is OFF
Rotate the locking dial clockwise (left to right) to loosen
Slide the speedlight into the camera’s hot shoe with the display facing the same direction as the camera’s rear
Rotate the locking dial counterclockwise (right to left) until securely mounted
Turn on the camera and press the shutter release button lightly. The Link icon will display on the screen, indicating a proper connection
Note: The FJ80-SE is compatible with Sony cameras in Manual mode. The FJ Wireless Adapter for Sony is required for TTL and HSS.
Detaching from a Camera Hot Shoe or Cold Shoe Mount
Ensure the FJ80-SE is OFF
Rotate the locking dial clockwise (left to right) to loosen
Gently slide the speedlight off the camera hot shoe towards the rear
IMPORTANT: Always ensure the locking pin is fully retracted before attaching or detaching the speedlight to avoid damage.
Best Camera Settings for FJ80-SE
Sony Cameras
The FJ80-SE M can be used in Manual mode for basic functionality. For TTL and HSS, use the dedicated FJ Wireless Adapter for Sony. or the FJ80-SE S model specifically designed for Sony.
Turn off red-eye reduction
Disable the electronic front curtain shutter
Turn off silent shooting
Set the flash mode to "Fill-In"
Ensure wireless flash is turned off
Fuji Cameras
Set the shutter type to "Mechanical"
Turn off red-eye removal
Nikon Cameras
For DSLRs: Set the shutter to "Mechanical." In the E1 Flash Sync menu, select "Auto FP 1/250th" if available.
For Mirrorless Cameras: Ensure the shutter is set to "Mechanical," silent photography is turned off, and flash mode is set to "Fill-In." Set the E1 Flash Sync menu to "Auto FP 1/200th" or "1/250th."
Canon Cameras
For DSLRs: Disable silent live view, enable flash, and turn off red-eye reduction.
For Mirrorless Cameras: Disable silent shutter and silent live view, and set the shutter to "Mechanical" if possible.
Heat Warning: The FJ80-SE speedlight lens and components may become hot during use. Avoid contact immediately after use to prevent burns.
Battery Safety: Use only the Westcott FJ80-SE Lithium-Ion Battery and Charger.
General Precautions:
Do not touch the speedlight lens immediately after use
Never leave the speedlight unattended around children or pets
Ensure proper installation when attaching or removing the speedlight from the camera hot shoe to avoid damaging the locking pin
Keep away from fire, water, and moisture
Avoid drastic temperature changes before, during, or after use
Remove the battery during travel or storage to prevent accidental operation
Dual-Stage Heat Protection:
Stage 1: At 185°F (85°C), the screen displays "OH," and recycle time increases by 3.2 seconds.
Stage 2: At 215°F (102°C), the screen displays "OH," and recycle time increases by an additional 3 seconds.
Stage 3: At 221°F (105°C), the screen displays "OH," and recycle time increases by an additional 8 seconds.
The LED modeling lamp will be disabled during overheating to help cool the unit. To learn more, check out our FJ80 Speedlight overheating? article.
Firmware Updates
The FJ80-SE is equipped with a USB-C port for firmware updates, ensuring you have the latest features and improvements. The firmware version is displayed on the start-up screen.
To update your FJ80-SE firmware, visit the Westcott Firmware Downloads and follow the provided instructions.
Important Notes:
If the FJ80-SE doesn’t display as an external device after connecting to a computer, disconnect the USB cable from both devices, restart the computer, and then restart the firmware update process.
Ensure your computer's power level is less than 25% before beginning the firmware update. Power loss during this process could render the FJ80-SE inoperable, requiring professional repair.
Always properly eject the FJ80-SE from your computer before removing the USB cable to avoid potential damage to the device.
If the firmware copying process is interrupted, close the progress window and try again. If issues persist, restart your computer.
For any issues or further assistance, contact Westcott Customer Support at support@fjwestcott.com.
Warranty Information
The FJ80-SE is covered by a limited one-year warranty from the date of purchase. This warranty covers defects in materials and workmanship under normal use. Please review the full warranty terms and conditions on our Warranty Information page.
"},"name":"FJ80 SE Quick Start Guide"},{"@type":"Question","acceptedAnswer":{"@type":"Answer","text":"
"},"name":"FJ Wireless System Camera Compatibility"},{"@type":"Question","acceptedAnswer":{"@type":"Answer","text":"
When working with the FJ Wireless system, ensuring proper functionality and connectivity is essential for a seamless shooting experience. This guide will walk you through troubleshooting steps with your FJ80, FJ80 II M, FJ80 II S, FJ80 SE M, and FJ80SE S.
By following these steps, you can quickly identify and resolve any challenges, helping you maintain consistent performance across your FJ Wireless Speedlights. This comprehensive guide is designed to educate and assist you with your FJ Wireless gear.
The FJ Wireless System is compatible with many cameras using the latest firmware updates. Check the Compatibility Chart below and see if your camera is listed. Additional camera models are likely compatible and will be added to this list as they are tested and confirmed.
It is important the correct camera manufacturer, your camera, is selected.
FJ80 and FJ80II
In speedlight mode, touch the camera manufacturer in the upper left to cycle through manufacturers.
FJ80 SE
Press and hold the two center circular buttons that have a "gear" icon between them to enter the settings menu
"Camera" will be the first selection, Press the center button on the control wheel and then rotate the wheel to select your camera manufacturer.
Press the far right circular button corresponding with a back arrow to exit the settings menu.
4. Turn off X-Sync
X-sync disables HSS and TTL functions. Typically used in film photography.
FJ80 and FJ80II
When enabled, X-Sync will be displayed in the lower left above the up arrow.
To toggle, press the home button and touch settings to enter the settings menu. Then touch the box next to X-Sync to toggle it "OFF"
FJ80SE
When enabled, X-Sync will be displayed in the lower right of the screen.
To Toggle, press and hold the two center circular buttons with a "gear" icon in between them to enter the settings menu. Then by rotating the control wheel, locate the X-Sync Setting. Press the center button on the control wheel to select the setting, and rotate the wheel to "OFF". Lastly, press the far right circular button corresponding with the back button to exit the menu.
5. Enable HSS on Your Westcott Equipment
Sometimes, cameras will not automatically switch their HSS setting and this must be done manually.
FJ80II
Speedlight Mode At the top of the screen in between the camera brand selection and the STDBY (Stand By) selection is the Sync Function Selection. The Sync Function Selection will cycle through front curtain sync, rear curtain sync, and HSS displayed by an H with a lightning bolt.
Host Mode At the bottom left of the screen above the up arrow is the Sync Function Selection. The Sync Function Selection will cycle through front curtain sync, rear curtain sync, and HSS displayed by an H with a lightning bolt and will toggle the setting for all connected lights.
Client Mode Sync Function setting is controlled by the host device.
FJ80SE
Speedlight Mode Within Menu 1, pressing the sync button will cycle through front curtain sync, rear curtain sync, and HSS displayed by an H with a lightning bolt displayed to the right of the screen above the ZOOM label.
Host Mode Within Menu 2, pressing the sync button will cycle through front curtain sync, rear curtain sync, and HSS displayed by an H with a lightning bolt displayed to the right of the screen above the modeling light label and will toggle the setting for all connected lights.
Client Mode Sync Function setting is controlled by the host device.
FJ80
Speedlight Mode At the top of the screen next to the camera brand selection is the Sync Function Selection. The Sync Function Selection will cycle through front curtain sync, rear curtain sync, and HSS displayed by an H with a lightning bolt.
Host Mode At the bottom left of the screen above the up arrow is the Sync Function Selection. The Sync Function Selection will cycle through front curtain sync, rear curtain sync, and HSS displayed by an H with a lightning bolt and will toggle the setting for all connected lights.
Client Mode Sync Function setting is controlled by the host device.
6. Enable HSS inside your camera
In addition to enabling HSS on your FJ gear, HSS must be enabled inside your camera as well.
Within your camera's settings, locate flash function settings and enable HSS. Refer to your camera's manual for assistance.
Consider the following settings to adjust in your camera as well:
Flash: Enable
Shutter Mode: Mechanical if available otherwise E-Front Curtain Shutter
Flash Mode: Fill
Silent Shutter: Off/Disabled
Red Eye reduction: Off/Disabled
Wireless Flash: Off
Flash sync: Auto FP 1/250 (Nikon and Fuji) to enable HSS
7. Verify Mounting
Because FJ wireless systems use a universal hot shoe mount, it's important to ensure the trigger is set to the appropriate camera manufacturer and that all pins are properly aligned.
In some instances, the manufacturing of a particular model or camera unit can result in the need for the user to pay special attention to the mounting process when attaching an FJ trigger or speed light to that camera's hot shoe.
Checking the Quality of Connection
FJ80 and FJ80II When autofocusing or metering with your camera you should notice the manufacturer selection is solid green. This signals you have a good connection between the trigger and your camera.
FJ80SE When autofocusing or metering with your camera you should notice a "chain link" Icon under the camera manufacturer selection. This signals you have a good connection between the trigger and your camera.
Positioning Tips
Fuji: A small lip at the hot shoe may need a little extra force forward to mount fully.
Canon R series: added pins at the front of the hot shoe may give the impression that the FJ gear is fully mounted when in fact a small nudge forward may be needed to ensure a full mount and proper contact
Nikon Z series: Rarely have issues, but older DSLRs may need a backward nudge before locking down.
Sony: Align the pins at the base and the front of the hot shoe with the contacts and ensure they are clean. The Sony pins at the front of hot shoes can become dirty over time and prevent proper connections. Check that the pins are free of dirt and grime
Ensure all your FJ Wireless gear and camera are running the latest firmware. You can check what version your equipment is on by looking at the bottom right of the screen when powering on. To download the latest firmware and follow along with detailed instructions, refer to our Firmware page.
Reinstall firmware
In some cases, firmware can be uploaded to your unit with an error causing odd issues like the screen powering on but using the touch screen to power it on does nothing.
Delete any downloaded firmware on your computer
Restart your computer
Redownload the current firmware version and follow firmware installations as instructed.
Contact Westcott Support if the options above do not solve your issue.
"},"name":"FJ80 HSS Not Working With (High-Speed Sync)"},{"@type":"Question","acceptedAnswer":{"@type":"Answer","text":"
Sync functions, like HSS and rear and front curtain sync, are typically controlled by the host unit, the speedlight or the trigger. When units are properly connected wirelessly, the host unit will override settings and adjustments made manually on the units themselves. If issues persist, select the FJ Wireless gear you want to troubleshoot.
When working with the FJ Wireless system, ensuring proper functionality and connectivity is essential for a seamless shooting experience. This guide will walk you through troubleshooting steps with your FJ Strobes.
By following these steps, you can quickly identify and resolve any challenges, helping you maintain consistent performance across your FJ Wireless Strobes. This comprehensive guide is designed to educate and assist you with your FJ Wireless gear.
HSS control is controlled by the host unit. The need to manually toggle HSS on the unit itself is rare.
FJ400 ii and FJ800
Press the Menu tab until Menu 2 is displayed
Press the Sync tab to display the different sync modes and select "High Speed"
FJ400
Press Button 1 repeatedly until MENU 1 appears in the cyan square at the top right of the screen.
Press Button 3 until the High-speed Sync icon appears in the bottom left of the screen.
FJ200
Quick press the center Control Dial once to enter the Settings menu.
Rotate the Control Dial until SYNC is selected with the thin box.\n3. Once selected, quickly press the Control Knob until the thin white box turns blue.
Rotate the Control Dial until HSS sync is selected.
Engage HSS sync by quickly pressing the center Control Dial or by pressing the Return | Model\nbutton once.
Rotate the Control Dial to make further changes in the Settings menu or press the Return |\nModel again to return to the main control screen.
2. Enable HSS Inside Your Camera
In addition to enabling HSS on your FJ gear, HSS must be enabled inside your camera if it does not enable automatically.
Within your camera's settings, locate flash function settings and enable HSS. Refer to your camera's manual for assistance.
Consider the following settings to adjust in your camera as well:
Flash: Enable
Shutter Mode: Mechanical if available otherwise E-Front Curtain Shutter
Flash Mode: Fill
Silent Shutter: Off/Disabled
Red Eye reduction: Off/Disabled
Wireless Flash: Off
Flash sync: Auto FP 1/250
3. Proper Pin Alignment With the Host Unit
Because FJ Wireless System uses a universal hot shoe mount, it's important to ensure the host unit, trigger, or speed light, is set to the appropriate camera manufacturer and that all pins are properly aligned.
Additionally, refer to our FJ80 Speedlights and FJ Triggers troubleshooting sections for more mounting details on host units.
Fuji: A small lip at the hot shoe may need a little extra force forward to mount fully.
Canon R series: added pins at the front of the hot shoe may give the impression that the FJ gear is fully mounted when in fact a small nudge forward may be needed to ensure a full mount and proper contact
Nikon Z series: Rarely have issues, but older DSLRs may need a backward nudge before locking down.
Sony: Align the pins at the base and the front of the hot shoe with the contacts and ensure they are clean. The Sony pins at the front of hot shoes can become dirty over time and prevent proper connections. Check that the pins are free of dirt and grime
Ensure all your FJ Wireless gear and camera are running the latest firmware. You can check what version your equipment is on by looking at the bottom right of the screen when powering on. To download the latest firmware and follow along with detailed instructions, refer to our Firmware page.
Reinstall firmware
In some cases, firmware can be uploaded to your unit with an error causing odd issues like the screen powering on but using the touch screen to power it on does nothing.
Delete any downloaded firmware on your computer
Restart your computer
Redownload the current firmware version and follow firmware installations as instructed.
Please follow this link to select the host unit you wish to troubleshoot if issues persist.
"},"name":"FJ Strobes HSS Not Working (High-Speed Sync)"},{"@type":"Question","acceptedAnswer":{"@type":"Answer","text":"
When working with the FJ Wireless system, ensuring proper functionality and connectivity is essential for a seamless shooting experience. This guide will walk you through troubleshooting steps with your FJ-X3 M, FJ-X3 S, and FJ-X2 M.
By following these steps, you can quickly identify and resolve any challenges, helping you maintain consistent performance across your FJ Wireless Triggers. This comprehensive guide is designed to educate and assist you with your FJ Wireless gear.
The FJ Wireless System is compatible with many cameras using the latest firmware updates. Check the Compatibility Chart below and see if your camera is listed. Additional camera models are likely compatible and will be added to this list as they are tested and confirmed.
It is important the correct camera manufacturer, your camera, is selected at the top left of the trigger LCD.
FJ-X2m
Press the menu button until you see "Camera" as the bottom left label on the LCD screen
Press the far left button corresponding with the Camera label until the desired camera manufacturer is displayed in the top left of the LCD screen
FJ-X3 M
Press and hold the "Sync - Menu" button to enter the settings menu
The first settings option is "Camera". Press the center button on the directional pad to select the option
Use the up and down arrows on the directional pad to select your camera manufacturer.
4. Turn off X-Sync
X-sync disables HSS and TTL functions and is typically only used in film photography.
FJ-X2m
X-sync will not be displayed on the trigger LCD when it is enabled.
To toggle, press and hold the center and right circular buttons under the LCD screen to enter the settings menu.
Using the control wheel, scroll down until you see X-Sync
Press in the wheel to select the option then scroll to "OFF"
Press the button corresponding with "OK" to exit the screen.
Note: When turned on, X-sync will remain on even when powered off. This setting needs to be manually toggled when desired on or off.
FJ-X3
X-sync will be displayed on the screen when enabled.
To toggle, Press and hold the "Sync-Menu" button to enter the settings menu.
Using the up and down arrows on the directional pad, scroll down to X-Sync.
Press the center button on the directional pad to select it, then use the up and down arrows to switch to "OFF"
Note: When turned on, X-sync will remain on even when powered off. This setting needs to be manually toggled when desired on or off.
5. Enable HSS on your trigger
Some camera models will not trigger HSS automatically on the trigger, in these cases, you must enable HSS manually.
FJ-x2m
Press the menu button until you see "SYNC" as the bottom far right option on the LCD screen.
Press the far right circular button under the 'SYNC" label to change the icon in the top right, under the battery indicator, to an "H" With a lightning bolt. This is HSS mode. You will be able to cycle between HSS (H with a lightning bolt), rear curtain sync, and front curtain sync.
FJ-X3
Pressing the "Sync - Menu" button will cycle between HSS (H with a lightning bolt), rear curtain sync, and front curtain sync. this is displayed under the battery level in the top right.
6. Enable HSS inside your camera
In addition to enabling HSS on your FJ gear, HSS must be enabled inside your camera. Within the settings of your camera, locate the flash function settings and enable HSS. Refer to your camera's manual for assistance.
Consider the following settings to adjust in your camera as well:
Flash: Enable
Shutter Mode: Mechanical if available otherwise E-Front Curtain Shutter
Flash Mode: Fill
Silent Shutter: Off/Disabled
Red Eye reduction: Off/Disabled
Wireless Flash: Off
Flash sync: Auto FP 1/250
7.Verify Mounting
Because FJ wireless systems use a universal hot shoe mount, it's important to ensure the host unit, trigger or speed light, is set to the appropriate camera manufacturer and that all pins are properly aligned.
In some instances, the manufacturing of a particular model or camera unit can result in the need for the user to pay special attention to the mounting process when attaching an FJ trigger or speed light to that camera's hot shoe.
Checking The Quality of Connection
Fuji Cameras
With the trigger attached to your camera, both the camera and trigger are powered on and the trigger is set to Fuji, when autofocusing or metering with your camera you should notice a little LED light above the LCD screen flashing green. This signals you have a good connection between the trigger and your camera.
Other camera manufacturers
With the trigger attached to your camera, both the camera and trigger are powered on and the trigger is set to your desired camera manufacturer, when autofocusing or metering with your camera you should notice a little LED light above the LCD screen is solid green. This signals you have a good connection between the trigger and your camera.
Positioning Tips
Fuji: A small lip at the hot shoe may need a little extra force forward to mount fully.
Canon R series: added pins at the front of the hot shoe may give the impression that the FJ gear is fully mounted when in fact a small nudge forward may be needed to ensure a full mount and proper contact
Nikon Z series: Rarely have issues, but older DSLRs may need a backward nudge before locking down.
Sony: Align the pins at the base and the front of the hot shoe with the contacts and ensure they are clean. The Sony pins at the front of hot shoes can become dirty over time and prevent proper connections. Check that the pins are free of dirt and grime
Ensure all your FJ Wireless gear and camera are running the latest firmware. You can check what version your equipment is on by looking at the bottom right of the screen when powering on. To download the latest firmware and follow along with detailed instructions, refer to our Firmware page.
Reinstall firmware
In some cases, firmware can be uploaded to your unit with an error causing odd issues like the trigger is fully charged but not turning on.
Delete any downloaded firmware on your computer
Restart your computer
Redownload the current firmware version and follow firmware installations as instructed.
"},"name":"FJ Trigger not working with HSS (High-Speed Sync)"},{"@type":"Question","acceptedAnswer":{"@type":"Answer","text":"
Occasionally, it may be necessary to reset your FJ system lighting and triggering devices to the factory defaults. A reset will not affect the firmware version and may maintain other customized settings such as language choice. Channel, group, and camera brand choices will often need to be readjusted after a factory reset.
FJ200
Press the large center control dial once to enter the settings menu.
Rotate the Control Dial until the Factory Reset is highlighted.
Press the control dial to turn the box color blue and then rotate the dial to display the word YES.
Press the control dial again to initiate the reset. The display will return to the word NO.
Channel, group, and RT/ID may need to be adjusted while in the settings menu after a reset.
Press the small right-hand round button to exit settings and return to the main menu.
"},"name":"Factory Resetting The FJ200"},{"@type":"Question","acceptedAnswer":{"@type":"Answer","text":"
Occasionally, it may be necessary to reset your FJ system lighting and triggering devices to the factory defaults. A reset will not affect the firmware version and may maintain other customized settings such as language choice. Channel, group, and camera brand choices will often need to be readjusted after a factory reset.
FJ400
Press and hold the top Menu button to the right of the screen, next to the test button, for approximately 3 seconds. This will take you to Menu 6 (Settings).
Press the select button (3rd down from the top) until you see the Factory Setting box and the corresponding box with the word NO highlighted.
Rotate the select wheel to display the word YES and then press the wheel's center OK button to initiate the reset. This process will power off the FJ400.
When powering back on, make sure to adjust the channel and group as the reset will default to channel 1 and Group A.
To exit the settings menu before the reset, press the menu button (1st button).
"},"name":"Factory Resetting Your FJ400"},{"@type":"Question","acceptedAnswer":{"@type":"Answer","text":"
Westcott lighting gear, your strobes and triggers, sometimes receive firmware updates to improve performance, add new features, and ensure compatibility with newer camera systems. Keeping everything updated is often the key to getting the best results.
Use the Correct USB Cable: Always use the USB-A to USB-C cable included with your strobe and trigger for firmware updates. Using other connectors may result in error messages.
Check Firmware Compatibility: Ensure you are loading the correct firmware version for your specific FJ system product. Using incorrect firmware can lead to errors.
Troubleshooting Errors: If the latest firmware update causes malfunctions, try the following steps:
Re-download the firmware from the Westcott website.
Firmware version numbers are found in the lower right corner of the gear’s opening screens when you power the units on.
How do I check for Westcott firmware updates?
Visit our Firmware Page to find the most recent firmware updates for your Westcott strobes, speed lights and triggers. Double-check that every piece of gear is up to date to keep everything working together perfectly.
Make sure that you are installing the right firmware (.bin file) to the matching piece of gear. If you accidentally copy the wrong file into a device, typically, installing the proper firmware will correct any issues.
Can I roll back my FJ firmware?
Yes, you can roll back your firmware. Westcott provides the prior version of the firmware on the firmware page. Also, if you save your firmware updates to your computer, you can roll back to any version you have on file. Additionally, you can contact support@fjwestcott.com and request a previous version of the firmware.
Will Firmware Versions Across Different Gear Match?
No, firmware updates and versions will most likely not match. It is expected and normal for a trigger to have a different firmware version than a strobe and the strobe to be different from a speedlight. Firmware releases can be for an individual piece of gear. Major updates may involve firmware releases for several pieces of gear at the same time.
Do I need to update all my gear at the same time?
Yes, when visiting our Firmware Page you should check the latest versions available for all your Westcott Gear. Often updates involve multiple pieces of gear. Using older firmware on a strobe, combined with the new firmware on a trigger may result in less than optimum performance.
Best Practices for Handling Camera Firmware Updates
Camera companies often have firmware updates as well. Westcott recommends that you delay any except those camera firmware updates labeled “critical” for a few weeks. This will give Westcott engineers an opportunity to provide updates should the camera’s update conflict with your current FJ firmware. Most camera firmware does not offer a rollback option. Once you install that camera firmware you will be unable to return to your earlier functioning version.
Unzip the file and open the extracted folder. (Note: Various browsers may automatically unzip the ZIP file.) IMPORTANT: Read ALL FILES located in the extracted folder (i.e. README, Changelog).
Ensure the FJ80 II is OFF and cooled before installing the firmware.
Remove the FJ80 II battery.
Connect the USB-A to USB-C cable to the FJ80 II’s USB-C port.
Common operating systems will present the strobe as an external drive device. (Note: MacOS may display the external device on the desktop or in the Finder window.)
Locate the .BIN file on your computer and drag the file to the FJ80 II (external device). Do not attempt to open the file directly.
(Note: The file ending in .BIN will be the ONLY file copied to the FJ80 II.)
Once the file has been completely copied to the FJ80 II, EJECT the FJ80 II from the computer. Remove the USB-C cable from the FJ80 II and reattach the battery.
Long press the Power | Test button on the FJ80 II, tap the blue power logo on the screen to initiate the firmware update.
Finally, confirm installation was successful by locating the firmware text in the bottom right corner of the opening screen during the start-up process.
IMPORTANT
If the FJ80 II doesn’t display as an external device after being connected to the computer, disconnect the USB cable from both devices, restart the computer, and restart the firmware installation process.
It’s recommended that the firmware update installation process be completed only when the connected computer’s power level is ≥ 50%. Loss of power of any type during this process could render the FJ80 II inoperable and require professional repair.
Removing the USB-A to USB-C cable from the FJ80 II without properly ejecting the FJ80 II from your computer could render the speedlight inoperable and require professional repair.
Depending on the operating system and the applications running, copying the firmware from your computer to the FJ80 II may take a few minutes and/or halt the copying process. Should this happen, close the copy progress window and try again. Further copying issues may require the computer to be restarted.
Unzip the file and open the extracted folder. (Note: Various browsers may automatically unzip the ZIP file.) IMPORTANT: Read ALL FILES located in the extracted folder (i.e. README, Changelog).
Ensure the FJ80-SE is OFF and cooled before installing the firmware.
Remove the FJ80-SE battery.
Connect the USB-A to USB-C cable to the FJ80-SE’s USB-C port.
Common operating systems will present the strobe as an external drive device. (Note: MacOS may display the external device on the desktop or in the Finder window.)
Locate the .BIN file on your computer and drag the file to the FJ80-SE (external device). (Note: The file ending in .BIN will be the ONLY file copied to the FJ80-SE.)
Once the file has been completely copied to the FJ80-SE, EJECT the FJ80-SE from the computer.
Remove the USB-C cable from the FJ80-SE and reinsert the battery.
Slide up the Power button on the FJ80-SE to initiate the firmware update.
Finally, confirm installation was successful by locating the firmware text in the bottom right corner of the opening screen during the start-up process.
IMPORTANT
If the FJ80-SE doesn’t display as an external device after being connected to the computer, disconnect the USB cable from both devices, restart the computer, and restart the firmware installation process.
It’s recommended that the firmware update installation process be completed only when the connected computer’s power level is ≥ 50%. Loss of power of any type during this process could render the FJ80-SE inoperable and require professional repair.
Removing the USB-A to USB-C cable from the FJ80-SE without properly ejecting the FJ80-SE from your computer could render the speedlight inoperable and require professional repair.
Depending on the operating system and the applications running, copying the firmware from your computer to the FJ80-SE may take a few minutes and/or halt the copying process. Should this happen, close the copy progress window and try again. Further copying issues may require the computer to be restarted.
Unzip the file and open the extracted folder. (Note: Various browsers may automatically unzip the ZIP file.) IMPORTANT: Read ALL FILES located in the extracted folder (i.e. README, Changelog).
Ensure the FJ80 is OFF and cooled before installing the firmware.
Connect the USB-A to USB-C cable to the FJ80’s USB-C port.
Common operating systems will present the strobe as an external drive device (Note: MacOS may display the external device on the desktop or in the Finder window.)
Locate the .BIN file on your computer and drag the file to the FJ80 (external device). (Note: The file ending in .BIN will be the ONLY file copied to the FJ80.)
Once the file has been completely copied to the FJ80, EJECT the FJ80 from the computer.
Remove the USB-C cable from the FJ80 and reattach the battery.
Long press the Power | Test button on the FJ80, tap the blue power logo on the screen to initiate the firmware update.
Finally, confirm installation was successful by locating the firmware text in the bottom right corner of the opening screen during the start-up process.
IMPORTANT
If the FJ80 doesn’t display as an external device after being connected to the computer, disconnect the USB cable from both devices, restart the computer, and restart the firmware installation process.
It’s recommended that the firmware update installation process be completed only when the connected computer’s power level is ≥ 50%. Loss of power of any type during this process could render the FJ80 inoperable and require professional repair.
Removing the USB-A to USB-C cable from the FJ80 without properly ejecting the FJ80 from your computer could render the speedlight inoperable and require professional repair.
Depending on the operating system and the applications running, copying the firmware from your computer to the FJ80 may take a few minutes and/or halt the copying process. Should this happen, close the copy progress window and try again. Further copying issues may require the computer to be restarted.
"},"name":"Updating Firmware on FJ80 Speedlights"},{"@type":"Question","acceptedAnswer":{"@type":"Answer","text":"
Westcott lighting gear, your strobes and triggers, sometimes receive firmware updates to improve performance, add new features, and ensure compatibility with newer camera systems. Keeping everything updated is often the key to getting the best results.
Important Instructions Before Updating
Use the Correct USB Cable: Always use the USB-A to USB-C cable included with your strobe and trigger for firmware updates. Using other connectors may result in error messages.
Check Firmware Compatibility: Ensure you are loading the correct firmware version for your specific FJ system product. Using incorrect firmware can lead to errors.
Troubleshooting Errors: If the latest firmware update causes malfunctions, try the following steps:
Re-download the firmware from the Westcott website.
Firmware version numbers are found in the lower right corner of the gear’s opening screens when you power the units on.
How do I check for Westcott firmware updates?
Visit our Firmware Page to find the most recent firmware updates for your Westcott strobes, speed lights and triggers. Double-check that every piece of gear is up to date to keep everything working together perfectly.
Make sure that you are installing the right firmware (.bin file) to the matching piece of gear. If you accidentally copy the wrong file into a device, typically, installing the proper firmware will correct any issues.
Can I roll back my FJ firmware?
Yes, you can roll back your firmware. Westcott provides the prior version of the firmware on the firmware page. Also, if you save your firmware updates to your computer, you can roll back to any version you have on file. Additionally, you can contact support@fjwestcott.com and request a previous version of the firmware.
Will Firmware Versions Across Different Gear Match?
No, firmware updates and versions will most likely not match. It is expected and normal for a trigger to have a different firmware version than a strobe and the strobe to be different from a speedlight. Firmware releases can be for an individual piece of gear. Major updates may involve firmware releases for several pieces of gear at the same time.
Do I need to update all my gear at the same time?
Yes, when visiting our Firmware Page you should check the latest versions available for all your Westcott Gear. Often updates involve multiple pieces of gear. Using older firmware on a strobe, combined with the new firmware on a trigger may result in less than optimum performance.
Best Practices for handling Camera Firmware updates
Camera companies often have firmware updates as well. Westcott recommends that you delay any except those camera firmware updates labeled “critical” for a few weeks. This will give Westcott engineers an opportunity to provide updates should the camera’s update conflict with your current FJ firmware. Most camera firmware does not offer a rollback option. Once you install that camera firmware you will be unable to return to your earlier functioning version.
Unzip the file. Open the extracted folder. (Note: Various browsers may automatically unzip the ZIP file.) IMPORTANT: Read ALL FILES located in the extracted folder (i.e. README, Changelog).
Ensure the FJ-X3 is OFF.
Connect the USB-A to USB-C cable to the FJ-X3’s USB-C port. See step 6 before connecting the USB-A end to the computer.
On the FJ-X3, press and hold the SYNC•MENU button below the screen.
While holding the button, connect the USB-A end of your cable to your computer’s USB-A port. The Wireless Signal Indicator light on FJ-X3 will illuminate red when your computer has recognized the connection to the FJ-X3. You may release the button at this time. Most operating systems will present the FJ-X3 as an external device. MacOS may display an icon on the desktop or in a Finder window.
Locate the .BIN file on your computer and drag the file to the FJ-X3 (external device).
Once the file has been copied to the FJ-X3, EJECT the external device from the computer.
Unplug the USB-A to USB-C cable from your computer and the FJ-X3.
Long press the Power button on the FJ-X3 to initiate the firmware update. Confirm installation was successful by locating the firmware text in the bottom right corner of the opening screen during the start-up process.
IMPORTANT
If the FJ-X3 doesn’t display as an external device after connecting to a computer, disconnect the USB cable from both devices and restart the computer and firmware update process.
It’s recommended that the firmware update installation process be completed only when the connected computer’s power level is ≥ 25%. Loss of power of any type during this process could render the FJ-X3 inoperable and require professional repair.
Removing the USB cable from the FJ-X3 without properly ejecting the device from your computer could render the trigger inoperable and require professional repair.
Copying the firmware from your computer to the FJ-X3 may take a few minutes and/or halt the copying process. Should this happen, close the copy progress window and try again. Further copying issues may require the computer to be restarted.
FJ-X2 M
Step by Step Instructions
Download the latest firmware ZIP file IMPORTANT There are two versions of the FJ-X2m firmware. The beginning letter of Your trigger’s serial number will determine which version is correct for your unit. The serial number is found on the back side of the tilter mechanism. Make sure to load the correct version as indicated on the download page. If you incorrectly load the wrong version, reinstallation with the correct version will correct the error.
Unzip the file. Open the extracted folder. (Note: Various browsers may automatically unzip the ZIP file.) IMPORTANT: Read ALL FILES located in the extracted folder (i.e. README, Changelog).
Ensure the FJ-X2m is OFF.
Connect the USB-A to USB-C cable to the FJ-X2m’s USB-C port. See step 6 before connecting the USB-A end to the computer.
On the FJ-X2m, press and hold the far-right round button below the screen just under the C.Fn text. While holding the button, connect the USB-A to USB-C cable into your computer’s USB-A port. The Wireless Signal Indicator light on FJ-X2m will illuminate red when your computer has recognized the connection to the FJ-X2m. You may release the button at this time. Most operating systems will present the FJ-X2m as an external device. MacOS may display an icon on the desktop or in a Finder window.
Locate the .BIN file on your computer and drag the file to the FJ-X2m (external device).
Once the file has copied to the FJ-X2m, EJECT the external device from the computer.
Unplug the USB-A to USB-C cable from your computer and the FJ-X2m.
Long press the Power | Menu button on the FJ-X2m to initiate the firmware update. Confirm installation was successful by locating the firmware text in the bottom right corner of the opening screen during the start-up process.
IMPORTANT
If the FJ-X2m doesn’t display as an external device after connecting to a computer, disconnect the USB cable from both devices and restart the computer and firmware update process.
It’s recommended that the firmware update installation process be completed only when the connected computer’s power level is ≥ 25%. Loss of power of any type during this process could render the FJ-X2m inoperable and require professional repair.
Removing the USB cable from the FJ-X2m without properly ejecting the device from your computer could render the trigger inoperable and require professional repair.
Copying the firmware from your computer to the FJ-X2m may take a few minutes and/ or halt the copying process. Should this happen, close the copy progress window and try again. Further copying issues may require the computer to be restarted.
"},"name":"Updating Firmware on FJ Triggers"},{"@type":"Question","acceptedAnswer":{"@type":"Answer","text":"
That are the light effects in the lights?
"},"name":"That are the light effects in the lights?"},{"@type":"Question","acceptedAnswer":{"@type":"Answer","text":"
Battery Run times L60
"},"name":"Battery Run times L60"},{"@type":"Question","acceptedAnswer":{"@type":"Answer","text":"
Battery Run times L120
"},"name":"Battery Run times L120"},{"@type":"Question","acceptedAnswer":{"@type":"Answer","text":"
Occasionally, it may be necessary to reset your FJ system lighting and triggering devices to the factory defaults. A reset will not affect the firmware version and may maintain other customized settings such as language choice. Channel, group, and camera brand choices will often need to be readjusted after a factory reset.
How to Reset your FJ400ii and FJ800
Touch and hold the Menu button in the top right of the screen. This will enter you into the settings menu.
Touch the arrows until the "Factory Reset" setting is displayed.
Change "OFF" to "ON", then press "OK"
You will be brought back to the home screen.
"},"name":"Factory Resetting Your FJ400ii and FJ800"},{"@type":"Question","acceptedAnswer":{"@type":"Answer","text":"
Here are a few simple ways to keep your speedlight from overheating:
Lower the Power:
If you're indoors, try raising your camera’s ISO or opening up the aperture. This helps the FJ80 work on lower power, so it won’t heat up as much. In TTL mode, increasing the ISO means the speedlight automatically needs less power, which helps keep things cool.
Adjust the Beam Angle and Get Closer:
Set the zoom of the speedlight to a telephoto length so the light just covers your subject. This allows the speedlight to use less power whether you’re in TTL or Manual mode. And if possible, move closer to your subject. This also allows the speedlight to use less power.
Do not use Modifiers Unless Needed:
When you're shooting fast, it’s best to avoid using things like softboxes or diffusers on the flash—they trap heat and make the light work harder. If you need to use a modifier, stick to single shots or take a few breaks between bursts to let the unit cool down.
What if it still overheats?
If the speedlight overheats, it’ll either slow down or stop firing for a bit to cool off. When that happens, try lowering the power or shooting at a slower pace. For longer sessions, a steady, moderate pace works well—most speedlights take about 2.5 to 4 seconds to recycle.
Does the FJ80ii do better with heat?
Absolutely. The FJ80ii has better heat dissipation, so it handles more intense shoots without as many interruptions. You can shoot faster and longer without worrying about overheating.
Ring Lights are designed to create shadowless/flat light which is often useful when illuminating surfaces without distracting shadows. Moving the light closer to the subject will often create a more dimensional appearance to the face or object as the light on each side begins to decrease and reflect less light back to the camera from the sides. Having the light too far from the subject will flatten the light as the falloff is less pronounced and the angle of reflection is less influential.
"},"name":"Why is the light from my Ring Light so flat?"},{"@type":"Question","acceptedAnswer":{"@type":"Answer","text":"
The Eyelighter 2 has a variable 74 degree tilt.
\n
With the thumb screws of the tilter facing you, set the tilt so the edge of the washer on the top thumb screw is just inside the right end of the adjustment slot and tighten the thumb screw. This will set the angle as in the original design while maintaining the ability to make tilt adjustments. This video shows Larry using the Eyelighter and the singular optimal tilt angle of the original design. https://westcottu.com/history-eyelighter-larry-peters
"},"name":"How do I set the Eyelighter 2 tilt to match the optimum tilt set up from the original Eyelighter?"},{"@type":"Question","acceptedAnswer":{"@type":"Answer","text":"
In most cases, the speedlite mount and the central rear opening area of the Rapid Box Switch will accommodate only one speedlite. The Rapid Box Duo is not part of the Rapid Box Switch series, but it is designed specifically for use with up to two speedlites and features a fixed dual speedlite bracket.
"},"name":"Can I use multiple speedlites with Rapid Box Switch modifiers?"},{"@type":"Question","acceptedAnswer":{"@type":"Answer","text":"
When combining different light sources and technologies, including LED and CFL, we recommend conducting test shots ahead of time before capturing your final images. Although the Solix daylight (~5600K), or the Solix Bi-color set to produce a 5600K color temperature are considered daylight balanced, these source may respond differently to your camera's white balance and color adjustments than a CFL bulb. These variables can differ from light source-to-light source, camera-to-camera, and even manufacturer to manufacturer, so it's always good to be prepared for an important shoot.
"},"name":"Can I combine a Solix Bi-color or Solix Daylight LED with a compact fluorescent (CFL) light source in my lighting setup?"},{"@type":"Question","acceptedAnswer":{"@type":"Answer","text":"\n
Westcott Top Pro photographer Kevin Kubota shows how to assemble the LunaGrip speedlite handle for photographers in this instructional video.
The LunaGrip was designed by Kevin and allows photographers to pair their speedlight with their favorite diffusion disc for a easy-to-use modifier with beautiful light output. The LunaGrip features an adjustable shoe-mount bracket, easy-to-grip handle, and three flexible grip arms.
"},"name":"How to Setup the LunaGrip Speedlight Modifier"},{"@type":"Question","acceptedAnswer":{"@type":"Answer","text":"\n
Designed by Joel Grimes, the 24\" Rapid Box Beauty Dish is a collapsible, travel-friendly softbox for beauty and fashion photography. This ultra-portable beauty dish directs a soft, clean pattern of light. Featuring a soft white interior, 16 durable ribs, and a true parabolic form, this softbox is a must-have modifier for any portrait photographer.
\n
\n
"},"name":"How to Assemble the Rapid Box Beauty Dish"},{"@type":"Question","acceptedAnswer":{"@type":"Answer","text":"
Westcott Flex LED X-Bracket Kit Overview
The Westcott Flex LED X-Bracket Kit is a versatile lighting solution designed for photographers and filmmakers who need a powerful, portable light source. This kit includes the Flex LED Mat, an ultra-thin, flexible light panel, and the X-Bracket Mount, which makes setup quick and easy in virtually any location.
What is the Westcott Flex LED X-Bracket Kit?
The Flex LED X-Bracket Kit combines the Flex LED Mat with a convenient mounting system to create an adaptable lighting setup. The kit allows you to mount and adjust the Flex LED Mat on various surfaces like stands, chairs, tables, or shelves, making it an ideal tool for both studio and on-location shoots.
Key Features of the Flex LED Mat
Ultra-thin and Flexible: The Flex LED Mat is extremely lightweight, weighing less than 1 pound, and is flexible enough to mount in tight or awkward spaces.
Water-resistant: It’s designed to be durable and withstand different environmental conditions, adding to its versatility.
High-quality Output: The Flex LED Mat provides flicker-free light with up to 2000 lux at 1 meter, ensuring professional lighting quality for video and photography.
Dimmable Light: The mat is fully dimmable, allowing precise control over the light's intensity.
Color Temperature Options: Available in two versions:
Daylight (5600K)
Bi-color (2800-6000K), which allows you to adjust between warm and cool lighting.
What is Included in the X-Bracket Kit?
X-Bracket Mount: The X-Bracket features a user-friendly design that makes it easy to mount your Flex LED Mat onto various surfaces.
Mounting Clip: Securely holds the Flex LED Mat in place.
Light Stand Adapter: Attaches to light stands for more traditional setups.
Adjustable Diffusion Arms: These arms allow you to quickly secure the included diffusion panel, softening the light output to create a more flattering, even illumination.
Diffusion Panel: Helps soften and diffuse the light, making it ideal for portraits or situations where softer light is needed.
Common Questions
What can I mount the X-Bracket to? The X-Bracket can be mounted on light stands, chairs, tables, shelves, or nearly any surface you can think of. This versatility allows you to create stable lighting setups in a variety of environments.
How bright is the Flex LED Mat? The Flex LED Mat delivers up to 2000 lux at 1 meter, providing a bright and professional-quality light output suitable for both photography and filmmaking.
Is the Flex LED Mat durable? Yes, the Flex LED Mat is water-resistant and designed to handle various environments, making it a reliable option for both indoor and outdoor use.
Can I adjust the color temperature? If you choose the bi-color version, you can adjust the color temperature between 2800K and 6000K to suit different lighting needs. The daylight version offers a fixed color temperature of 5600K.
How do I soften the light output? The X-Bracket Kit includes a diffusion panel that attaches easily to the adjustable diffusion arms, helping to soften the light and reduce harsh shadows.
Conclusion
The Westcott Flex LED X-Bracket Kit is a highly adaptable and portable lighting solution that provides powerful, flicker-free output in a lightweight and flexible package. Whether you're a beginner or an advanced user, this kit offers ease of use and professional-quality results. It's perfect for on-the-go shoots or tight spaces, and its versatility makes it a go-to option for filmmakers and photographers alike.
"},"name":"Westcott Flex LED X-Bracket Kit Overview"},{"@type":"Question","acceptedAnswer":{"@type":"Answer","text":"
Westcott's ¾ stop Scrim Jim Cine fabric is the most breathable and the least noisy, but it is not completely silent.
"},"name":"Is the Scrim Jim Cine Fabric silent?"},{"@type":"Question","acceptedAnswer":{"@type":"Answer","text":"
Yes, the Triple Threat can be used with all of our 7' Parabolic Umbrellas as well as with all other photographic umbrellas. For use with our 7' Parabolic Umbrellas, we recommend attaching the Triple Threat directly to the umbrella shaft while the umbrella shaft is mounted to the light stand through use of a separate bracket (such as our Tilter Bracket). The Triple Threat's built-in threaded mount is for use with smaller modifiers but is not recommend to carry the weight of the larger umbrellas.
\n
"},"name":"Can the Triple Threat be used with the 7' Parabolic Umbrella?"},{"@type":"Question","acceptedAnswer":{"@type":"Answer","text":"
Grids are available for the Medium Apollo, Apollo Orb, and the Apollo Strip.
\n
"},"name":"What versions of the Apollo have grid options from Westcott?"},{"@type":"Question","acceptedAnswer":{"@type":"Answer","text":"
Absolutely. While the uLite softboxes are specific to the uLite itself, these light heads with or without their softboxes can be combined with other continuous light heads to create a more advanced multi-light set-up. The key to these elaborate setups is ensuring that the same style of bulb is used in each light head. For instance, using Westcott compact fluorescents bulbs in each light head will produce a beautiful, daylight-balanced light output.
\n
"},"name":"Can uLites be combined with more advanced constant lighting units like the D5 and TD6?"},{"@type":"Question","acceptedAnswer":{"@type":"Answer","text":"
The tapered end of the 8mm shaft on our 43\" collapsible umbrella will fit tightly just inside the umbrella holder hardware due to it's octagonal shape. Inserting the tapered end of the 43\" umbrella just inside the housing results in positioning the umbrella for maximum spread from the Skylux. All of our standard 7mm umbrellas pair perfectly with the Skylux. Depending on the construction of the shaft, other manufacturer's non-tapered 8mm or larger shaft may not work. The Skylux should accommodate any 7mm shaft umbrella.
\n
"},"name":"Will the Skylux accept an umbrella with an 8mm shaft?"},{"@type":"Question","acceptedAnswer":{"@type":"Answer","text":"
Our diffusion fabrics are not designed to be cleaned. Iron, hard water, softener salts, and anything out of the tap can stain diffusion fabric. Chemicals from cleaners can also weaken the material and alter the neutral color characteristics of the fabric. If absolutely necessary, you can try hand washing the screen with a delicate soap diluted with distilled water and allow to air dry. Results cannot be guaranteed. Always check that the fabric is completely dry before storing.
\n
"},"name":"How do I clean Westcott diffusion fabrics (for softboxes, scrims, etc)?"},{"@type":"Question","acceptedAnswer":{"@type":"Answer","text":"
The main difference you will see between these two Pocket Box softboxes is the shape of the catchlights in the eyes of your portrait subjects.
Some photographers prefer a round catchlight, which simulates the appearance of the sun while some prefer a square or rectangular catchlight to simulate the appearance of a window.
"},"name":"What's the difference between the square and round versions of the Pocket Box?"},{"@type":"Question","acceptedAnswer":{"@type":"Answer","text":"
The Ice Light 2 produces 1740 lumens of output with a 96 CRI.
\n
"},"name":"What is the lumen output of the Ice Light 2?"},{"@type":"Question","acceptedAnswer":{"@type":"Answer","text":"
You sure can! Our 18” x 24” and 24” x 36” Fast Flag Frames are both available for purchase separately.
"},"name":"Can I purchase extra Fast Flag frames to add my kit?"},{"@type":"Question","acceptedAnswer":{"@type":"Answer","text":"
Each D5 socket can house a single 85-watt CFL bulb for a maximum of 425 watts when using Westcott high-quality and daylight-balanced compact fluorescent bulbs. Photographers needing a higher wattage output in a continuous light that can house both tungsten and fluorescent bulbs should consider the Spiderlite TD6.
\n
"},"name":"What is the maximum wattage for the D5?"},{"@type":"Question","acceptedAnswer":{"@type":"Answer","text":"
Depending on the severity, you may be able to readjust the frame. This is best done with the help of another person.
Open your backdrop and have your helper stand on the opposite side of the background.
Grasp opposite ends of the frame and gently pull away from each other. This action moves the binding back into place inside the fabric edge. You may need to walk around the entire backdrop performing this process.
When you can lay it flat on the ground with no edges risen from the floor you will know it is fixed!
"},"name":"My Collapsible Backdrop's frame is warped. Can it be readjusted?"},{"@type":"Question","acceptedAnswer":{"@type":"Answer","text":"
Overview
The FJ-X2m trigger is your go-to solution for almost any camera with a hot shoe mount. The trigger opens the door to advanced features like High-Speed Sync (HSS) and TTL, making it a fantastic companion for photographers who switch between different camera systems.
Supported Camera Brands:
Canon
Nikon
Sony* (requires the FJ Wireless Adapter)
Panasonic Lumix
Fuji
Olympus
Advanced Functions
High-Speed Sync (HSS)
Shoot at those speedy shutter rates with ease on many compatible models.
TTL (Through The Lens)
Enjoy automatic exposure control, so your lighting stays consistent even in tricky conditions.
Manual Mode Features
When you switch to manual mode, the FJ-X2m offers several powerful features:
Remote Power Adjustments: Fine-tune your lighting right from the trigger.
Color Consistency: Keep your colors on point for a professional look.
Freeze Function: Capture sharp images of fast-moving subjects.
Fast Recycle Times: Get ready for the next shot without long waits.
Testing and Compatibility
Each compatible camera has been rigorously tested using a thorough protocol, ensuring reliable HSS and TTL performance. You can check out the full list of tested models on the FJ Wireless System Compatibility page.
Unconfirmed Compatibility
If you have a newer camera from one of the supported brands that isn’t on the list, it might still work with the FJ-X2m trigger. Just know that the Westcott technical team hasn’t confirmed full compatibility yet. They’re continually assessing new models and will update the list as they go.
Conclusion
When paired with the FJ400 strobe, the FJ-X2m trigger offers a wealth of features for photographers across various brands. Whether you’re in TTL or Manual mode, you can count on this trigger to help you achieve stunning results, no matter your camera system. For the best performance, check the compatibility list or reach out to Westcott if you have questions about any unconfirmed models.
"},"name":"What Cameras can the FJ-X2m Trigger be used on?"},{"@type":"Question","acceptedAnswer":{"@type":"Answer","text":"
You can verify that the FJ-X2m trigger is charging by one of two methods.
If the trigger is off when you connect it to a compatible cord and charger, you should see the LED light above the Westcott logo turn green and the screen will turn on for a second, followed by a red blinking light while the trigger charges.
If the trigger is turned on, you will see a red lightning bolt next to the battery indicator on the screen as the unit charges.
"},"name":"How to know if the FJ-X2m trigger is charging?"},{"@type":"Question","acceptedAnswer":{"@type":"Answer","text":"
You will have the option to cancel your order by contacting our customer service team at support@fjwestcott.com or +1 (419) 243-7311.
Please include your order number and the reason for cancellation in your message.
Orders can only be canceled before they have been shipped. If you have received an email notifying you that your order has already been shipped, please refer to our return policy for further instructions.
More information regarding refunds and exchanges is available here.
"},"name":"How do I cancel my order?"},{"@type":"Question","acceptedAnswer":{"@type":"Answer","text":"
Yes! We Offer Free Shipping
Free shipping is available to addresses in the contiguous United States for most orders of qualifying products over $100.
Orders that contain large/heavy items or Lithium batteries are subject to additional shipping fees or restrictions, and may not qualify for free shipping.
More information regarding our shipping policies is available here.
"},"name":"Do you offer free shipping?"},{"@type":"Question","acceptedAnswer":{"@type":"Answer","text":"
Individuals who are over eighteen (18) years of age and have a registered Westcott website account are eligible to participate in the Westcott Rewards Program. The Program is void where prohibited by law.
More information regarding the Westcott Rewards Program is available here.
"},"name":"Who is eligible to join the Westcott Rewards Program?"},{"@type":"Question","acceptedAnswer":{"@type":"Answer","text":"
No, a gift card must be used at the time of placing an order and cannot be used retroactively on prior purchases. This policy helps ensure a smooth and fair process for all customers.
"},"name":"Can I apply gift cards to prior purchases?"},{"@type":"Question","acceptedAnswer":{"@type":"Answer","text":"
Warranty Exclusions
Normal Wear and Tear: The warranty does not cover deterioration from normal use.
Damage from Abuse or Misuse: Excludes damage caused by:
Abuse, neglect, or misuse
Accidents or overloading
Improper installation or misapplication
Product alteration or unauthorized repairs
Improper operation, cleaning, handling, or maintenance
Incidental or Consequential Damages: Not covered unless Accidental Damage Protection has been purchased.
Self-Inflicted Damage: Any defect or malfunction resulting from user error, including:
Failing to follow operating instructions
Using improper or faulty equipment
Unauthorized Modifications: The warranty becomes invalid if the product is opened, disassembled, repaired, or modified by anyone not authorized by Westcott.
Customer Responsibilities
Shipping Charges and Taxes: Customers are responsible for return shipping fees, duties, and taxes.
Shipping Recommendations: It is strongly recommended to use delivery services like FedEx or UPS that provide tracking information and insurance for returns.
Additional Information
Warranty Validity:
The warranty is provided exclusively to the original purchaser.
It remains valid for the duration of the warranty period, provided that the customer continues to own the product and Westcott continues to manufacture it.
Do Not Attempt Repairs: Please do not try to fix anything yourself; unauthorized repairs or modifications void the warranty.
More information regarding our product warranty and repair policies is available here.
"},"name":"What is not covered under warranties?"},{"@type":"Question","acceptedAnswer":{"@type":"Answer","text":"
This guide covers the basic setup, controls, and operation of the FJ400 Strobe, including, powering on/off, attaching to a camera or mount, and recommended camera settings. For a complete user manual, visit the Westcott Product Manuals & Support Videos page.
The battery can be charged either separately or while attached to the FJ400.
Connect the power cord to the AC Adapter
Connect the AC Adapter's barrel plug to the battery's AC receptacle
Plug the power cord into a power outlet
The charging process is complete when the red indicator light on the AC Adapter turns green.
AC Adapter LED Indicator Light Colors
Green:
AC Adapter is plugged into a power outlet without a battery attached or is connected to a fully-charged battery
Red:
AC Adapter is plugged into a power outlet, and the battery is currently charging and less than 100% charged
Attaching and Removing the FJ400 AC/DC Lithium Polymer Battery
Attaching: Align the silver connection points on the rear of the strobe with the holes on the silver strips on the back of the battery. Slide the battery down until it locks into place.
Removing: Ensure the FJ400 is OFF by long-pressing the Power / Model button until the LCD screen turns off. Slide the release lock located on top of the battery away from the strobe. Gently press the battery up and away from the strobe to remove it.
AC Power Operation
Ensure the battery charge level is greater than 25%.
Ensure the battery is securely attached to the FJ400
Plug the power cord into the AC Adapter
With the strobe powered off, connect the AC Adapter's barrel plug to the battery's AC receptacle
Plug the power cord into a dedicated power outlet
Turn the strobe ON by pressing and holding the Power button until the start-up screen appears
DC Power Operation
Ensure the FJ400 battery has been fully charged.
Ensure the battery is securely attached to the FJ400
Turn the strobe ON by pressing and holding the Power | Model button until the start-up screen appears
Mounting the FJ400 to a Light Stand
Rotate the tilter bracket's handle counterclockwise until the light stand receptacle is perpendicular to the strobe body
Loosen the tension knob located lower on the tilter bracket
Insert the light stand spigot into the FJ400's 5/8"-16 mm tilter bracket receptacle
Tighten the tension knob to secure the strobe to the light stand
Attaching & Removing Modifiers
Connecting a Bowens Speedring & Modifier:
Ensure the strobe is turned OFF and has cooled for five minutes
Grasp the speedring attached to the modifier and align its three square mounting blocks with the openings on the face of the strobe
Insert the speedring and turn clockwise until it locks into place
Removing a Bowens Speedring & Modifier:
Ensure the strobe is turned OFF and has cooled for five minutes
Grasp the speedring attached to the modifier
Slide the strobe's speedring release away from the modifier
Rotate the modifier's speedring counterclockwise until the three square mounting blocks align with the openings, then pull the modifier away from the strobe to release
Attaching an Umbrella-Based Modifier:
Ensure the strobe is turned OFF and has cooled for five minutes
Grasp the umbrella's shaft and slide it into the strobe's umbrella receptacle
Tighten the tension screw to secure the umbrella-based modifier
Removing an Umbrella-Based Modifier:
Ensure the strobe is turned OFF and has cooled for five minutes
Loosen the umbrella tension screw.
Grasp the umbrella's shaft and gently slide the umbrella out of the FJ400 umbrella receptacle
Note: Never force entry or removal of speedring, umbrellas, or modifiers. Use caution during the removal of modifiers to avoid damaging the flash tube. Octagonal umbrella shafts may not fit into the FJ400 umbrella receptacle.
Best Camera Settings for FJ400
Sony Cameras
The FJ400 can be used with the FJ-X3m in Manual mode for basic functionality. For TTL and HSS, use the dedicated FJ-X3s specifically designed for Sony.
Turn off red-eye reduction
Disable the electronic front curtain shutter
Turn off silent shooting
Set the flash mode to "Fill-In"
Ensure wireless flash is turned off
Fuji Cameras
Set the shutter type to "Mechanical"
Turn off red-eye removal.
Nikon Cameras
For DSLRs: Set the shutter to "Mechanical." In the E1 Flash Sync menu, select "Auto FP 1/250th" if available.
For Mirrorless Cameras: Ensure the shutter is set to "Mechanical," silent photography is turned off, and flash mode is set to "Fill-In." Set the E1 Flash Sync menu to "Auto FP 1/200th" or "1/250th."
Canon Cameras
For DSLRs: Disable silent live view, enable flash, and turn off red-eye reduction.
For Mirrorless Cameras: Disable silent shutter and silent live view, and set the shutter to "Mechanical" if possible.
The FJ400 is equipped with self-monitoring cooling fans to ensure safe operation. It also features an automatic shutoff mechanism. In the rare event that the strobe reaches an unsafe operating temperature, the screen will display "OH" (overheat). Once the unit has cooled, the "OH" indicator will disappear from the screen, and it will be safe to continue operation.
Safety Warnings
IMPORTANT: During operation, the flash tube, LED modeling lamp, and certain components of the FJ400 strobe may reach high temperatures. Exercise caution to avoid serious burns or injuries.
Use only with the Westcott FJ400 AC/DC Lithium Polymer Battery and/or AC Power Adapter and Cord.
Avoid touching the glass diffusion dome, flash tube, LED modeling lamp, or metal reflector after immediate use to prevent potential injury.
Never leave the strobe unattended around children or pets.
Keep the strobe away from fire, water, and moisture. Do not submerge it in water.
Avoid drastic temperature changes before, during, or after use.
Avoid direct skin contact with the flash tube and LED modeling lamp when replacing the flash tube.
Always remove the FJ400 AC/DC Lithium Polymer Battery from the FJ400 Strobe during travel/storage to prevent accidental operation, which could lead to overheating or permanent damage.
Do not overtighten the tilter bracket tension knob or umbrella tension screw.
Ensure the FJ400 is securely mounted before use.
Only use compatible modifiers and accessories, and ensure they are securely attached to the FJ400 Strobe before use.
Do not attempt to modify any Westcott products. Contact Westcott for assistance.
Maximum operating temperature: 32-104°F (0-40°C).
Installing the Firmware
Visit the Westcott Firmware List to find and download the latest firmware ZIP file. (Note: Some browsers may automatically unzip the ZIP file.)
Unzip the file and open the extracted folder.
You can review what updates are included in the firmware by reading the README document.
Ensure the FJ400 is OFF and has cooled before removing the battery from the strobe.
Connect the USB-A to USB-C cable to the FJ400's USB-C port.
Common operating systems will present the strobe as an external drive device. (Note: MacOS may display the external device on the desktop or in the Finder window.)
Locate the .BIN file on your computer and drag it to the FJ400 (external device). (Note: The file ending in .BIN will be the ONLY file copied to the FJ400.)
Once the file has been completely copied to the FJ400, EJECT the FJ400 from the computer.
Remove the USB-C cable from the FJ400 and reattach the battery.
Press the Power | Model button on the FJ400 to initiate the firmware update.
IMPORTANT: If the FJ400 doesn't display as an external device after being connected to the computer, disconnect the USB cable from both devices, restart the computer, and restart the firmware installation process.
It is recommended that the firmware update installation process be completed only when the connected computer's power level is ≥ 50%. Loss of power during this process could render the FJ400 inoperable and require professional repair.
Removing the USB-A to USB-C cable from the FJ400 without properly ejecting the FJ400 from your computer could render the strobe inoperable and require professional repair.
Depending on the operating system and applications running, copying the firmware from your computer to the FJ400 may take a few minutes or halt the copying process. If this happens, close the copy progress window and try again. Further copying issues may require the computer to be restarted.
The Freeze mode on FJ Westcott strobes allows photographers to record incredibly fast-moving subjects with precision. This feature helps you "freeze" motion efficiently by providing the shortest flash durations, making it suitable for high-speed photographic conditions.
What does the Freeze function do, and when should it be used?
The Freeze mode creates the shortest flash duration possible. It is perfect for circumstances of very fast movement, allowing you to photograph fast-moving subjects like water drops with minimal to no motion blur. To avoid light contamination, decrease or remove any ambient¸ light in your scene, and make sure the flash duration is quick enough to effectively freeze the motion.
How does the Freeze function affect flash duration and power levels?
The lower the power setting, the shorter the flash duration in Freeze mode. You may need to adjust power settings and camera settings according to your shooting needs for optimal performance.
What happens to the color temperature?
While FJ strobes are calibrated for a consistent 5500K color temperature. Using the Freeze function will make the light noticeably cooler. For the most accurate results, consider using a custom white balance and/or a gray card when activating Freeze mode.
How to Activate the Freeze Function
FJ-X3 Trigger
Enter the settings menu by pressing and holding the sync/menu button to access the settings menu.
Set the Freeze function to ON. Note: The Freeze mode will deactivate automatically when the trigger is powered off.
FJ400
Freeze mode is controlled by the FJ- X Trigger.
When Freeze is active, the display shows a "FRE" indicator along with yellow text representing the flash duration.
FJ200
Enter the settings menu by pressing the rotating knob once
In the SYNC Field Change NOR or HSS to FRE Note: The Freeze mode will remain on even when powering off the strobe. It must be turned off manually
FJ80II
Enter the settings menu by pressing the home button and selecting "settings"
Set the Freeze function to ON. Note: The Freeze mode will remain on even when powering off the speedlight. It must be turned off manually
FJ80 SE
Enter the settings menu by pressing and holding the two center buttons under the LCD marked with a gear icon.
Set the Freeze function to ON. Note: The Freeze mode will remain on even when powering off the speedlight. It must be turned off manually
"},"name":"What is Freeze Function?"},{"@type":"Question","acceptedAnswer":{"@type":"Answer","text":"
When working with the FJ Wireless system, ensuring proper functionality and connectivity is essential for a seamless shooting experience. This guide will walk you through troubleshooting steps with your FJ80, FJ80 II M, FJ80 II S, FJ80 SE M, and FJ80SE S.
By following these steps, you can quickly identify and resolve any challenges, helping you maintain consistent performance across your FJ Wireless Speedlights. This comprehensive guide is designed to educate and assist you with your FJ Wireless gear.
Use the On-Flash test button to test fire all other FJ Wireless flashes you are trying to trigger. This button has a lighting bolt and should be green when ready to test fire. Confirm all wirelessly connected flashes are firing. If you find one of your units is not firing, press the test fire button on that unit. If you find a flash is not firing when pressing the onboard test fire button, select the FJ Wireless gear you want to troubleshoot.
If it appears other flashes are not being triggered but are firing when pressing their onboard test fire button, check the wireless connections in section 2 below.
2. Check Wireless Connections and Modes
FJ80 and FJ80 II M (S)
Channel
In host mode, confirm what channel the unit is on. This is displayed at the top of the FJ80II.
Then, confirm the other FJ Wireless flashes you wish to control are on the same channel. If you need to change the channel, simply touch the CH button and use the arrows at the bottom to select your desired channel
Note: Westcott suggests the use of a channel between 5 and 15 as a starting point. these channels appear to offer the best connectivity.
Group
Once the channel matches all the units you desire to control, notice what flashes are connected to what group (GR). The FJ80 II is the Host and will control the groups under it. For example, if all your lights are under group A, then the power output or setting that is set on the FJ80 II within group A will be applied to all those lights connected to that group.
Sleep mode (SLP)
You will be able to cycle between M, TTL, and SLP within the groups. SLP mode will keep the units connected but that group will not fire. You must put the group into M or TTL mode for a fire signal to be sent.
To change this on the FJ80 II, touch the box next to the group that contains one of the three options to cycle through the settings.
Standby Mode (STDBY)
This mode disengages the hot shoe and will not send or receive any fire signals. In host mode, notice the STDBY button at the top right of the screen.
Green: The unit is in standby mode and will not fire.
Gray: Standby mode is disabled and flash will resume normal function.
FJ80 SE
Channel
When in host mode (The FJ80 SE is in Host mode when you see groups A B and C displayed. Press the M button until Host mode is displayed) confirm what channel the unit is on by looking at the top of the LCD screen and looking next to CH.
Then, confirm the other FJ Wireless flashes you wish to control are on the same channel. If you need to change the channel, navigate to Menu 3 and press the button corresponding with CH.
You then will be able to use the wheel control to change the channel.
Note: Westcott suggests the use of a channel between 5 and 15 as a starting point. These channels appear to offer the best connectivity.
Group
Once the channel matches all the units you desire to control, notice what flashes are connected to what group (GR). The FJ80 SE is the Host and will control the groups under it. For example, if all your lights are under group A, then the power output or setting that is set on the FJ80 II within group A will be applied to all those lights connected to that group.
Sleep mode (SLP)
You will be able to cycle between M, TTL, and SLP within the groups. SLP mode will keep the units connected but that group will not fire.
You must put the group into M or TTL mode for a fire signal to be sent. To change this on the FJ80 SE, select the group you wish to change with the control wheel. Under menu 1, press the button corresponding to MODE. This will cycle the group through the 3 mode options.
Standby Mode (STDBY)
In host mode, If STDBY is enabled it will be displayed under the camera manufacturer in the top left.
To toggle this setting, navigate to menu 3 and press the button corresponding to STDBY.
Canon RT Connections
When triggering Canon RT flashes, be sure “Canon-RT” is selected as the manufacturer at the top left of the screen.
Along with confirming and matching the Channel, the RT ID must both match the FJ80 II and the Canon Flash you are using. The RT ID can be selected within the settings menu of the FJ80 II.
In some instances, the manufacturing of a particular model or camera unit can result in the need for the user to pay special attention to the mounting process when attaching an FJ trigger or speed light to that camera's hot shoe.
Checking The Quality of Connection
FJ80 & FJ80II When autofocusing or metering for exposure with your camera, the manufacturer selection at the top left of the screen should be solid green. This signals there is a good connection between the camera and flash.
FJ80II SE When autofocusing or metering for exposure with your camera, a "link" or "chain link" icon (two circles intertwined) will be displayed under the selected manufacturer in the top right.
Positioning Tips
Fuji: A small lip at the hot shoe may need a little extra force forward to mount fully.
Canon R series: added pins at the front of the hot shoe may give the impression that the FJ gear is fully mounted when in fact a small nudge forward may be needed to ensure a full mount and proper contact
Nikon Z series: Rarely have issues, but older DSLRs may need a backward nudge before locking down.
Sony: Align the pins at the base and the front of the hot shoe with the contacts and ensure they are clean. The Sony pins at the front of hot shoes can become dirty over time and prevent proper connections. Check that the pins are free of dirt and grime
Ensure that the flash you desire to trigger is within range of the host trigger or master unit. The effective wireless range can vary depending on your shooting environment, and obstructions like walls can reduce the signal strength.
5. Update Firmware
Check Firmware
Ensure all your FJ Wireless gear and camera are running the latest firmware. You can check what version your equipment is on by looking at the bottom right of the screen when powering on. To download the latest firmware and follow along with detailed instructions, refer to our Firmware page.
Reinstall firmware
In some cases, firmware can be uploaded to your unit with an error causing odd issues like the screen powering on but using the touch screen to power it on does nothing.
Delete any downloaded firmware on your computer
restart your computer
redownload the current firmware version and follow firmware installations as instructed.
"},"name":"FJ80 Not Triggering Other Flashes (Host Mode)"},{"@type":"Question","acceptedAnswer":{"@type":"Answer","text":"
When working with the FJ Wireless system, ensuring proper functionality and connectivity is essential for a seamless shooting experience. This guide will walk you through troubleshooting steps with your FJ strobes.
By following these steps, you can quickly identify and resolve any challenges, helping you maintain consistent performance across your FJ Wireless Strobes. This comprehensive guide is designed to educate and assist you with your FJ Wireless gear.
Only use the supplied charging cords included with your strobe when charging. Sending the wrong voltage could cause long-term or permanent damage.
Try a different outlet or power source to confirm the power source is not the issue.
2. Check The Battery
Be sure the battery is fully charged and is charging correctly.
LED Battery Status Indicators
FJ400, FJ400ii, FJ800
The AC Power Adapter & Cord Will be RED when charging and GREEN when idle.
Press the Battery Status Button located on the removable battery to check the remaining charge capacity. Illuminated LED Indicators reflect the following:
4 lights: 100% ~ 75%
3 lights: 74% ~ 50%
2 lights: 49% ~ 25%
1 light: 24% ~ 0%
0 lights: 0%
FJ200
Solid Red & Solid Green Indicator LEDs
No Battery Inserted: The charger is plugged into a power outlet and ready to charge the FJ200 Li-po Battery.
Battery Inserted: The FJ200 Battery is fully charged and ready to be removed from the charger.
Solid Red & Blinking Green Indicator LEDs
Battery Inserted: The FJ200 Battery is successfully docked and charged.
3. Charging & Life Expectancy
It is important to use the dedicated charging cord and power supply that is supplied with the unit. Not doing and sending the wrong voltage could cause long-term or permanent damage.
Charging & Life Expectancy
The FJ Pro and ProMax Lithium-ion Batteries require an average of 1.5 hours (FJ Pro) & 3 hours (FJ ProMax) to fully charge from a discharged state.
The FJ Pro and ProMax Batteries
Avoid charging or using the battery outside the recommended operating temperature range of 32–113°F (0–45°C), as this may affect both the battery and strobe functionality
For long-term storage, maintain battery health by storing it at approximately 75% capacity (indicated by three indicator lights) in a dry, room-temperature environment. If the battery is not in use, recharge it to this level at least every three months to preserve its longevity.
FJ400 Charging & Life Expectancy
The average charge time is 2.5 hours from complete discharge.
The FJ400 Lithium-Polymer Battery (14.8V 65Wh, 4400mAh) will achieve at least 300 complete charge cycles. Continued usage beyond the expected charge cycles will result in diminished performance and the ability to hold a charge.
Avoid charging and using the battery outside of the stated operating temperatures (32~104°F / 0~40°C) as it will affect the overall performance of the battery and strobe.
Preserve the longevity of the battery by storing at roughly ~75% capacity (3 indicator lights) at room temperature in a dry environment and recharge to this capacity at least every 3 months when not being used.
FJ200 Charging & Life Expectancy
The average charge time is 2 hours from complete discharge.
The FJ200 Lithium-Polymer Battery (14.8V 37Wh, 2500mAh) will achieve at least 300 complete charge cycles (@80% after 300). Continued usage beyond the expected charge cycles will result in diminished performance and the ability to hold a charge.
Avoid charging and using the battery outside of the stated operating temperatures 50~113°F / 10~45°C as it will affect the overall performance of the battery and strobe.
Preserve the battery’s longevity by storing at roughly ~75% capacity (3 indicator lights) at room temperature in a dry environment and recharge to this capacity at least every three months when not being used.
4. Reinstall firmware
In some cases, firmware can be uploaded to your unit with an error causing odd issues like the screen powering on but the unit does nothing.
Delete any downloaded firmware on your computer
restart your computer
redownload the current firmware version and follow firmware installations as instructed.
Contact Westcott Support if you find your battery or charger is not operating normally after considering the information above. After or near 300 charge cycles or repeated events of charging outside of recommended temperatures or voltages, consider replacing your battery.
"},"name":"FJ Strobes Are Not turning On / Batteries Not Charging"},{"@type":"Question","acceptedAnswer":{"@type":"Answer","text":"
When working with the FJ Wireless system, ensuring proper functionality and connectivity is essential for a seamless shooting experience. This guide will walk you through troubleshooting steps with your FJ-X2 M, FJ-X3 M, and FJ-X3 S.
By following these steps, you can quickly identify and resolve any challenges, helping you maintain consistent performance across your FJ Wireless Strobes. This comprehensive guide is designed to educate and assist you with your FJ Wireless gear.
Only use the USB -A to USB-C cable included with your trigger and a 5v power source when charging.
Try a different outlet or power source to confirm the power supply is not the issue.
2. Check the Batteries
LED Light Indicators
Blinking Red: Charging
Blinking Green: Fully Charged
FJ-X2m:
Estimated charging time is 2 hours
FJ-X3:
Estimated charging time is 3 hours
Check Battery position
If you have ever removed and reinstalled the battery, double-check the contact points on the battery are matching with the contact points on the trigger. The Westcott Logo on the battery should be facing away from you, into the trigger, when installed.
NOTE: During cold weather usage, the FJ-X3 battery charge may deplete quicker or show inaccurate
3. Reinstall Firmware
In some cases, firmware can be uploaded to your unit with an error causing odd issues like it appearing to be fully charged but not turning on.
Delete any downloaded firmware on your computer
restart your computer
redownload the current firmware version and follow firmware installations as instructed.
Install a new battery to diagnose if the battery is at fault or not.
Removing & Replacing the Battery
Turn off the FJ-X3.
Turn over with the battery cover facing upwards.
Apply slight pressure to the textured area and slide the battery cover in the direction of the arrow to remove the battery cover.
Remove the battery by inserting your finger into the half-circle cutout above the battery and lean the battery forward. Or, turn the FJ-X3 over and gently shake the unit over your hand until the battery dislodges from the battery bay.
Reinsert a battery by aligning the 3 contact points on the battery with those inside the battery bay. Angle the battery and gently insert into the battery bay. (NOTE: Never force the battery into place.]
Ensure that the battery is seated flush by gently pressing it into place.
Reinstall the battery cover by laying the cover flat and covering ¾ of the battery. Use the textured area to slide the battery cover toward the base of the FJ-X3 until it clicks into place.
"},"name":"FJ Triggers Not Turning On / Not Charging"},{"@type":"Question","acceptedAnswer":{"@type":"Answer","text":"
Westcott lighting gear, your strobes and triggers, sometimes receive firmware updates to improve performance, add new features, and ensure compatibility with newer camera systems. Keeping everything updated is often the key to getting the best results.
Important Instructions Before Updating
Use the Correct USB Cable: Always use the USB-A to USB-C cable included with your strobe and trigger for firmware updates. Using other connectors may result in error messages.
Check Firmware Compatibility: Ensure you are loading the correct firmware version for your specific FJ system product. Using incorrect firmware can lead to errors.
Troubleshooting Errors: If the latest firmware update causes malfunctions, try the following steps:
Re-download the firmware from the Westcott website.
Firmware version numbers are found in the lower right corner of the gear’s opening screens when you power the units on.
How do I check for Westcott firmware updates?
Visit our Firmware Page to find the most recent firmware updates for your Westcott strobes, speed lights and triggers. Double-check that every piece of gear is up to date to keep everything working together perfectly.
Make sure that you are installing the right firmware (.bin file) to the matching piece of gear. If you accidentally copy the wrong file into a device, typically, installing the proper firmware will correct any issues.
Can I roll back my FJ firmware?
Yes, you can roll back your firmware. Westcott provides the prior version of the firmware on the firmware page. Also, if you save your firmware updates to your computer, you can roll back to any version you have on file. Additionally, you can contact support@fjwestcott.com and request a previous version of the firmware.
Will Firmware Versions Across Different Gear Match?
No, firmware updates and versions will most likely not match. It is expected and normal for a trigger to have a different firmware version than a strobe and the strobe to be different from a speedlight. Firmware releases can be for an individual piece of gear. Major updates may involve firmware releases for several pieces of gear at the same time.
Do I need to update all my gear at the same time?
Yes, when visiting our Firmware Page you should check the latest versions available for all your Westcott Gear. Often updates involve multiple pieces of gear. Using older firmware on a strobe, combined with the new firmware on a trigger may result in less than optimum performance.
Best Practices for handling Camera Firmware updates
Camera companies often have firmware updates as well. Westcott recommends that you delay any except those camera firmware updates labeled “critical” for a few weeks. This will give Westcott engineers an opportunity to provide updates should the camera’s update conflict with your current FJ firmware. Most camera firmware does not offer a rollback option. Once you install that camera firmware you will be unable to return to your earlier functioning version.
Unzip the file and open the extracted folder. (Note: Various browsers may automatically unzip the ZIP file.) IMPORTANT: Read ALL FILES located in the extracted folder (i.e. README, Changelog).
Ensure the FJ400 is OFF and cooled before removing the battery from the strobe.
Connect the USB-A to USB-C cable to the FJ400’s USB-C port found on the back of the unit once the battery is removed.
Common operating systems will present the strobe as an external drive device (Note: MacOS may display the external device on the desktop or in the Finder window.)
Locate the .BIN file on your computer and drag the file to the FJ400 (external device). (Note: The file ending in .BIN will be the ONLY filed copied to the FJ400.)
Once the file has been completely copied to the FJ400, EJECT the FJ400 from the computer.
Remove the USB-C cable from the FJ400 and reattach the battery.
Press the Power | Model button on the FJ400 to initiate the firmware update and confirm the firmware version. The firmware version can be found at the bottom right of the opening screen when powered on.
IMPORTANT
If the FJ400 doesn’t display as an external device after being connected to the computer, disconnect the USB cable from both devices, restart the computer, and restart the firmware installation process.
It’s recommended that the firmware update installation process be completed only when the connected computer’s power level is ≥ 50%. Loss of power of any type during this process could render the FJ400 inoperable and require professional repair.
Removing the USB-A to USB-C cable from the FJ400 without properly ejecting the FJ400 from your computer could render the strobe inoperable and require professional repair.
Depending on the operating system and the applications running, copying the firmware from your computer to the FJ400 may take a few minutes and/or halt the copying process. Should this happen, close the copy progress window and try again. Further copying issues may require the computer to be restarted.
"},"name":"Updating Firmware on the FJ400"},{"@type":"Question","acceptedAnswer":{"@type":"Answer","text":"
Westcott lighting gear, your strobes and triggers, sometimes receive firmware updates to improve performance, add new features, and ensure compatibility with newer camera systems. Keeping everything updated is often the key to getting the best results.
Important Instructions Before Updating
Use the Correct USB Cable: Always use the USB-A to USB-C cable included with your strobe and trigger for firmware updates. Using other connectors may result in error messages.
Check Firmware Compatibility: Ensure you are loading the correct firmware version for your specific FJ system product. Using incorrect firmware can lead to errors.
Troubleshooting Errors: If the latest firmware update causes malfunctions, try the following steps:
Re-download the firmware from the Westcott website.
Firmware version numbers are found in the lower right corner of the gear’s opening screens when you power the units on.
How do I check for Westcott firmware updates?
Visit our Firmware Page to find the most recent firmware updates for your Westcott strobes, speed lights and triggers. Double-check that every piece of gear is up to date to keep everything working together perfectly.
Make sure that you are installing the right firmware (.bin file) to the matching piece of gear. If you accidentally copy the wrong file into a device, typically, installing the proper firmware will correct any issues.
Can I roll back my FJ firmware?
Yes, you can roll back your firmware. Westcott provides the prior version of the firmware on the firmware page. Also, if you save your firmware updates to your computer, you can roll back to any version you have on file. Additionally, you can contact support@fjwestcott.com and request a previous version of the firmware.
Will Firmware Versions Across Different Gear Match?
No, firmware updates and versions will most likely not match. It is expected and normal for a trigger to have a different firmware version than a strobe and the strobe to be different from a speedlight. Firmware releases can be for an individual piece of gear. Major updates may involve firmware releases for several pieces of gear at the same time.
Do I need to update all my gear at the same time?
Yes, when visiting our Firmware Page you should check the latest versions available for all your Westcott Gear. Often updates involve multiple pieces of gear. Using older firmware on a strobe, combined with the new firmware on a trigger may result in less than optimum performance.
Best Practices for handling Camera Firmware updates
Camera companies often have firmware updates as well. Westcott recommends that you delay any except those camera firmware updates labeled “critical” for a few weeks. This will give Westcott engineers an opportunity to provide updates should the camera’s update conflict with your current FJ firmware. Most camera firmware does not offer a rollback option. Once you install that camera firmware you will be unable to return to your earlier functioning version.
Unzip the file and open the extracted folder. (Note: Various browsers may automatically unzip the ZIP file.) IMPORTANT: Read ALL FILES located in the extracted folder (i.e. README, Changelog).
Ensure the FJ200 is OFF and cooled before removing the battery from the strobe.
Connect the USB-A to USB-C cable to the FJ200’s USB-C port.
Common operating systems will present the strobe as an external drive device (Note: MacOS may display the external device on the desktop or in the Finder window.)
Locate the .BIN file on your computer and drag the file to the FJ200 (external device). (Note: The file ending in .BIN will be the ONLY file copied to the FJ200.)
Once the file has been completely copied to the FJ200, EJECT the FJ200 from the computer.
Remove the USB-C cable from the FJ200 and reinsert the battery.
Long press the Power/Test button on the FJ200 to initiate the firmware update and confirm installation was successful by locating the firmware text in the bottom right corner of the screen during the start-up process.
IMPORTANT
If the FJ200 doesn’t display as an external device after being connected to the computer, disconnect the USB cable from both devices, restart the computer, and restart the firmware installation process.
It’s recommended that the firmware update installation process be completed only when the connected computer’s power level is ≥ 50%. Loss of power of any type during this process could render the FJ200 inoperable and require professional repair.
Removing the USB-A to USB-C cable from the FJ200 without properly ejecting the FJ200 from your computer could render the strobe inoperable and require professional repair.
Depending on the operating system and the applications running, copying the firmware from your computer to the FJ200 may take a few minutes and/or halt the copying process. Should this happen, close the copy progress window and try again. Further copying issues may require the computer to be restarted.
"},"name":"Updating Firmware on the FJ200"},{"@type":"Question","acceptedAnswer":{"@type":"Answer","text":"
Westcott lighting gear, your strobes and triggers, sometimes receive firmware updates to improve performance, add new features, and ensure compatibility with newer camera systems. Keeping everything updated is often the key to getting the best results.
Important Instructions Before Updating
Use the Correct USB Cable: Always use the USB-A to USB-C cable included with your strobe and trigger for firmware updates. Using other connectors may result in error messages.
Check Firmware Compatibility: Ensure you are loading the correct firmware version for your specific FJ system product. Using incorrect firmware can lead to errors.
Troubleshooting Errors: If the latest firmware update causes malfunctions, try the following steps:
Re-download the firmware from the Westcott website.
Visit our Firmware Page and download the latest firmware ZIP file. Note: If your browser automatically unzips the file, skip to Step 3.
Manually unzip the downloaded file, then open the extracted folder. IMPORTANT: Read all documents included in the folder, such as “README” and “Changelog,” which may contain crucial update instructions.
Ensure the FJ Strobe is powered off and has cooled. Remove the battery from the strobe.
Use the supplied USB-C cable to connect the strobe to your computer.
Your computer will recognize the strobe as an external storage device.
Locate the .BIN file within the extracted firmware folder and drag it to the FJ Strobe’s external device folder to transfer. IMPORTANT: Only copy the file ending in .BIN to the strobe. Do not transfer any other files.
Once the file is transferred, safely eject the FJ Strobe from your computer.
Disconnect the USB-C cable from the strobe and reattach the battery.
Press the Power button on the FJ Strobe, followed by the onscreen power button, to initiate the firmware update process.
Important Notes for the Firmware Update Process
If the FJ Strobe does not appear as an external device after connecting to your computer, disconnect the USB cable from the strobe and the computer. Restart your computer, then begin the firmware installation process again.
Perform the firmware update only when your computer’s power level is at or above 50%. Any power loss during the update process—whether from the strobe or the computer—can render the FJ Strobe inoperable and require professional repair.
Always properly eject the FJ Strobe from your computer before disconnecting the USB-C cable. Failure to do so may corrupt the firmware installation and render the strobe unusable, requiring professional repair.
Depending on your operating system and running applications, transferring the firmware file may take several minutes or could temporarily stall. If the transfer process halts, close the progress window and attempt the transfer again. If the issue persists, restart your computer and repeat the process.
How do I Check the Firmware Version on Westcott Gear
Firmware version numbers are found in the lower right corner of the gear’s opening screens when you power the units on.
How do I check for Westcott firmware updates?
Visit our Firmware Page to find the most recent firmware updates for your Westcott strobes, speed lights and triggers. Double-check that every piece of gear is up to date to keep everything working together perfectly.
Make sure that you are installing the right firmware (.bin file) to the matching piece of gear. If you accidentally copy the wrong file into a device, typically, installing the proper firmware will correct any issues.
Can I roll back my FJ firmware?
Yes, you can roll back your firmware. Westcott provides the prior version of the firmware on the firmware page. Also, if you save your firmware updates to your computer, you can roll back to any version you have on file. Additionally, you can contact support@fjwestcott.com and request a previous version of the firmware.
Will Firmware Versions Across Different Gear Match?
No, firmware updates and versions will most likely not match. It is expected and normal for a trigger to have a different firmware version than a strobe and the strobe to be different from a speedlight. Firmware releases can be for an individual piece of gear. Major updates may involve firmware releases for several pieces of gear at the same time.
Do I need to update all my gear at the same time?
Yes, when visiting our Firmware Page you should check the latest versions available for all your Westcott Gear. Often updates involve multiple pieces of gear. Using older firmware on a strobe, combined with the new firmware on a trigger may result in less than optimum performance.
Best Practices for handling Camera Firmware updates
Camera companies often have firmware updates as well. Westcott recommends that you delay any except those camera firmware updates labeled “critical” for a few weeks. This will give Westcott engineers an opportunity to provide updates should the camera’s update conflict with your current FJ firmware. Most camera firmware does not offer a rollback option. Once you install that camera firmware you will be unable to return to your earlier functioning version.
"},"name":"Updating Firmware on the FJ400ii and FJ800"},{"@type":"Question","acceptedAnswer":{"@type":"Answer","text":"
When working with FJ speedlights, it’s really important to know the differences between Manual and TTL modes for getting the exposure just right. In Manual mode, any power changes you make on the trigger show up immediately on the strobe. But in TTL mode, the trigger and strobe can be adjusted independently.
What happens in TTL mode?
In TTL mode, the strobe and trigger don’t reflect each other. For example, if you set your strobe to -1 and your trigger to +1, the effective exposure compensation will be "0." So, the adjustments you make on the trigger won’t be reflected on the strobe like they are in Manual mode.
How do power adjustments work in Manual mode?
In Manual mode, any adjustments you make to the power settings on the trigger are instantly reflected on the strobe. This lets you adjust your lighting setup in real-time.
Why adjust compensation settings in TTL mode?
TTL compensation settings are great for fine-tuning exposure based on your own style and the specific camera-lens combo you’re using. If your images are coming out darker than you'd like with a compensation of 0, bumping up the strobe’s compensation to a + setting can brighten things up. You can also make small adjustments of +/- 3 power levels through the trigger to match your subject’s tones.
How can I check compensation settings on the FJ400?
On the FJ400, you can see both strobe and trigger compensation settings. Here’s how:
Long-press the top (menu) button to get to menu 6 (settings menu).
Hit the select button and turn the TTL-M option to "ON."
Press the menu button to go back to menu 1.
When you’re in TTL mode, you’ll see three numbers on the display:
The big number shows the strobe compensation setting.
The first set of smaller numbers displays the trigger compensation setting.
The last number indicates the Manual equivalent of the last TTL exposure for group "A," assuming the strobe was fired via the camera's shutter.
"},"name":"TTL Compensation Numbers are different on Strobes and Triggers *Old"},{"@type":"Question","acceptedAnswer":{"@type":"Answer","text":"
Earlier versions of the Rapid Box are mount-specific. Westcott does not offer conversions of the original Rapid Box to the Rapid Box Switch models
"},"name":"Can the original Rapid Boxes be modified to make them “Switch” versions?"},{"@type":"Question","acceptedAnswer":{"@type":"Answer","text":"
Westcott's Portable D-Tap Battery provides up to2 hours run-time for a Solix Daylight LED or 1.25 hours run-time for the Solix Bi-Color LED when operating at full power.
\n
The Solix is compatible with various 14.8V D-Tap or PowerTap batteries when using the optional Westcott D-Tap Cable. For inquiries about using 3rd-party D-Tap/PowerTap batteries, cables and connectors with the Solix, please contact the product's manufacturer.
"},"name":"How long do the Solix Daylight and Bi-Color LEDs operate when powered with a battery?"},{"@type":"Question","acceptedAnswer":{"@type":"Answer","text":"
Brandon, at Westcott, walks viewers through assembling the Eyelighter in this product tutorial. The Eyelighter is the only curved reflector available on the market, featuring a durable aluminum frame and highly reflective silver surface.
"},"name":"How to Assemble the Eyelighter"},{"@type":"Question","acceptedAnswer":{"@type":"Answer","text":"
A Rapid Box Duo will work with bare bulb portable flashes like Q-flash and the many Godox 180/360 formulations like the Streaklight or Bolt models. Due to the configuration of these flash units, smaller versions of the Rapid Box Speedlight Boxes may not allow the bulb to fully enter into the back of the modifier. Mount for most units will mimic the speedlight setup in the above video but use only one of the 1/4"-20 thumb screws with the cold shoe removed. The Norman and Lumendyne style heads would need a 1/4"-20 female to 1/4"-20 male spigot/stud (not supplied by Westcott) attached in place one of the cold shoes on the Rapid Box. The spigot would be attached to the base of the tilter with one of the included 1/4"-20 mounting thumb screws and the twin flash mounting arm would not be used.
"},"name":"Using a Bare Bulb Speedlight with a Rapid Box"},{"@type":"Question","acceptedAnswer":{"@type":"Answer","text":"
Westcott Lighting will allow photographers to leave the reflector on their light head to assist in directing the light into an umbrella. Leaving the silver reflector off of your light head is also OK and can provide a different look.
"},"name":"Should I use the silver reflector included with my Strobelite or Skylux light head when using an umbrella?"},{"@type":"Question","acceptedAnswer":{"@type":"Answer","text":"
Apollo and Halo modifiers are heat rated for up to 300 watts, so they can be used with constant light sources that do not exceed this limit. When outfitted with six 50-watt CFL bulbs only, the Spiderlite TD6 falls within this 300-watt threshold, however our Pro Softboxes are better options for many continuous lighting sources.
"},"name":"Can I use the Apollo and Halo with continuous light?"},{"@type":"Question","acceptedAnswer":{"@type":"Answer","text":"
Yes. Our 4-Socket Adapter was designed to fit within all of the uLite softboxes. This adapter is designed for use with compact fluorescent bulbs that totals less than 250 watts (62 watts per socket). Do not use the adapter with tungsten bulbs as the added heat could damage the softbox and/or the socket adapter.
\n
"},"name":"Can I use the 4-socket fluorescent adapter inside the uLite softboxes?"},{"@type":"Question","acceptedAnswer":{"@type":"Answer","text":"
The Skylux includes a silver 7\" metal reflector. The reflector is design to fit any light head utilizing the Bowens S-type mounting solution.
\n
"},"name":"What is the size reflector comes with the Skylux?"},{"@type":"Question","acceptedAnswer":{"@type":"Answer","text":"
Our diffusion fabrics are not designed to be cleaned. Iron, hard water, softener salts, and anything out of the tap can stain diffusion fabric. Chemicals from cleaners can also weaken the material and alter the neutral color characteristics of the fabric. If absolutely necessary, you can try hand washing the screen with a delicate soap diluted with distilled water and allow to air dry. Results cannot be guaranteed. Always check that the fabric is completely dry before storing.
\n
"},"name":"How do I clean Westcott diffusion fabrics (for softboxes, scrims, etc)?"},{"@type":"Question","acceptedAnswer":{"@type":"Answer","text":"
The lifetime warranty on all Illuminator and Omega reflectors covers nearly everything other than misuse.
Our reflector frames are double-riveted, high-quality steel for longevity and durability. Our reflector fabrics are a high-quality materials manufactured to withstand repeated use without having to worry about the reflective laminate peeling or wearing off.
Carry cases are not covered under our lifetime warranty, but are designed to protect and store reflectors for many years and it's common to see signs of wear on the cases over time.
"},"name":"What does the lifetime warranty cover on Illuminator Reflectors?"},{"@type":"Question","acceptedAnswer":{"@type":"Answer","text":"
Yes. Our heavy-duty Zeppelin Speedring Mount would work with a large Octabank and other large modifiers to assist in relieving the weight of your modifier from your light head. However, the Zeppelin Speedring Mount does not rotate and thus might not be a good solution for large rectangular boxes.
\n
"},"name":"Can the Zeppelin Speedring and Bracket be used with a large Octabank to take the stress off my light head?"},{"@type":"Question","acceptedAnswer":{"@type":"Answer","text":"
You've probably heard the statement, “the bigger the light source the softer light”. The larger Pocket Boxes will create a slightly softer output. Your light will then be spread evenly over a wider area and often will bounce off surrounding walls, floors, and ceilings. This creates less contrast in shadows, giving the appearance of an even softer light source.
\n
"},"name":"Are Pocket Box modifiers too small to soften my flash?"},{"@type":"Question","acceptedAnswer":{"@type":"Answer","text":"
The energy consumed for each of the Flex mat sizes varies. The current 10" x 3" Flex mat draws a15-watts of power. The largest 2' x 2' Flex mat only draws 200-watts.
"},"name":"How Many Watts of Power do the Flex Units Use?"},{"@type":"Question","acceptedAnswer":{"@type":"Answer","text":"
Yes. The D5 comes with a built-in tilter bracket equipped with an umbrella mounting receptacle for use with umbrella-style modifiers like the Apollo and Halo.
\n
"},"name":"Can I use umbrellas, Apollo softboxes, or Halo softboxes with the D5?"},{"@type":"Question","acceptedAnswer":{"@type":"Answer","text":"
We most-commonly find photographers using neutrals and gray backdrops, like our Muslin Storm Cloud Backdrops or our Wrinkle-Resistant Neutral Gray Backdrops.
\n
"},"name":"What color background would you suggest for a wedding?"},{"@type":"Question","acceptedAnswer":{"@type":"Answer","text":"
Yes. The Ice Light 2 is compatible with all existing Ice Light accessories, including barndoors, tungsten gel, two-way connectors, and more.
"},"name":"Can accessories for the original Ice Light be used on the Ice Light 2?"},{"@type":"Question","acceptedAnswer":{"@type":"Answer","text":"
Proper battery management is essential for maximizing the performance of your FJ-X2m trigger. Following the right charging practices ensures reliable operation during shoots.
Understanding Battery Life
How long can I expect the battery to last?
Even with all features enabled, you should expect thousands of triggerings from a single charge. However, certain advanced features may deplete the battery more quickly.
Which features affect battery life?
Battery charge levels can be impacted by specific settings on the FJ-X2m and FJ400, including:
Selecting Canon RT camera settings
Having Bluetooth "ON"
Activating the FJ400 settings menu with M → TTL "ON"
How to Charge Your FJ-X2m Trigger
What type of cable should I use?
The FJ-X2m should only be charged with the included USB-C to USB-A cord, connected to a USB-A port charger. This is crucial for optimal charging performance.
What charge level is ideal for operation?
The FJ-X2m functions best with a battery charge level above one bar. Keeping the battery charged at this level or higher helps extend the number of charging cycles the internal battery can provide.
When should I charge my trigger?
It’s best practice to fully charge the FJ-X2m in advance of an important assignment or a full day of studio work. This ensures you have sufficient power throughout your shoot.
By being mindful of these features, you can help maintain battery life and ensure reliable performance during your shoots.
"},"name":"Factors Affecting FJ-X2m Trigger Battery Life & Flash Count"},{"@type":"Question","acceptedAnswer":{"@type":"Answer","text":"
No additional accessories are needed to operate the FJ400 using the AC power unit.
Ensure the battery charge level is ≥ 25%.
Ensure the battery is securely attached to the FJ400.
Plug the power cord into the AC Adapter.
With the strobe powered off, connect the AC Adapter’s barrel plug to the battery’s AC receptacle.
Plug the power cord into a dedicated power outlet.
Turn the strobe ON by pressing and holding the Power | Model button until the start-up screen appears.
"},"name":"How to use AC Power with the FJ400"},{"@type":"Question","acceptedAnswer":{"@type":"Answer","text":"
Yes.
At Westcott, we stand behind the quality of our products and want you to be satisfied with your purchase. If you are unsatisfied, you can return your merchandise within 30 calendar days and we will refund the purchase price, less original shipping costs. This includes all stock merchandise.
Vinyl and canvas backdrops are eligible for a one-time exchange within 10 days of delivery for items of equal or lesser value.
There are a few important things to keep in mind when returning a product that you purchased from our website:
You have 30 calendar days from the date of delivery to return an item.
Westcott products purchased through other retailers must be returned in accordance with the retailer's respective returns and refunds policy.
Claims for missing items or items damaged in transit must be received within 15 days of receipt of merchandise. Please refer to the next section for more details.
Merchandise must be in new, (unused) and saleable condition, in the original packaging, with all components that were originally provided with the merchandise (ie. batteries, chargers, cables),
Returns must include a copy of the original invoice or packing slip.
The customer is responsible for covering the cost of shipping returned merchandise to Westcott.
There are some items, however, that are ineligible for return, including:
Custom-made products
Products no longer in resalable condition or damaged from use
Clearance merchandise
Closeout merchandise
Refurbished equipment
More information regarding refunds and exchanges is available here.
"},"name":"Do you offer refunds or exchanges?"},{"@type":"Question","acceptedAnswer":{"@type":"Answer","text":"
International Shipping Policy
We have partnered with a third-party service to calculate and collect duties, taxes, and shipping costs for our international customers. In most cases, your location will be automatically detected and you will be provided with estimates for the shipping, duties, taxes, and any applicable fees. Once you begin to checkout, you will be provided with actual international shipping costs as well as applicable duties, taxes, and any fees for the delivery of your merchandise based on the delivery address of your order. Upon completion of your order, your method of payment will be charged for the entire purchase.
The following list of countries and regions are not supported by our store:
Cuba
Iran
North Korea
Syria
The Crimea region of Ukraine
The Donetsk People's Republic in Ukraine
The Luhansk People’s Republic in Ukraine
More information regarding our shipping policies is available here.
"},"name":"Do you ship worldwide?"},{"@type":"Question","acceptedAnswer":{"@type":"Answer","text":"
To join the Westcott Rewards Program, simply create an account on the Westcott website. By creating an account, you will automatically be enrolled in the Rewards Program.
More information regarding the Westcott Rewards Program is available here.
"},"name":"How can I join the Westcott Rewards Program?"},{"@type":"Question","acceptedAnswer":{"@type":"Answer","text":"
Yes, gift cards expire five (5) years after the date of issue.
"},"name":"Will my gift cards expire?"},{"@type":"Question","acceptedAnswer":{"@type":"Answer","text":"
Extended Warranty
Customers have the opportunity to purchase extended warranty coverage on select Westcott products at the time of purchase. This extended coverage is only available for products purchased directly from Westcott through the Westcott website. In general. the extended warranty coverage is subject to the same limitations and stipulations as Westcott's standard warranty coverage.
Extended warranty coverage begins after the standard warranty has ended and is in force for the additional term specified at the time of purchase unless warranty coverage has been voided as a result of misuse, failure to follow operating instructions, abuse, or use with improper or faulty equipment or any other disqualifying actions by the consumer.
This guide covers the basic setup, controls, and operation of the FJ200 Strobe, including, powering on/off, attaching to a camera or mount, and recommended camera settings. For a complete user manual, visit the Westcott Product Manuals & Support Videos page.
Ensure the FJ200 is OFF by long-pressing the Power | Test button until the LCD screen turns off.
Remove the battery from the FJ200 by sliding the release towards the rear of the FJ200 while gently pulling the battery away from the strobe body.
Connect the FJ200 Charger Power Cord to the FJ200 Battery Charger and plug the cord into a wall outlet. Wait until the AC Power LED indicator light turns red and the four battery LED indicators to turn green before inserting the battery.
Align the gold contacts on the bottom of the FJ200 battery with the pins inside the FJ200 charger, insert the battery into the charger and gently press down until the battery locks into place.
The battery is charged and can be safely removed from the charger when all four battery LED indicators are full and stopped blinking.
Remove the battery from the charger by grasping the sides and gently pulling away from the charger
Battery Charger LED Indicator Light Colors
Solid Red & Solid Green Indicator LEDs
No Battery Inserted: The charger is plugged into a power outlet and ready to charge the FJ200 Li-po Battery.
Battery Inserted: The FJ200 Battery is fully-charged and ready to be removed from the charger.
Solid Red & Blinking Green Indicator LEDs
Battery Inserted: The FJ200 Battery is successfully docked and charging.
Attaching and Removing the FJ200 Lithium Polymer Battery
Attaching: align the metal contacts on the bottom of the battery to the pins inside the battery compartment on the FJ200, slide the battery release on the FJ200 toward the rear of the unit, and gently press the battery into the battery compartment until it clicks into place.
Removing: Remove the battery from the FJ200 by sliding the release towards the rear of the FJ200 while gently pulling the battery away from the strobe body.
DC Power Operation
Ensure the FJ200 battery has been fully charged.
Ensure the battery is securely inserted into the FJ200.
Turn the strobe ON by pressing and holding the Power | Test button until the start-up screen appears. Release the Power | Test button.
AC Power Operation
NOTE: AC operation requires the FJ200 AC Adapter sold separately.
Ensure the FJ200 strobe is OFF.
Remove the battery from the FJ200.
Insert the 2-pin power cord in the FJ200 AC Adapter.
Align the metal contacts on the bottom of the AC Adapter to the pins inside the battery compartment and gently press the AC Adapter into the battery compartment until it clicks into place.
Plug the 2-prong connector into a standard wall outlet. (NOTE: Ensure that all electrical components are compatible with the country being used.)
Turn the strobe ON by pressing and holding the Power | Test button until the start-up screen appears. Release the Power | Test button.
Locking Onboard Controls
Avoid accidentally changing the onboard control
Simultaneously long-press the Control Dial|Select Button & Return Button/Modeling Lamp until\nthe lock icon appears on the FJ200 display.
Mounting the FJ200 to a Light Stand
Attach the tilter bracket to the FJ200 by attaching the ¼”-20 thread attached to the tilter The bracket’s locking dial is located on the tilter bracket to the bottom of the FJ200. (NOTE: The curved side of the tilter bracket platform equipped with the ¼”-20 should face forwards.)
Rotate the tilter bracket’s silver locking dial clockwise until it’s securely affixed to the base of the FJ200. (NOTE: Do not overtighten.)
Rotate the tilter bracket’s tension knob counterclockwise until the light stand receptacle is perpendicular to the strobe body. Retighten by turning the knob clockwise.
Loosen the tension knob located lower on the tilter bracket.
Insert the light stand spigot into the FJ200’s 5/8"-16 mm tilter bracket receptacle.
Tighten the tension knob to secure the strobe to the light stand. (NOTE: Do not overtighten.)
Attaching & Removing Modifiers
Connecting the FJ200 Metal Reflector and Compatible Modifiers:
Remove the FJ200's Flash Tube Cover by sliding the adapter release towards the product logo, rotate the flash tube cover counterclockwise and pull away from the FJ200.
Grasp the FJ200 Metal Reflector (or compatible FJ200 modifier) and align its four square mounting blocks with the openings located on the face of the strobe.
Insert the reflector or modifier and rote clockwise until it locks into place.
Removing The FJ200 Metal Reflector & Modifiers:
Ensure the strobe is turned OFF and has cooled for five minutes
With Caution grasp the FJ200 Reflector or modifier.
Slide the strobe's adapter release away from the modifier.
Rotate the reflector or modifier counterclockwise until the four square mounting blocks align with the adapter openings and gently pull the modifier away from the strobe to remove.
Attaching an Umbrella-Based Modifier:
Ensure the strobe is turned OFF and has cooled for five minutes
Grasp the umbrella's shaft and slide into the strobe's umbrella receptacle located on the tilter bracket.
Slide the umbrella into the desired position.
Note: Due to the compact design of the FJ200, the removeable titler bracket is not equipped with an umbrella tension screw. When using umbrella based modifiers, aboid tilting the FJ200 at an angle that may cause the modifier to slide out of the bracket, resulting in potential damage to the product, individuals, and/or the surroundings.
Removing an Umbrella-Based Modifier:
Ensure the strobe is turned OFF and has cooled for five minutes
Grasp the umbrella's shaft and gently slide the umbrella out of the FJ200 umbrella receptacle.
Note:
Never force entry or removal of modifiers and/or umbrellas.
Use caution during the removal of modifiers to not damage the flash tube.
Octagonal and larger umbrella shafts greater than 8mm will not fit into the FJ200 umbrella receptacle.
Best Camera Settings for FJ200
Sony Cameras
The FJ200 can be used with the FJ-X3m in Manual mode for basic functionality. For TTL and HSS, use the dedicated FJ-X3s specifically designed for Sony.
Turn off red-eye reduction
Disable the electronic front curtain shutter
Turn off silent shooting
Set the flash mode to "Fill-In"
Ensure wireless flash is turned off
Fuji Cameras
Set the shutter type to "Mechanical"
Turn off red-eye removal.
Nikon Cameras
For DSLRs: Set the shutter to "Mechanical." In the E1 Flash Sync menu, select "Auto FP 1/250th" if available.
For Mirrorless Cameras: Ensure the shutter is set to "Mechanical," silent photography is turned off, and flash mode is set to "Fill-In." Set the E1 Flash Sync menu to "Auto FP 1/200th" or "1/250th."
Canon Cameras
For DSLRs: Disable silent live view, enable flash, and turn off red-eye reduction.
For Mirrorless Cameras: Disable silent shutter and silent live view, and set the shutter to "Mechanical" if possible.
The FJ200 Is equipped with a self-monitoring system ensuring safe operation during continued full-power use during a short timeframe. The monitoring system provides a staged automatic shutoff scenario.
Stage 1: Once the strobe reaches an internal operating temperature of 131ºF (55ºC) the screen will display a red Bulb Icon and the recycle time will increase to 2 seconds in efforts to cool the unit while allowing for further operation.
Stage 2: Once the strobe reaches an internal operating temperature of 167ºF (75ºC) The screen will display a red OH icon and the unit will be inoperable for an estimated 10 minutes until an adequate internal temperature has been reached to continue operation.
once the unit has cooled, the OH will disappear from the screen, and it will then be safe to continue operation.
Safety Warnings
IMPORTANT: During operation, the flash tube, LED modeling lamp, and certain components of the FJ200 strobe may reach high temperatures. Exercise caution to avoid serious burns or injuries.
Use only with the Westcott FJ200 Lithium Polymer Battery and/or AC Power Adapter and Cord (Sold Separately)
Do not touch the flash tube, LED modeling lamp, metal reflector, or metal snoot, and other metal components and accessories after immediate use to avoid potential injury.
Never leave unattended around children and/or pets.
Keep away from fire, water, and moisture.
Do not submerge in water.
Avoid drastic temperature changes before, during, or after use.
Avoid direct skin contact with the flash tube and LED modeling lamp when replacing the flash tube.
Always remove the FJ200 Lithium Polymer Battery from the FJ200 Strobe during travel/Storage to avoid accidental operation which could lead to overheating or permanent damage.
Do not overtighten tilter bracket tension knobs.
Ensure the FJ200 Is securely mounted before use.
Only use FJ200 compatible modifiers and accessories and ensure they are securely attached to the FJ200 Strobe before use.
Do not attempt to modify any Westcott products. Contact Westcott for assistance.
The maximum operating temperature is 14º-104ºF (-10-40ºC)
Installing the Firmware
Visit the Westcott Firmware List to find and download the latest firmware ZIP file. (Note: Some browsers may automatically unzip the ZIP file.)
Unzip the file and open the extracted folder.
IMPORTANT: Read ALL FILES located in the extracted folder. (i.e. README, Changelog).
Ensure the FJ200 is OFF and cooled before removing the battery from the strobe.
Connect the USB-A to USB-C cable to the FJ200's USB-C port.
Common operating systems will present the strobe as an external drive device. (Note: MacOS may display the external device on the desktop or in the Finder Window.
Locate the .BIN file on your computer and drag the file to the FJ200 (External Device). Note: The file ending in the .BIN will be the ONLY file copied to the FJ200)
Once the file has been completely copied to the FJ200, EJECT the FJ200 from the computer.
Remove the USB-C cable from the FJ200 and reinsert the battery.
Long press the Power/Test button on the FJ200 to initiate the firmware update and confirm installation was successful by locating the firmware text in the bottom right corner of the screen during the start-up process.
IMPORTANT: If the FJ200 doesn't display as an external device after being connected to the computer, disconnect the USB cable from both devices, restart the computer, and restart the firmware installation process.
It is recommended that the firmware update installation process be completed only when the connected computer's power level is ≥ 50%. Loss of power during this process could render the FJ200 inoperable and require professional repair.
Removing the USB-A to USB-C cable from the FJ200 without properly ejecting the FJ200 from your computer could render the strobe inoperable and require professional repair.
Depending on the operating system and applications running, copying the firmware from your computer to the FJ200 may take a few minutes or halt the copying process. If this happens, close the copy progress window and try again. Further copying issues may require the computer to be restarted.
This article covers essential information related to Guide Numbers (GN) in strobe and speedlight photography, including an explanation of GNs, factors influencing GN values, and how they apply to the Westcott FJ series. Use the links below to navigate specific topics.
In Flash photography, Guide Numbers (GN) are a numerical amount (number) assigned to gear based on the maximum measured output of the unit.
GN=metered aperture x distance.
Standard GN reports use 100 ISO, a shutter speed that falls within a normal sync speed and the maximum power level of the gear. Guide Numbers may be reported in either meters or feet. Standard measurements will typically be recorded at 2 meters or 10 feet for reports.
A calibrated flash meter reading of F8 at 2 meters would result in a Guide Number of 16 (8 x 2=16) using meters as a distance measure. The same strobe with the same modifications measured at 4 meters would return a flash meter reading of F4 (4 x 4=16) so the GN always remains the same.
What factors affect the measured and reported GN?
Some photographers use Guide Number specifications to compare the output level of various gear when considering a purchase. In most cases Watt Seconds (Ws) may be a better indicator of the actual total light output of a strobe or speedlight. GN measurements are influenced not only by the Ws power of the source but also by:
Reflective Surfaces
Westcott records a GN in a testing darkroom to prevent the influence of ambient (existing) light or reflected light on the recorded output reflecting from walls.
Modifiers or Modifications
Any modifiers or modifications used to shape the source will influence GN meter readings and therefore can make it difficult to provide a direct comparison between manufacturers or even various units in the same manufacturer’s ecosystem. One manufacturer uses a shiny, highly efficient, narrow beam reflector which requires an additional optional purchase for gathering and reporting guide numbers.
Speed light zoom range
Speed Lights offer varying zooms with the typical GN reported being the number generated from the highest power level at the maximum zoom. Speed lights that offer a 200mm zoom setting would therefore report a higher GN than one with a lower maximum zoom like 105mm even though the total Ws power output is similar.
Round head Vs Square Head
Round head Speed lights, while delivering a more pleasing light pattern than a traditional rectangular speed light, will record lower GN results than a standard speedlight of similar Ws since much of the round head light emitting from the head may fall outside the area being recorded. When used in a round softbox style modifier, the round head speedlight typically regains the edge while providing a more even light across the diffusion front of a round modifier.
Diffusion Domes
The FJ400 has a glass front diffusion dome along with a forward positioned flash tube. Removing the dome will add some recorded output. The bare bulb no dome and closer to the body flash tube of the FJ200 benefits in output from this arrangement but sacrifices some softening and spread of light. This light spread is noticed particularly when used with large modifiers.
Color Consistency
Strobes across lighting brands that offer tight color consistency (commonly referred to as Pro Models) like the Westcott FJ units, will typically report a GN slightly below what strobes with identical Ws and modifications provide when those strobes ignore color consistency.
Why aren’t Guide Numbers Included with Westcott Gear?
Westcott does not provide GN details in its specification’s listings. The wide variations possible for testing and reporting a Guide number are discussed in the previous topic.
These differences alone are enough to discourage the use of Guide numbers for comparison in the specifications until and unless industry standards are updated to include specific testing guidelines related to how the number is arrived at by the manufacturer.
The Westcott team decided to include the magnetic wide reflector as it offers more versatility to photographers in the field than a standard reflector. Since most photographers likely expect Guide Numbers that are based on the gear that ships with the initial equipment offering, reporting the measured Guide Number may have resulted in an inaccurate and misleading comparison of the gear with similar 400Ws units based on this singular specification.
Using a deeper more focused reflector for gathering GN data as other manufacturers report, would have left Westcott customers confused as to why their results did not match the reported Guide number out-of-the-box.
How can you determine the GN for your personal setup?
Consider the following before testing;
Use a quality light meter
Perform tests in a space with minimal to no ambient light sources
Avoid using a small space with light or reflective walls and ceilings as this can give you an inflated meter reading which will not likely be accurate.
We suggest metering at 2 meters from the light unit as anything closer can be influenced more heavily by the modifications used on the unit
Consider modifiers and other variables listed above “What factors affect the measured and reported GN?” section
After taking all careful considerations and setting up an optimal environment, it's as easy as 1, 2, 3!
Set the meter for ISO 100 and the shutter at 1/160 to 1/250 to reflect your camera’s maximum normal sync speed.
Meter the flash.
Use the F stop reading reported by the meter and multiply it times the distance (2m). This is your guide number in meters for your setup. Guide number=metered aperture x distance.
Note: If your flash meter reports tenths such as “5.6.7” you would use the corresponding F number designation of F7.1 which is ~7 tenths above 5.6. 7.1 x 2 = GN of 14.2.
When comparing different manufacturer’s units, using the same or nearly identical reflector or modifier on all units tested is critical. Best practice for gathering Guide numbers for your own setups would be to run the test with the modifier(s) you intend to use for imaging. Remember to examine both the output and light quality when assessing the gear.
What are some ways you can use Guide Numbers in your photography workflow?
(Nerdy Math stuff)
Once you establish a Guide Number for your setup you can use that number to easily calculate the maximum distance range of your light or the effect of your light on an image when changing distances.
If your setup returns a Guide number of 64 at 2 meters (F32 x 2) at full power, it can translate to any of the following plus several other possibilities.
F32 at 2 meters (32 x 2 =64)
F16 at 4 meters (16 x 4 =64)
F8 at 8 meters (8 x 8 =64).
Once you determine the F stop at any distance using full power, you can manipulate your F stop further by adjusting the ISO or power levels. Each time you lower the Decimal power level of an FJ unit you make an equal adjustment to your F-stop.
F16 at level 9 (full power)= F11 at level 8 (½ power)=F8 at level 7(¼ power), etc.
Similarly, each time you double your ISO you gain one F stop.
F8 at ISO 100 =F11 at ISO 200= F16 at ISO 400 = F22 provided your distance remains the same.
A real-world example:
My flash has a Guide Number of 32 at the standard 100 ISO. I need to photograph a large group and to maintain even light over all the subjects and compose them within a normal range lens, my light needs to be at least 4 meters from the group.
At 4 meters I can set the power at full and know that I have enough light to photograph at F8 to maintain an adequate depth of field to capture front and back rows in focus. (4 x 8 =32) If my flash only had a guide number of 16, I would need to bump my ISO up to maintain my F8 reading. 16 divided by 4 would result in a f4. I would then need to add two stops to arrive at F8 by increasing the ISO by two stops (double it twice -100 to 200 to 400).
"},"name":"Guide Numbers - Calculating, Charts and Overview"},{"@type":"Question","acceptedAnswer":{"@type":"Answer","text":"
When working with the FJ Wireless system, ensuring proper functionality and connectivity is essential for a seamless shooting experience. This guide will walk you through troubleshooting steps with your FJ80, FJ80 II M, FJ80 II S, FJ80 SE M, and FJ80SE S.
By following these steps, you can quickly identify and resolve any challenges, helping you maintain consistent performance across your FJ Wireless Speedlights. This comprehensive guide is designed to educate and assist you with your FJ Wireless gear.
Only use the provided chargers and cables included with your equipment.
Try a different outlet or power source to confirm the power supply is not causing the issue.
2. Check The Battery And Charger
Be sure the battery is fully charged and is charging correctly.
Battery Charger LED Indicator Lights
FJ80 II
Green No charging is taking place.
Orange Battery Inserted: Indicates the battery is charging.
FJ80 SE
Blinking Green: No battery inserted; charger ready
Solid Green: No charging is taking place
Solid Yellow: Battery at 50% charge
Solid Red: Battery charging
FJ80
Solid Green Indicator LED
No charging is taking place
Solid Red Indicator LED
Battery Inserted: The FJ80 Battery is correctly inserted and is charging.
3. Reinstall firmware
In some cases, firmware can be uploaded to your unit with an error causing odd issues like the screen powering on but using the touch screen to power it on does nothing.
Delete any downloaded firmware on your computer
restart your computer
redownload the current firmware version and follow firmware installations as instructed.
It is important to use the dedicated charging cord and power supply that is supplied with the unit. Not doing and sending the wrong voltage could cause long-term or permanent damage.
FJ80 II
The average charge time is ~2 hours from complete discharge.
The FJ80 Lithium-Polymer Battery will achieve at least 300 full charge cycles (@80% after 300). Continued usage beyond the expected charge cycles will result in diminished performance and the ability to hold a charge.
Avoid charging and using the battery outside of the stated operating temperatures (14~122°F / - 10°~50°C) as it will affect the overall performance of the battery and speedlight.
Preserve the battery’s longevity by storing at roughly ~40% capacity at room temperature in a dry environment and recharge to this capacity at least once every three months when not being used.
FJ80 SE
The average charge time is ~3 hours from complete discharge.
The FJ80-SE Lithium-ion Battery will achieve at least 200 full-charge cycles (@80% capacity after 200). Usage beyond charge cycles may result in diminished performance and the ability to hold a charge for extended periods.
Avoid charging and using the battery outside of the stated operating temperatures (14~131°F / - 10°~55°C) as it will affect the overall performance of the battery and speedlight.
Preserve the battery’s longevity by storing at roughly ~40% capacity at room temperature in a dry environment and recharge to this capacity at least once every three months when not being used.
FJ80
The average charge time is ~2 hours from complete discharge.
The FJ80 Lithium-Polymer Battery will achieve at least 300 full charge cycles (@80% after 300). Continued usage beyond the expected charge cycles will result in diminished performance and the ability to hold a charge.
Avoid charging and using the battery outside of the stated operating temperatures (14~122°F / -10°~50°C) as it will affect the overall performance of the battery and speedlight.
Preserve the battery’s longevity by storing at roughly ~75% capacity (3 indicator lights) at room temperature in a dry environment and recharge to this capacity at least every three months when not being used.
Contact Westcott Support if you find your battery or charger is not operating normally after considering the information above. After or near 300 charge cycles or repeated events of charging outside of recommended temperatures or voltages, consider replacing your battery.
"},"name":"FJ80 Not Turning On / Batteries Not Charging"},{"@type":"Question","acceptedAnswer":{"@type":"Answer","text":"
No additional accessories are needed to operate the FJ400ii or FJ800 using the AC power unit. The included charger can be used for AC power.
Ensure the battery charge level is ≥ 25%.
Ensure the battery is securely attached to the FJ400ii or the FJ800.
Plug the power cord into the AC Adapter.
With the strobe powered off, connect the AC Adapter’s barrel plug to the battery’s AC receptacle.
Plug the power cord into a dedicated power outlet.
Turn the strobe ON by pressing and holding the Power button until the start-up screen appears.
"},"name":"How to Use AC power with the FJ400ii and FJ800"},{"@type":"Question","acceptedAnswer":{"@type":"Answer","text":"
Each power level designates 1 stop or 1/2 the output of the level just above it.
Power level 9 is 1/1, 8 is 1/2, 7 is 1/4 and so forth down to level 1 which is 1/256 of the full output. Another example to help understand this is a situation when moving from power level 9 to 8, a one stop light change. If your camera was at f/5.6 at level 9, an equivalent exposure would be f4 at level 8.
Power Levels- FJ systems employ level 1 thru 9 with 9 being the highest. Each number represents 1 stop (½ or twice the previous numbered output).
Power Level
Fractional Output
400ws
200ws
80ws
9
1
400
200
80
8
1/2
200
100
40
7
1/4
100
50
20
6
1/8
50
25
10
5
1/16
25
12.5
5
4
1/32
12.5
6.25
2.5
3
1/64
6.25
3.125
1.25
2
1/128
3.125
1.56
0.62
1*
1/256*
1.56*
0.78*
0.31*
Power Level 1 (1/256) not available in Canon RT
"},"name":"Fractional and Watt Second Equivalents for Power levels 9-1"},{"@type":"Question","acceptedAnswer":{"@type":"Answer","text":"
It’s important to understand how power levels, recycle times and TTL work together, especially if you’re shooting at fast frame rates.
Why do misfires happen at high power settings?
When you’re using high power settings, the strobe might not recycle quickly enough, causing missed flashes. This is especially true if you’re using TTL with low ISO or narrow apertures, which require higher output that might not recycle fast enough.
How can I avoid misfires when shooting fast?
Here are a few tips to help:
Lower Power Settings: Try setting your power levels to 3 or 4 to make sure the strobe can recycle in time for each shot.
Increase ISO or Use Wider Apertures: Boosting your ISO or using wider apertures (smaller f-stop numbers) can help the strobe keep up with faster recycle rates in TTL mode.
What should I expect from TTL at high frame rates?
At very high frame rates, TTL exposures might not be perfectly consistent. While FJ strobes are quick, they might have trouble keeping up with the super-fast shooting rates of 10 to 20 frames per second, especially when using high power levels. Additionally, when using TTL modes the flash fires twice per exposure, increasing recycle time. One flash sends the light to the subject and gathers exposure information, the second flash is what will be in your photo.
"},"name":"FJ Strobes with High-Speed Continuous Shooting Old"},{"@type":"Question","acceptedAnswer":{"@type":"Answer","text":"
No. For product repairs, please contact Westcott’s customer service team at sales@fjwestcott.com or at 1-800-886-1689. Unauthorized product repairs will void your product’s warranty.
"},"name":"Can the Solix’s light emitting diodes (LEDs) be replaced or repaired by the user?"},{"@type":"Question","acceptedAnswer":{"@type":"Answer","text":"
Yes, our 7' Parabolic Umbrella is equipped with a standard 8mm shaft and a 7mm tip, allowing it to be mounted with traditional umbrella mounting brackets. These umbrellas are designed with a double-walled shaft to support the weight of the umbrella.
\n
"},"name":"Does the 7' Parabolic Umbrella fit into a regular umbrella mount or will I need special adapter?"},{"@type":"Question","acceptedAnswer":{"@type":"Answer","text":"
The best way to mount a speedlight in our umbrella-based modifiers is by utilizing our adjustable shoe mount/swivel bracket. This bracket is rugged, versatile, and will allow you to tilt the modifiers.
\n
"},"name":"How do I mount my speedlight to an Apollo or Halo?"},{"@type":"Question","acceptedAnswer":{"@type":"Answer","text":"
No. Our uLite 4-Socket Adapter is designed for use only with compact fluorescent bulbs that totals less than 250 watts (62 watts per socket). Do not use the adapter with any tungsten bulbs or with a CFL bulb rated at more than 62 watts as the added heat could damage the softbox and/or the socket adapter.
\n
"},"name":"Can I use tungsten bulbs in the uLite 4-Socket Adapter?"},{"@type":"Question","acceptedAnswer":{"@type":"Answer","text":"
The light is extremely quiet, but not totally silent. The sound is minimal and should not affect video recordings if the microphone is placed at a distance greater than 1' of the Skylux.
\n
"},"name":"How quiet is the Skylux unit?"},{"@type":"Question","acceptedAnswer":{"@type":"Answer","text":"
The Scrim Jim Cine Deluxe Wheeled Travel Case is designed specifically for large Scrim Jim Cine Kits. We recommend measuring your C-stands to ensure they they'll fit within this case, which is 53\" x 9\" x 10\".
\n
"},"name":"What is the best solution for transporting Scrim Jim Cine Kits and C-stands on-location?"},{"@type":"Question","acceptedAnswer":{"@type":"Answer","text":"
Our 5-in-1 Reflector Kits are our most affordable option and is best suited for entry-level photographers. These kits includes one diffuser frame and a removable/reversible slip cover with reflective fabrics.
Our 4-in-1 Illuminator Reflector Kits include a 1-stop diffuser frame and a reversible reflector frame. These allow you to diffuse, reflect and/or block light simultaneously. Plus, all Illuminator Reflectors and Illuminator Reflector Kits feature an impressive lifetime warranty.
Our 6-in-1 Illuminator Reflector Kits include a 1-stop diffuser frame and a 2-stop diffuser frame. These kits also include a removable/reversible slip cover with multiple reflective surfaces. These allow you to diffuse, reflect and/or block light simultaneously. Plus, all Illuminator Reflectors and Illuminator Reflector Kits feature an impressive lifetime warranty.
"},"name":"What is the difference between the 4-in-1, 5-in-1, and 6-in-1 Reflector Kits?"},{"@type":"Question","acceptedAnswer":{"@type":"Answer","text":"
Yes. The placement of your speedlites in relation to the rear entry-point of the Rapid Box is adjustable, allowing space for hot shoe radio triggers. There's also additional space on the Duo's horizontal speedlite bracket for adding a third cold shoe mount for attaching your radio transceiver.
\n
"},"name":"Can I mount a radio receiver on the Rapid Box Duo?"},{"@type":"Question","acceptedAnswer":{"@type":"Answer","text":"
If you already have a speedring, the our softboxes should work with them. If you're looking to purchase additional speedrings, Westcott carries several speedrings for many industry brands.
\n
"},"name":"Will Westcot Pro softboxes attach to the speedring I already have for my strobe?"},{"@type":"Question","acceptedAnswer":{"@type":"Answer","text":"
Unfortunately, we're unable to provide a precise answer for every speedlite available in the market, as speedlites are manufactured in variety of sizes and shapes.
If you are concerned that our larger Pocket Boxes might block your IR beam, we recommend laying out the size of the Pocket Box in question on a sheet of paper, cutting that shape out, and placing it on the front of your speedlite.
The Pocket Box Max is 8” x 12” and the Pocket Box Round is 8.5”. If it appears that these modifiers may interfere with your speedlite’s IR beam, then we recommend trying the Pocket Box Mini (which is 6” x 7”).
"},"name":"Will Pocket Box modifiers block my speedlite’s infrared (IR) beam?"},{"@type":"Question","acceptedAnswer":{"@type":"Answer","text":"
Maximum Lux varies by unit size. The current spec range is 500 lux at 1 meter (3.3 feet) for our 10" x 3" Flex mat and an astounding 9100 lux at 1 meter (3.3 feet) for our 2' x 2' Flex. All Flex mats are dimmable with the included dimmer.
"},"name":"What is the Lux Rating on Flex Units?"},{"@type":"Question","acceptedAnswer":{"@type":"Answer","text":"
Currently, Westcott does not offer different reflective fabrics for the Eyelighter. However, we continuously expand our product lines and accessories so stay tuned through our website and other networks to learn of new product releases!
"},"name":"Are there other reflective fabrics available for the Eyelighter?"},{"@type":"Question","acceptedAnswer":{"@type":"Answer","text":"
The D5 Basic softboxes are not quickly collapsible, but they do breakdown into a smaller size for storage. There are 8 flexible rods that connect to the eight receptacles on the D5 head for a simple set-up and breakdown.
\n
"},"name":"Are the D5 softboxes quickly collapsible or do you need to assemble them?"},{"@type":"Question","acceptedAnswer":{"@type":"Answer","text":"
Our Wrinkle Resistant Backdrops are constructed with a 2" wide pole pocket. Most backdrop mounting systems incorporate poles the will fit within this pocket. Refer to your backdrop mounting system’s guide for weight and size limitations.
"},"name":"I have backdrop system that is not from Westcott. Can Westcott Wrinkle Resistant Backdrops be hung with it?"},{"@type":"Question","acceptedAnswer":{"@type":"Answer","text":"
Overview
The FJ400 is designed to be versatile with a variety of light modifiers, enhancing its usability in different shooting scenarios. This strobe is compatible with Bowens S-type modifiers and incorporates a unique mounting system for umbrellas, allowing photographers to achieve optimal light spread and quality.
Bowens S-Type Compatibility:
The FJ400 accepts Bowens S-type modifiers and speedrings.
Extended flash tube placement ensures optimal light spread, especially when used with modifiers like Westcott Rapid Boxes.
Standard Accessories:
You can utilize standard hard reflectors and other accessories that employ the Bowens S-type mount.
Umbrella and Umbrella-Style Modifiers:
The FJ400 features an umbrella mounting system with a tensioning device.
Adjustable Tensioner:
Secures larger umbrellas while providing a safety release in strong winds.
Protects the umbrella shaft from indentation due to over-tightening.
Hexagonal Shaft:
The Westcott collapsible umbrellas fit partially into the receptacle, allowing for secure mounting without sliding through completely.
Light Spread Efficiency:
The included FJ400 magnetic reflector serves as a spill kill, enhancing the evenness of light spread.
For larger umbrellas, the Bowens-style rapid box insert also functions effectively as a spill kill reflector, contributing to uniform light distribution.
Conclusion
The FJ400’s compatibility with Bowens S-type modifiers and its umbrella mounting system make it an excellent choice for photographers looking to optimize their lighting setups.
"},"name":"What Modifiers can I use with the FJ400"},{"@type":"Question","acceptedAnswer":{"@type":"Answer","text":"
Yes. The Ice Light 2 is compatible with all existing Ice Light accessories, including barndoors, tungsten gel, two-way connectors, and more.
"},"name":"Can accessories for the original Ice Light be used on the Ice Light 2?"},{"@type":"Question","acceptedAnswer":{"@type":"Answer","text":"
How to Return an Item
To initiate a return of an item purchased on this website, please complete the following steps:
We will email you a Return Authorization (RA) Number. We will not accept shipments without an RA Number.
Properly package the item(s) to ensure protection from damage in shipping. Include the RA Number on the outside of the box.
We strongly recommend shipping merchandise via FedEx, UPS, or another delivery service that provides tracking information and insurance. You are responsible for return shipping charges and international fees.
Ship your return to:
F.J. Westcott Co. Attn: RA #0000000 ← Use your RMA number 1425-B Holland Road Maumee, Ohio 43537
More information regarding refunds and exchanges is available here.
"},"name":"How do I make a return?"},{"@type":"Question","acceptedAnswer":{"@type":"Answer","text":"
Delivery time depends on where it's going and which delivery method is used
Orders are shipped on regular business days only, including Monday-Friday, and excluding US Federal holidays. When your order ships, you will receive an email with a linked tracking number as well as subsequent email notifications of your delivery status.
We attempt to fulfill orders as quickly as possible based on the customer's selected delivery method; however, events such as holidays, severe weather conditions, and other unforeseen circumstances beyond our control can force exceptions to delivery estimates.
Item availability may also affect how long it will take for you to receive your order. Back-ordered products will ship to you as soon as we have it back in stock.
Please click the tracking number link to find out more about when your packages will be delivered.
Please note, periods of high-volume online shopping, like Cyber Monday, may cause a delay in shipping. We sincerely apologize for any inconvenience.
More information regarding our shipping policies is available here.
"},"name":"How long does delivery take?"},{"@type":"Question","acceptedAnswer":{"@type":"Answer","text":"
No, It is free to join. There is no purchase or fee required to participate in the Westcott Rewards Program.
More information regarding the Westcott Rewards Program is available here.
"},"name":"Is there a fee to join the Westcott Rewards Program?"},{"@type":"Question","acceptedAnswer":{"@type":"Answer","text":"
No, a discount code must be used at the time of placing an order and cannot be used retroactively on prior purchases. This policy helps ensure a smooth and fair process for all customers.
"},"name":"Can I apply discount codes to prior purchases?"},{"@type":"Question","acceptedAnswer":{"@type":"Answer","text":"
Extended Warranty
Customers have the option to purchase Accidental Damage Protection for select Westcott products at the time of purchase. This coverage is only available for products purchased directly from Westcott through the Westcott website. Accidental Damage Protection provides protection (i.e., repair or replacement) against accidental physical breakage or failure of your covered equipment, due to an unforeseen and unintentional event, that affects the functionality of your covered products during the covered period.
Accidental Damage Protection does not cover events including, but not limited to, theft, loss, damage caused by fire, power surges, vehicle accidents, or acts of nature, normal wear and tear, consumables, or abuse and misuse.
Manufacturing defects are not covered by this accidental damage protection but are covered by the manufacturer’s warranty separately.
Achieving a smooth and efficient workflow is key for any photographer, and the Westcott StudioLink app offers just that by allowing you to remotely adjust your FJ lights directly from a mobile device. This guide will walk you through every step of the process—from enabling Bluetooth on your FJ trigger and verifying each light’s settings to exploring advanced features like Mask Mode and Scene saving. By following these detailed instructions, you’ll be able to confidently manage your lighting setups, experiment with creative effects, and instantly recall favorite configurations for future shoots.
You can follow along with the video below
1. Prepare Your Equipment
Connect your lights to the FJ-X3m as normal. Confirming everything is on the same channel and is firing with the test fire button.
Make sure your camera, trigger, and lights all have a fully charged battery or are connected to a power source.
Make sure your StudioLink app is installed and updated.
Enable Bluetooth on your mobile device.
2. Turn on Bluetooth on Your FJ Trigger
Press and hold the Sync/Menu button on the trigger to access its menu.
Scroll through the menu until you find Bluetooth.
Select Bluetooth and turn it On.
Press and hold the Sync/Menu button again to return to the main screen.
Once Bluetooth is enabled, you will see a Bluetooth icon displayed on the screen showing your trigger is ready to connect with the StudioLink app.
3. Connect to the StudioLink App
Open the Westcott StudioLink app on your mobile device.
From the main screen of the app, select FJ Wireless Controls.
Tap the Bluetooth icon in the top-right corner.
Look for your trigger in the list of available devices; select it to pair.
Once the trigger is successfully connected, the Bluetooth icon on the trigger should turn green, indicating a stable connection.
4. Verify Key Light Settings
Before making adjustments in the app, ensure that:
TTL is On if you plan to use TTL.
Each FJ light (e.g., FJ400, FJ200) should have TTL turned on through the FJ-X3m trigger if you plan on using them with the trigger wirelessly.
Channels & Groups Match
All devices (trigger and lights) must share the same channel (e.g., Channel 5).
Assign each light to a group (A, B, C, etc.) so you can control them individually if desired.
To confirm communication, press the Test button on your trigger. All lights on the matching channel should fire.
5. Connecting to the FJ-X3m
After the previous steps are considered, you are ready to connect the trigger to the StudioLink App.
Open the Westcott Studio Link app on your mobile device and touch FJ Wireless Controls
Overview of the StudioLink App
When you open FJ Wireless Controls in the StudioLink app, you’ll see:
Manual Control All Groups (top box)
Individual group controls (A, B, C, etc.)
Bottom menu bar with icons for adding groups, changing sync modes, Test firing Mask Mode, Scenes, and Save Scene.
Manual Control All Groups
Toggled On: Adjust all lights to the same power simultaneously.
Toggled Off: This lets you individually adjust each group’s power settings.
6. Adjusting Power for Individual Lights
Turn Off Manual Control All Groups if it’s enabled.
Tap on the group label (e.g., Group A) to expand its settings.
Use the slider (or plus/minus buttons) to adjust the power level (e.g., from 7.5 down to 4.0).
Your light’s output will change immediately.
You can also Test Fire the light from the app by tapping the Test button in the bottom bar—handy for checking exposure without having to walk back to your camera or each light.
7. Changing Light Modes (TTL, Manual, Sleep)
Within each group’s expanded settings, you can:
Switch Mode
TTL: Lets your camera set the flash power automatically.
Manual: Fixes the power to a level you set.
Sleep: Temporarily turns off the light’s flash without powering down the unit.
Toggle Other Functions
Modeling Lamp: Turn on/off the modeling light.
Beep: Enable a beep when the flash recycles.
Freeze Flash: Useful for freezing motion or faster recycling in certain shooting conditions.
8. Using Mask Mode
Mask Mode allows you to create multiple exposures by firing lights in sequence. For example, you could fire one light first, then a second light for a separate exposure, and so on. The FJ400 has mask mode built in, but the StudioLink app lets you extend this functionality to other lights (like the FJ200).
In the bottom bar, tap Mask Mode.
Turn On Mask Mode.
Choose how many sequences you want (e.g., 2 or 3).
Open each group’s drop-down and select which Sequence (1, 2, 3…) that group should fire in.
Now when you trigger the lights, they’ll fire in the specified order—perfect for composite or creative lighting effects.
9. Saving and Recalling Scenes
Scenes let you store entire lighting setups—power levels, modes, and other custom settings—so you can instantly recall them later.
9.1 Saving a Scene (Method 1)
Tap the Scenes icon in the bottom bar of the app.
Select Add a New Scene.
Give it a name (e.g., “Headshot 1”).
Tap Save.
All current power and mode settings across your groups will be saved under that scene.
9.2 Saving a Scene (Method 2)
From the main screen, tap the Save Scene icon (in the bottom-right corner).
Name your scene (e.g., “Headshot 2”).
Tap Save to finalize.
9.3 Loading a Saved Scene
Tap the Scenes icon.
Pick the scene you want to load (e.g., “Headshot 1”).
The app will automatically adjust each light to those stored settings.
10. Troubleshooting Tips
No Light Firing?
Double-check each light’s TTL or Wireless setting is on.
Make sure the channel and group assignments match on both the trigger and the lights.
Confirm your trigger’s Bluetooth icon is still green.
Power Won’t Update?
Disable “Manual Control All Groups” if you only want to adjust an individual group.
Toggle the group’s mode between TTL and Manual to see if the change registers.
Connection Lost?
Reopen the Bluetooth menu in the app.
Ensure your mobile device’s Bluetooth is on and close to the trigger.
If all else fails, turn the trigger off and on again, then re-pair.
"},"name":"StudioLink App And FJ-X3m: Connecting And Using"},{"@type":"Question","acceptedAnswer":{"@type":"Answer","text":"
The FJ400 is designed to be versatile with a variety of light modifiers, enhancing its usability in different shooting scenarios. This strobe is compatible with Bowens S-type modifiers and incorporates a unique mounting system for umbrellas, allowing photographers to achieve optimal light spread and quality.
Bowens S-Type Compatibility:
The FJ400ii and FJ800 accepts Bowens S-type modifiers and speedrings.
Extended flash tube placement ensures optimal light spread, especially when used with modifiers like Westcott Rapid Boxes.
Standard Accessories:
You can utilize standard hard reflectors and other accessories that employ the Bowens S-type mount.
Umbrella and Umbrella-Style Modifiers:
The FJ400ii and FJ800 feature an umbrella mounting system with a tensioning device.
Adjustable Tensioner:
Secures larger umbrellas while providing a safety release in strong winds.
Protects the umbrella shaft from indentation due to over-tightening.
Hexagonal Shaft:
The Westcott collapsible umbrellas fit partially into the receptacle, allowing for secure mounting without sliding through completely.
Light Spread Efficiency:
The included magnetic reflector serves as a spill kill, enhancing the evenness of light spread.
For larger umbrellas, the Bowens-style rapid box insert also functions effectively as a spill-kill reflector, contributing to uniform light distribution.
"},"name":"What Modifiers can I use with the FJ400ii and FJ800"},{"@type":"Question","acceptedAnswer":{"@type":"Answer","text":"
When updating using a MAC system, your desktop and/or finder will typically display a "No Name" drive related to the connected FJ equipment. Your firmware .bin file will be dragged directly into the drive without opening the file.
For Big Sur users, access will be via an "Untitled" USB drive in Finder.
"},"name":"Updating Firmware Using MAC OS and MAC Big Sur OS"},{"@type":"Question","acceptedAnswer":{"@type":"Answer","text":"
The Solix produces 2,125 lux at 1 meter, which makes its light output about 40% brighter than a 500-watt tungsten photoflood (1,542 lux at 1 meter) and slightly brighter than (6) 50-watt CFL bulbs (2,048 lux at 1 meter) when used as a direct source. The Solix Bi-Color will produce up to 3100 lux at 1 meter making it an additional 30% brighter than the Daylight Solix. Using CFL bulbs in a modifier will improve the response and be reflected in outputs levels similar to the Solix LED in an identical modifier.
"},"name":"How does the light output of the Solix LED compare to compact fluorescent (CFL) and tungsten lighting?"},{"@type":"Question","acceptedAnswer":{"@type":"Answer","text":"
This depends upon your subject and the style of Parabolic Umbrella that you are using. A single speedlite paired with a 7' Silver Parabolic Umbrella will typically provide more output than a 7’ Diffusion or White Parabolic Umbrella. However, regardless of the umbrella style, a single speedlite is unlikely to provide the amount or spread of light you might want to light a large group or subject (i.e. car, motorcycle). We currently offer the Triple Threat Bracket, which is a simple solution for mounting multiple speedlites in an umbrella. We recommend this option for all photographers using large Parabolic Umbrellas.
\n
"},"name":"Would using one off-camera speedlite provide enough light for a 7' Parabolic Umbrella?"},{"@type":"Question","acceptedAnswer":{"@type":"Answer","text":"
The Apollo and Halo series works most effectively by utilizing radio triggers or an extended sync cord. Relying on IR (infrared) commonly found built into today's DLSRs and speedlites may result in inconsistent firing.
\n
"},"name":"What methods do you recommend for remote firing my off-camera speedlites when using Westcott Apollo or Halo softboxes? Can I use my speedlite's built-in IR (infrared) trigger?"},{"@type":"Question","acceptedAnswer":{"@type":"Answer","text":"
Yes. For the uLite, you can switch a tungsten lamp to a fluorescent lamp as long as the max wattage is not exceeded. The uLite head can safely operate with a 500-watt tungsten or a fluorescent bulb that doesn't draw more than 500 watts.
\n
"},"name":"Is it possible and safe to swap tungsten bulbs out for fluorescent bulbs with the uLite ?"},{"@type":"Question","acceptedAnswer":{"@type":"Answer","text":"
The Skylux cannot be used without the ballast. The ballast is an important component to the product which regulates power to the light head which eliminates any flickering and/or pulsing.
\n
"},"name":"Can the Skylux be used without the supplied ballast?"},{"@type":"Question","acceptedAnswer":{"@type":"Answer","text":"
This net fabric is constructed with a tight weave to provide increased diffusion of the light source with no apparent pattern on the subject.
\n
"},"name":"Do the Scrim Jim Cine's net fabrics create a pattern on a subject when placed between a light source and subject?"},{"@type":"Question","acceptedAnswer":{"@type":"Answer","text":"
Choosing a reflector size is not an exact science, but there are some basic ideas to help you find the reflector that’s right for you.
10~14" reflectors are small and perfect for reflecting light in very small areas. These reflectors are ideal for macro photographers and are small enough to fit in a pocket or camera bag.
20~22" reflectors are perfect for filling in shadows for head shots and for reflecting light on small still life sets.
30~32" reflectors are very versatile. These reflectors are great for 1 person portraits and are still very easy to handle.
40~42" reflectors are our most popular size. These are large enough to photograph couples headshots, medium sized still-life sets, and more. These reflectors are still quite manageable and are ideal to use with the Westcott Illuminator Arm.
50~52" reflectors offer enough reflective coverage for 3/4 length to full-body portraits and small groups.
47" x 72" reflectors are perfect for full-length shots, larger groups, or reflecting light into a scene from a distance.
"},"name":"What size reflector should I use?"},{"@type":"Question","acceptedAnswer":{"@type":"Answer","text":"
Slightly. Any loss of light from the Rapid Box's unique center rod design is minimal and barely recognizable.
\n
"},"name":"Does the center rod design of the Rapid Box series block the output from my speedlite or strobe?"},{"@type":"Question","acceptedAnswer":{"@type":"Answer","text":"
Westcott Pro Softboxes can be used with most manufacturer's light heads through the use of light head specific adapter rings (speedrings). Check out selection of available speedrings to ensure that we offer an option that is compatible with your light source.
\n
"},"name":"Are Westcott Pro Softboxes compatible with my light head?"},{"@type":"Question","acceptedAnswer":{"@type":"Answer","text":"
In our testing, the 1' x 2' Flex Mat (100-watt) was similar in output at 1 meter to a 500-watt bulb in a silver reflector.
However, every light source and fixture has unique properties which influence performance as well as output. Check the technical data from trusted sites particularly for lux, CRI, TLCI, and color temperature when comparing lighting options.
"},"name":"How Bright is the Flex Compared to a 500-watt Tungsten Light?"},{"@type":"Question","acceptedAnswer":{"@type":"Answer","text":"
The Eyelighter is designed for use with a diffused light source that is at least 24\" in size. The Eyelighter's creator, Larry Peters, suggests a medium-sized round or octagonal softbox, like our Halo, Apollo Orb, Rapid Box Octas, or the Joel Grimes Beauty Dish.
\n
"},"name":"What is a good main light source for using with an Eyelighter?"},{"@type":"Question","acceptedAnswer":{"@type":"Answer","text":"
Only D5 softboxes are compatible with the D5 light head's built-in rod receptacles. However, Apollos, Halos, and umbrellas may also be used thanks to the D5's built-in umbrella receptacle.
\n
"},"name":"Does the D5 fixture only work with D5 dedicated softboxes or is it possible to mount a standard softbox?"},{"@type":"Question","acceptedAnswer":{"@type":"Answer","text":"
We recommend storing Muslin Backdrops in a cool and dry place. You should consider picking up a Background Storage Bag for protection from the elements to prolong the life of your background.
\n
"},"name":"What is the best way to store a Muslin Backdrop?"},{"@type":"Question","acceptedAnswer":{"@type":"Answer","text":"
Overview
If you’re diving into the FJ system with Canon RT speedlites like the Canon EL-1, proper connection is key. This ensures smooth wireless triggering and control, especially in busy environments where wireless signals might clash.
Key Features of the FJ System with Canon RT Speedlites
Operating Modes
Canon RT Mode: Tailored for Canon cameras and RT speedlites. While it maintains compatibility, it may struggle in crowded wireless spots where many wireless devices can be found.
FJ Wireless Mode (TTL-ALL): If you're in a high-traffic area, this mode really shines, reducing interference and ensuring effective communication between devices.
Power Adjustment
The Canon RT system allows a minimum power adjustment of 1/128, aligning with power level 2 on the FJ400 strobe. This is essential for consistent output when using RT speedlites.
Setting Up Your FJ System
Start Fresh
Before you kick things off, reset your FJ triggering device to factory defaults. This small step can save you from future headaches, especially if you’re just starting out.
Match Channels and IDs:
Ensure your FJ strobes and speedlites are set to the same channel and RT ID as the trigger. Canon RT IDs run from 0000 to 1000; match the first two digits (0000 to 0099).
Configuring Your FJ Units:
FJ200: Go to the settings menu and enable RT/ID.
FJ80 & FJ80II: Activate Canon-RT/ID and input the matching ID number.
FJ400: Select TTL/ALL in Menu 1, then long-press RT/ID in Menu 2 to set your RT ID.
FJ Trigger: Double-check that the RT-ID in the settings menu aligns with your strobes.
Confirming Your Connection:
After making these adjustments, look for green indicators: "Canon-RT" on the trigger and "ID/RT" on the strobe. If the green light doesn’t appear after a few seconds, press the ID/RT button on the strobe to refresh the connection.
Connecting Your Canon RT Speedlites
Activate RT Mode:
Turn on the speedlite and press the double arrow link button until you see ETTL or M, along with "slave" and the wireless symbol (not the lightning bolt).
Assigning Groups:
Use the “Gr” button to assign the speedlite to a group (A-E). This keeps everything organized, especially if you’re working with multiple light sources.
Example Setup:
Let’s say you’re using an FJ400 with a Canon RT speedlite. Here’s a quick rundown:
Set the FJ400 to Channel 1 and RT ID 01.
On the speedlite, set the channel to 1 and the RT ID to 0001.
Assign the speedlite to Group A, ensuring it’s different from the FJ400’s group.
In MENU 3 of the speedlite, ensure the channel matches the FJ strobe and trigger. Set the RT/ID to match the FJ units, starting with "00" and then the last two digits.
The link LED on the speedlite should glow green. If not, cycle the link button and fire a test shot to check the connection.
Limitations and Troubleshooting
Testing Flashes:
Keep in mind that the FJ trigger’s test button might not activate all flashes in Canon RT mode. It’s usually better to use your camera’s shutter for this.
Connectivity Issues:
Connecting If you have followed the instructions above and the units are not connecting, you are not seeing the "link" icon, power cycle all the units. Users have reported after all the connection settings are confirmed powering all the units off and then on, initiated the connection.
Losing Connection Users have reported when their host camera goes to sleep mode, RT connection is lost. Turn any sleep modes or auto-off modes to their longest time value or OFF.
When changing connection settings, channel or ID, users have reported the connection being lost. Power cycling the units can restore the connection.
If you encounter wireless connectivity issues, Canon forums can be a great resource for tips from other users.
when using Canon RT settings, features like remote toggling of modeling lights and audible beeps are disabled.
Conclusion
For the best results with your Canon RT speedlites, a solid setup and configuration are crucial. Starting with a reset can help prevent issues and improve connectivity. If you run into challenges, don’t hesitate to contact Westcott for help or to tap into online communities for support and solutions.
"},"name":"Using FJ Gear with Canon RT Speedlites: Setup and Tips"},{"@type":"Question","acceptedAnswer":{"@type":"Answer","text":"
The FJ400 receives maximum functionality with either the pairing of an FJ Trigger (FJ-X2m, FJ-X3m and FJ-X3s) the FJ80 Speed Lights or Canon ST-E3-RT radio triggers.
Other triggers can be used to trigger the FJ400 provided they offer an option for output to a 3.5mm male connector and a separate receiver unit.
Typically, remote power adjustment, TTL, and HSS functionality are not available on these other triggers when used with the FJ400. Most will provide camera flash synchronization in the normal shutter speed sync range.
"},"name":"What Radio Triggers can be Used With the FJ400?"},{"@type":"Question","acceptedAnswer":{"@type":"Answer","text":"
Tracking your order delivery
Once your order has been processed and shipped, you will receive a confirmation email from Westcott with your order details. This email will include a tracking number and a link to our tracking page.
Click on the tracking number link in the email, the tracking link in your website account order information screen, or enter the tracking number into the carrier's tracking page to get the most current tracking information.
Tracking information may not be immediately available after your order is placed. It can take several hours for the number to become active in the carrier's systems. If you don't see any updates right away, please be patient and check back later.
"},"name":"How do I track my order?"},{"@type":"Question","acceptedAnswer":{"@type":"Answer","text":"
No. If you have a verified Westcott website account, you are automatically enrolled in the Westcott Rewards Program. You can locate your rewards by logging into your account and clicking on the tab in your account titled “Rewards”.
More information regarding the Westcott Rewards Program is available here.
"},"name":"Do I need to join the Westcott Rewards Program if I already have a Westcott website account?"},{"@type":"Question","acceptedAnswer":{"@type":"Answer","text":"
Tracking your order delivery
Once your order has been processed and shipped, you will receive a confirmation email from Westcott with your order details. This email will include a tracking number and a link to our tracking page.
Click on the tracking number link in the email, the tracking link in your website account order information screen, or enter the tracking number into the carrier's tracking page to get the most current tracking information.
Tracking information may not be immediately available after your order is placed. It can take several hours for the number to become active in the carrier's systems. If you don't see any updates right away, please be patient and check back later.
More information regarding our shipping policies is available here.
"},"name":"How can I track my order?"},{"@type":"Question","acceptedAnswer":{"@type":"Answer","text":"
Printed Backdrops
Made-to-order printed vinyl and canvas backdrops are exchangeable one time, within 30 days of receipt, for items of equal or lesser value.
More information regarding our product warranty and repair policies is available here.
"},"name":"What is the warranty applied to Printed Backdrops?"},{"@type":"Question","acceptedAnswer":{"@type":"Answer","text":"
Both strobes come equipped with the interchangeable FJ Pro AC/DC Battery. The FJ Pro offers up to 550+ flashes on the FJ400 II and 250+ flashes on the FJ800 at full power. With fast recharge times and the ability to swap batteries between units, you can work seamlessly in any environment from studio to location shoots.
"},"name":"What Batteries can be used with the FJ400ii and FJ800?"},{"@type":"Question","acceptedAnswer":{"@type":"Answer","text":"
This guide is your key to achieving maximum compatibility between the Sony a9 III and the FJ Wireless Flash System. By customizing specific settings on both your camera and flashes, you'll achieve optimal performance to bring your creative vision to life. We will update this guide with additional settings and new findings as they’re available to ensure your gear performs at its best.
Sony a9 III Settings
Manual Mode
Set to Manual Mode for achieving flash sync speeds up to 1/80000
Silent Shutter
Shooting Menu-> Silent Mode Settings-> Off
Flash Mode
Exposure/Color Menu -> Flash Mode -> Fill Flash
Wireless Flash
Exposure/Color Menu-> Wireless Flash -> Off
Red Eye Reduction
Exposure/Color Menu -> Red Eye Reduction -> Off
Sync Terminal Setting
Exposure/Color Menu -> Sync Terminal Settings -> Always
Reg. Flash Shooting Set
Exposure/Color Menu -> Reg. Flash Shooting Set -> Shutter Speed Range 1/60-1/80000
Flash Timing Setting
Exposure/Color Menu -> Flash Timing Setting -> On->
Change the µs to the appropriate number that’s determined by your shutter speed and the power of your flash
FJ Wireless Settings
Currently, all FJ Wireless equipment must be in Manual Mode to achieve flash sync speeds of up to 1/80000
TTL Mode is currently unavailable when trying to achieve a shutter speed past 1/8000
FJ-X triggers should be set in Front Curtain shutter and not HSS. (HSS will not allow you to go past a shutter speed of 1/8000.)
FJ400 Flash Sync Settings
FJ400 @ 1 Meter
Shutter Speed
500
1000
2000
4000
8000
10000
20000
40000
80000
Flash Power
Flash Sync Setting
9
0
300
560
600
660
760
680
640
660
8
0
580
700
760
800
940
780
960
980
7
0
160
580
680
820
760
820
960
900
6
0
0
480
620
720
660
780
800
800
5
0
120
460
520
680
700
660
720
740
4
0
0
360
500
560
620
680
660
680
3
0
0
380
440
540
540
560
620
620
2
0
40
320
400
500
520
620
620
580
1
0
0
220
420
450
420
440
460
480
FJ200 Flash Sync Settings
FJ200@ 1 Meter
Shutter Speed
500
1000
2000
4000
8000
10000
20000
40000
80000
Flash Power
Flash Sync Setting
9
360
400
480
600
560
580
660
640
680
8
540
460
900
1000
820
920
980
820
820
7
40
420
640
780
920
920
840
860
840
6
300
260
460
700
800
860
800
860
800
5
180
80
380
500
640
660
700
660
700
4
340
220
240
400
500
520
560
580
580
3
300
100
300
300
400
440
460
460
460
2
340
60
320
360
400
380
400
420
420
1
140
100
180
280
380
400
420
420
420
FJ80ii Flash Sync Settings
FJ80ii @ 1 Meter
Shutter Speed
500
1000
2000
4000
8000
10000
20000
40000
80000
Flash Power
Flash Sync Setting
9
0
0
40
160
220
200
240
260
280
8
0
0
20
40
200
100
120
200
120
7
20
20
20
40
120
40
100
180
220
6
20
20
20
20
100
100
160
180
180
5
20
40
0
20
80
120
160
180
180
4
20
20
20
20
40
60
100
120
120
3
0
20
0
0
40
60
100
140
140
2
40
40
20
20
40
80
100
140
140
1
40
40
0
20
40
60
100
120
120
FJ80 SE Flash Sync Settings
FJ80 SE @ 1 Meter
Shutter Speed
500
1000
2000
4000
8000
10000
20000
40000
80000
Flash Power
Flash Sync Setting
9
0
80
400
180
580
480
620
300
320
8
20
0
80
500
260
400
340
260
360
7
0
20
220
540
360
400
440
760
540
6
100
100
80
240
400
400
380
460
400
5
60
80
80
80
160
180
220
240
200
4
0
20
20
0
100
120
120
140
160
3
0
40
20
20
60
100
120
140
140
2
60
0
0
20
60
60
80
80
120
1
0
20
20
20
40
40
60
80
80
Updated: 1/6/2025
"},"name":"Field Guide: FJ Wireless Flash & Sony a9 III Compatibility Settings"},{"@type":"Question","acceptedAnswer":{"@type":"Answer","text":"
The Solix is not compatible with the 7' Octabank, Rapid Box, D5 softboxes, collapsible umbrellas, and uLite softboxes.
\n
The Solix Bi-Color has an added locking mechanism to prevent the Soft Box from rotating during the mounting process.
"},"name":"What light modifiers are compatible with the Solix LED Heads?"},{"@type":"Question","acceptedAnswer":{"@type":"Answer","text":"
Our Collapsible Umbrella's shaft is 8mm with a 7mm tapered tip. This shaft was designed with a unique octagonal shape for rigidity.
\n
"},"name":"What is the size of the Collapsible Umbrella's shaft?"},{"@type":"Question","acceptedAnswer":{"@type":"Answer","text":"
We do not currently offer a battery option for the Skylux. Various industry forums have mentioned using the Skylux LED with a mobile battery by other manufacturers, however Westcott has not tested these methods and cannot confirm compatibility. Please refer to the manufacturer of the inverter/battery regarding compatibility. We will continue to innovate and may introduce new battery options as the technology evolves.
\n
"},"name":"Is there a battery option available for the Skylux LED light?"},{"@type":"Question","acceptedAnswer":{"@type":"Answer","text":"
We strongly suggest that you only use fabrics designed for the style of frame you own. Stretching or wrapping the wrong version of fabric around Scrim Jim or Scrim Jim Cine frames can result in wear on the fabric and a less secure fit of the fabric to the frame.
\n
Only the LARGE Original Scrim Jim fabric fits on the new Scrim Jim Cine Large frame. You need to purchase four 1” straight connections and use them in place of the 2” connectors to make this work. (#2029)
"},"name":"Can the original Scrim Jim fabric be used on the new Scrim Jim Cine frames (and vice versa)?"},{"@type":"Question","acceptedAnswer":{"@type":"Answer","text":"
Our Illuminator Arm Extreme is our highest-quality reflector mounting solution and is ideal for professional studio photographers and filmmakers. The Illuminator Arm Extreme also gives you the ability to customize the location of its clamp for a variety of mounting positions.
"},"name":"What options are available for mounting reflectors?"},{"@type":"Question","acceptedAnswer":{"@type":"Answer","text":"
The Rapid Box 20” Octa Mini, 26” Octa, and 32” Duo are designed specifically for speedlite. Each of these modifiers includes a built-in speedlite bracket(s). The Rapid Box 24” Beauty Dish, 36” Octa XL, and 48” Octa XXL are designed for use with studio strobes and constant monolights. Each of these modifiers comes equipped with a built-in speedring available in 5 different mounting styles. When purchasing, be sure that you select the speedring that is compatible with your light source.
\n
"},"name":"Which versions of the Rapid Box work with speedlights and which versions work with studio strobes?"},{"@type":"Question","acceptedAnswer":{"@type":"Answer","text":"
Our Pro Asymmetrical Stripbank's design has several unique characteristics. Combined with the 3 included various density diffusion fabrics, you're able to create multiple lighting styles. Photographers using our Asymmetrical Stripbank for contemporary bride photography might use the modifier to add light to the bride's face and then create a gradual fall-off of light to prevent overexposing the dress.
\n
"},"name":"Why would I want an Asymmetrical Stripbank?"},{"@type":"Question","acceptedAnswer":{"@type":"Answer","text":"
Our current Flex Battery is only for use with Flex daylight and bi-color mats up to the 1' x 1' size. The larger Flex units, although far more efficient than other comparable constant lighting solutions, still consume more power than can be handled efficiently with current battery technology. As the technology evolves, Westcott will continue to innovate and introduce new battery options for all lighting solutions.
"},"name":"Will the Flex Portable Li-Ion Battery Work With Other Flex Lights?"},{"@type":"Question","acceptedAnswer":{"@type":"Answer","text":"
The Eyelighter II was designed to allow adjustments to the tilt angle. The original tilt, size, and curve of the unit were all designed by Larry Peters to easily produce the desired effect at the preset position. The Eyelighter II opens up the possibilities and allows for refinements of the orignally designed tilt. Follow the lighting guidelines provided with the Eyelighter and the online videos for best results.
\n
"},"name":"Is the mounting bracket on an Eyelighter II tiltable?"},{"@type":"Question","acceptedAnswer":{"@type":"Answer","text":"
Yes. Westcott Wrinkle-Resistant Backgrounds all come with their own protective carry case for easy travel and storage.
\n
"},"name":"Do Wrinkle Resistant Solid backdrops come with a case?"},{"@type":"Question","acceptedAnswer":{"@type":"Answer","text":"
Canon RT triggers and speedlites can control the FJ400. The FJ400 will show up on the controller’s menu and function just as a separate but more powerful Canon speedlight would.
"},"name":"Can the Canon RT triggers and RT Speedlites control the FJ400?"},{"@type":"Question","acceptedAnswer":{"@type":"Answer","text":"
No, Westcott Reward Points have no cash value and no exchange rate for any market currency. They are not your property and cannot be redeemed for cash.
More information regarding the Westcott Rewards Program is available here.
"},"name":"Do my Westcott Reward Points have any cash value?"},{"@type":"Question","acceptedAnswer":{"@type":"Answer","text":"
Please inspect your package by opening the shipping and retail boxes before accepting the delivery. Items may become damaged in transit even if the packaging does not show signs of damage. Do not accept delivery of packages that are visibly damaged without inspecting their contents. If any merchandise appears to be damaged, please refuse delivery of the item and write, "Refused due to damage" on the delivery receipt. Keep a copy of the delivery receipt with your notes regarding the damage and contact our Customer Care Team immediately. Claims with outer packaging damage must be received within 3 days of receipt of merchandise.
Please keep all packing materials and boxes until you confirm all contents are in good working condition. If you discover any missing items or damage to merchandise after the shipment was accepted, notify our Customer Care Team immediately. Claims for missing items or items damaged in transit must be received within 15 days of receipt of merchandise.
More information regarding our shipping policies is available here.
"},"name":"What if my order was damaged in transit"},{"@type":"Question","acceptedAnswer":{"@type":"Answer","text":"
Yes! There is a lifetime limited warranty on Flex Cine LED Mats.
This Lifetime Limited Warranty covers Westcott Flex Cine LED Mats only. This warranty does not cover any accessories or controllers associated with the Westcott Flex System. Westcott Flex Cine Mats purchased through a third-party retailer must be registered with Westcott using the Product Warranty Registration form within one year of the original purchase date. Flex Cine Mats are exchangeable one time for items of equal or lesser value.
More information regarding our product warranty and repair policies is available here.
"},"name":"Is there a Lifetime Warranty on Flex Cine LED Mats?"},{"@type":"Question","acceptedAnswer":{"@type":"Answer","text":"
------------
Canon users have two camera choice options with the FJ gear. The "Canon RT" choice on the FJ system is designed to work alongside Canon cameras with Canon RT speedlites, including the RT-compatible Canon EL-1. You can also use the FJ system triggers and speed lights as a triggering, mode selection (TTL or Manual), and remote power adjustment control for Canon RT-compatible speedlites with a Canon camera, independent of the FJ flash units.
Please note that the Canon RT system, whether using a Canon RT trigger or the FJ system with “Canon RT” selected, has a minimum power adjustment of 1/128, which corresponds to power level 2 on the FJ400 Strobe. Standard in-camera menu settings apply.
The RT system will only support channels 1-15. When switching between RT and Canon camera choices regularly, use a channel between 1-15 so both choices are supported. When using a Canon camera without Canon-branded RT speedlites, FJ users should choose the CANON camera choice, which has been shown to be more reliable in high wireless trafficked environments and offers additional functionality with the FJ system.
Resetting FJ Gear
Before beginning the process, you may find it beneficial to reset the FJ triggering device to factory defaults. Check the article on how to perform a factory reset of your FJ gear for details.
Connecting Your FJ Gear for RT Operation
Set your FJ strobes and speed light clients to the same channel (CH) and the same RT ID# as selected on the triggering device.
Canon RT ID#s range from 0000-1000, so the two-digit equivalent will be 0000-0099 on your Canon gear to match the FJ system.
FJ200: Set the Wireless setting in the settings menu to RT/ID.
FJ80 or FJ80II: Set the RT/ID to ON and match the RT/ID # in the settings menu.
FJ400: Use the TTL/ALL setting in Menu 1 and assign the RT/ID through a long press of the RT/ID button in Menu 2.
FJ Triggers: Set the matching two-digit RT-ID from the trigger's settings menu.
Once the channel and RT ID# on the trigger and strobe are matching, your triggers and strobes should indicate a connection by highlighting “Canon-RT” green on the trigger and “ID/RT” green on the strobe. If the green indication does not occur after about 3 seconds, press the ID/RT button on the strobe to reboot the connection.
Connecting Your 600RT Speedlites to the FJ Trigger
Turn on your RT Speedlite and press the double arrow link button until “ETTL” or "M" appears in the upper left corner, “slave” appears in the center of the screen, and the wireless symbol (not the lightning bolt) is in the upper right corner.
Choose a group assignment using the “Gr” button. Canon RT allows groups to be set between A and E. Typically, set your speedlite to a different group than your FJ400. Ensure the chosen group is activated on the trigger (not displaying SLP).
Press the “MENU 1” button on the speedlite twice to enter “MENU 3”. Once in Menu 3, press the “CH" button and set the channel to the same one as the strobe and trigger. Press the “ID” button and set the RT/ID to the same one as set on the strobe and trigger. Enter a four-digit RT ID with the first two digits set to "00" followed by the two digits set on your FJ units.
Confirm the Link. The link LED on your speedlite should now be green to confirm the link. If the link is not occurring, try cycling the link button to establish the link. Fire a test exposure via the camera shutter to ensure the system is linked.
Limits of the RT System Affecting the FJ Trigger
When using the Canon RT setup with the FJ400(s) and multiple RT speedlites, the FJ triggers’ test button may not fire all connected flashes. Test firings with the "Canon RT" camera selection should be done via the camera's shutter release. Canon's "RT" system is not compatible with multi-brand cameras and should not be combined with other brands of cameras when triggering an FJ400.
The Canon RT system, whether using a Canon RT trigger or an FJ system triggering device with “Canon RT” selected, has a minimum power adjustment of 1/128, corresponding to power level 2 on the FJ system strobes. Remote toggling of the FJ modeling lights and audible beep are also disabled when using the RT setting.
When using the FJ system independent of any RT speedlites, using the "Canon" camera choice on the trigger is recommended. Exiting the Canon RT camera selection to change to "Canon" or other brand choices may require you to reboot (turn off and restart) the FJ strobes to disable the ID function and ensure connectivity. Canon RT/FJ users must limit their channel choices to 1-15 to match the limitations of the Canon RT system.
"},"name":"Using FJ Triggers with Canon RT Speedlites: Setup and Tips old"},{"@type":"Question","acceptedAnswer":{"@type":"Answer","text":"
FJ Speed lights and FJ triggers offer locking option to avoid any accidental changes to your settings during a photo session. For example, he FJ400 has a Master Lock option to disable manual power adjustment coming from the trigger. If you lock the screen the units will remain locked until you disable the lock feature or power off the gear.
Speed Lights
In Host and Speed Light modes the speed lights will not allow adjustments while the lock is active. When in client mode you will be unable to change anything directly on the unit but you will still be able to control key functions like power and compensation through an unlocked FJ-X trigger or another FJ speed light operating as a host.
FJ80 and FJ80ii
Locking:
Lock the screen and settings by pressing and holding the home button on the FJ80 or FJ80ii until a lock icon shows up on the display.
Unlocking:
Unlock the screen and settings by pressing and holding the home button again until the lock icon disappears.
FJ80SE
Locking:
Lock the screen and settings by pressing and holding the “M” (mode) button on the lower left of the FJ80SE until the lock Icon appears on the screen.
Unlocking:
Unlock the screen and settings by pressing and holding the “M” (mode) button again until the lock icon disappears.
Triggers
Westcott FJ triggers also come with a locking feature that secures the settings on the trigger to prevent accidental changes to the settings. This feature is useful in high volume shooting situations like School Pictures or Head Shots where the settings need to remain the same throughout the sessions.
FJ-X3m and X3s
Locking:
Lock the FJ-X3 settings by long pressing the CH*Lock button below the unit’s screen until a green lock icon appears on the screen.
Unlocking:
Unlock the FJ-X3 controls by pressing and holding the the CH*Lock button below the unit’s screen again until the green lock icon disappears from the screen.
FJ-X2m
Locking:
Lock the FJ-X2m settings by long pressing the two leftmost round button below the screen at the same time until the green lock icon appears on the screen.
Unlocking:
Unlock the FJ-X2m settings by long pressing the two leftmost round button below the screen at the same time again until the green lock icon disappears from the screen.
FJ400 Strobe
The FJ 400 has a Master Lock feature which locks the power settings on the FJ400 and disables any power adjustment coming from the trigger.
This can be helpful if you want to adjust your power level on the strobe and not have it affected by manual power changes from the trigger(s).
Your FJ trigger will still synchronize your camera with the FJ400 but power adjustments must be made on the strobe itself. The Master Lock feature does not prevent adjustments to any settings made directly on the strobe.
Enable the Master Lock:
Press the second button in Menu 5. When enabled, a red double arrow will appear on the screen.
Disable the Master Lock:
Press the second button of Menu 5 when the master lock feature is enabled or by powering off the FJ400. When disabled, the red double arrow icon will disappear.
"},"name":"Locking Settings on FJ Gear"},{"@type":"Question","acceptedAnswer":{"@type":"Answer","text":"
Our 43\" Collapsible Umbrella folds down to just under 15\" and is about 2\" wide. This is a perfect travel size for any camera bag or purse.
\n
"},"name":"What is the collapsed length and width of the Collapsible Umbrella?"},{"@type":"Question","acceptedAnswer":{"@type":"Answer","text":"
Yes, a Sony flash can be paired with any of our Rapid Boxes for speedlites. To do so, utilize the cold shoe that came with your Sony flash unit. Remove the provided adjustable cold shoe from your Rapid Box from by unscrewing it from the attached bracket. Utilize this screw to attach the your Sony cold shoe to the bracket. Then mount your Sony flash to on this adapted bracket.
\n
"},"name":"Can I mount a Sony flash on Rapid Boxes?"},{"@type":"Question","acceptedAnswer":{"@type":"Answer","text":"
Not at this time. The built-in rod receptacles on the Spiderlite TD6 were designed to accept 4-rod softbox systems with rod tips no larger than a 1/4".
"},"name":"Can you use a Pro Signature Octabank or another 8 rod softbox with the Spiderlite TD6?"},{"@type":"Question","acceptedAnswer":{"@type":"Answer","text":"
With the release of the Flex Cine line, grids became available for the new Flex Cine soft boxes. The grids are a little larger than the face of the original Flex soft boxes so if used on such you will have some of the grid gathered at one corner. This will not interfere with the quality of light control. The new Flex Cine Soft Boxes do work with the original Flex mats 1x1 or larger.
"},"name":"Is There a Grid Available for the Original Flex Modifiers?"},{"@type":"Question","acceptedAnswer":{"@type":"Answer","text":"
Our 3' Backlight Stand pairs perfectly with the Eyelighter.
"},"name":"What size light stand should I use with the Eyelighter?"},{"@type":"Question","acceptedAnswer":{"@type":"Answer","text":"
Unlike most backdrops, our Wrinkle Resistant Backdrop can be machine washed in cold water on a delicate cycle. You can also tumble dry them on a low/delicate setting.
\n
"},"name":"How do I clean Wrinkle Resistant Backdrops?"},{"@type":"Question","acceptedAnswer":{"@type":"Answer","text":"
The thickness of diffusion material determines the level of softness of your light output. Our 1-stop diffuser has half of the diffusing power as our 2-stop diffuser.
\n
Our 1-stop diffuser is our most popular diffuser and is great for softening overhead lighting or studio light sources when shooting outdoors. Our 2-stop diffuser is great for softening powerful light sources or particularly harsh sunlight. Due to the thickness of the 2-stop diffuser material, our 2-stop diffuser can also act as a subtle reflector for bouncing light onto your subject.
"},"name":"What is the difference between a 1-stop and 2-stop diffuser?"},{"@type":"Question","acceptedAnswer":{"@type":"Answer","text":"
Overview
To get the most out of your FJ triggers and speed lights—especially when working with TTL (Through-The-Lens) and HSS (High-Speed Sync)—it’s essential to fine-tune your camera’s settings. The FJ system is compatible with multiple camera brands, but certain settings are key to ensuring smooth communication between your camera and the strobes. These settings can be stored either as defaults or in a custom profile, so you can quickly access them whenever needed.
Recommended In-Camera Settings
Flash: Make sure it’s enabled.
Shutter Mode: Mechanical or E-Front Curtain Shutter is recommended.
Flash Mode: Set this to Fill.
Rear Curtain Sync:
On most cameras (except Sony), you’ll adjust this directly on the FJ trigger.
For Sony cameras, set "Flash Mode" to REAR in the flash menu to activate proper rear curtain sync.
Silent Shutter: It’s best to have this turned off.
Red Eye Reduction: Turn this off too (FJ strobes handle light in a way that minimizes the chance of red eye).
Wireless Flash: Disable this setting.
Flash Sync: For Nikon and Fuji, set it to Auto FP 1/250 to unlock High-Speed Sync (HSS).
Saving Your Settings
Once everything is set, you can save these configurations as your camera’s default settings or store them as a custom profile for quick access during different shoots.
Why These Settings Matter
Red Eye Reduction: Disabling this feature speeds up flash activation, which is important when working with fast-paced lighting setups.
Sony Rear Curtain Sync: For Sony users, setting "Flash Mode" to REAR is crucial to ensure accurate rear curtain sync.
Flash Sync (Auto FP 1/250): This setting allows you to shoot at faster shutter speeds while keeping the flash synchronized. It’s essential for capturing high-speed motion without losing any detail or timing.
"},"name":"What Are the Required In-Camera Settings for FJ Triggers and Speed Lights?"},{"@type":"Question","acceptedAnswer":{"@type":"Answer","text":"
The FJ400 strobe is designed for speed, making it a fantastic choice for those quick-action shooting moments. With its impressive recycling times and battery management, this strobe lets you snap away without waiting around.
Recycle Time:
When you’re using a fully charged battery, the FJ400 offers a remarkable recycling time of 0.05 to 0.9 seconds, depending on the power level you choose (1 to 9). What’s great is that these fast times remain steady throughout the battery’s life, so you can keep firing without missing a beat.
Factors Affecting Recycling Times:
Extreme temperatures can cause heat buildup.
Continuous shooting can add to the heat buildup, especially during back-to-back captures.
Using High-Speed Sync (HSS) at higher power levels may generate additional heat.
"},"name":"FJ400 Strobe Recycle Time and Battery Impact"},{"@type":"Question","acceptedAnswer":{"@type":"Answer","text":"
Shipping Damage in Transit
Please inspect your package by opening the shipping and retail boxes before accepting the delivery. Items may become damaged in transit even if the packaging does not show signs of damage.
Do not accept delivery of packages that are visibly damaged without inspecting their contents. If any merchandise appears to be damaged, please refuse delivery of the item and write, "Refused due to damage" on the delivery receipt. Keep a copy of the delivery receipt with your notes regarding the damage and contact our Customer Care Team immediately. Claims with outer packaging damage must be received within 3 days of receipt of merchandise.
Please keep all packing materials and boxes until you confirm all contents are in good working condition. If you discover any missing items or damage to merchandise after the shipment was accepted, notify our Customer Care Team immediately. Claims for missing items or items damaged in transit must be received within 15 days of receipt of merchandise.
More information regarding our shipping policies is available here.
"},"name":"What if my package gets lost or arrives damaged?"},{"@type":"Question","acceptedAnswer":{"@type":"Answer","text":"
Participants may combine accounts, however, if points have been awarded for the same actions within both accounts, points will be capped at the maximum rewards allowed for these actions as specified in the terms and conditions.
More information regarding the Westcott Rewards Program is available here.
"},"name":"Can I merge multiple Westcott accounts?"},{"@type":"Question","acceptedAnswer":{"@type":"Answer","text":"
Repairs and Replacement
We will, at our discretion, repair, replace, or provide Westcott store credit for any product that proves to be defective in material or workmanship. If your product is no longer being manufactured or is out of stock, we may replace your product with a similar or better product at our option.
If you return your product within the first 30 days of purchase, you will receive a new replacement unit. Replacement units that are sent for products that are returned to Westcott after the first 30 days of purchase may be refurbished units of similar cosmetic wear.
We strongly recommend shipping merchandise via FedEx, UPS, or other delivery service that provides tracking information and insurance. Customers are responsible for return shipping charges, duties, and taxes.
To submit a warranty repair or replacement claim for your Westcott product, complete the online return form. Receipt/order confirmation required for warranty care.
More information regarding our product warranty and repair policies is available here.
"},"name":"What about Repairs and/or Replacements of Westcott Gear?"},{"@type":"Question","acceptedAnswer":{"@type":"Answer","text":"
Quick Summary
Choosing the right diffusion changes the softness, transmission, and durability of the material. Below are the three most common fabrics—Grid Cloth, Super Silk, and Standard Diffusion—with at-a-glance specs, best uses, and pro tips.
Side-by-Side Snapshot
Feature
Grid Cloth
Super Silk
Standard Diffusion
Softness
Soft, slight directionality
Ultra-soft, creamy
Varies
Transmission
Moderate
High
Wide range
Wind Resistance
High
Low
Fair
Durability
Excellent
Moderate
Low–Moderate
Color Cast
Neutral (quality brands)
Highly neutral
Can vary
Best For
Outdoor frames
Beauty / interviews
General use
Grid Cloth
Key Points
Details
Type
Reinforced diffusion (nylon/poly with criss-cross grid)
Light to heavy (Opal, Tough Spun, Tough Rolux, etc.)
Look on Set
Varies: plastic sheet, paper-like, or soft cloth
Light Effect
From mild softening (Spun) to heavy glow (Opal)
Light Loss
½ – 2 stops depending on thickness
Durability / Wind
Varies – single-use gels to reusable cloth
Best Use
Everyday softening, quick fixes, budget rigs
Why Choose It?
Cheap, versatile, easy to cut or tape anywhere.
Mix and match densities for custom looks.
Pro Tips & Common Mistakes
Dos
Don'ts
Pre-test exposure—full grid cuts ~2 stops.
Using Super Silk in strong wind; it will flap.
Stagger high-power lights behind grid cloth for quicker recycle.
Letting cheap frosts melt near hot HMIs—check heat rating.
Use Opal or Tough Rolux on flags for fast window-light softening.
Expecting one fabric to suit all jobs—carry a mix.
Scenario Cheatsheet
Beauty commercial ➜ Super Silk
12×12 in 20 mph wind ➜ Full Grid Cloth
Quick LED hotspot fix ➜ Tough Spun or Opal
Still Not Sure?
Environment first – windy? choose Grid Cloth.
Subject need – flawless skin? choose Super Silk.
Budget / speed – grab Standard Diffusion sheets.
"},"name":"Grid Cloth vs Super Silk vs Standard Diffusion"},{"@type":"Question","acceptedAnswer":{"@type":"Answer","text":"
FJ wireless triggers are designed with a universal hot shoe mount to control FJ Wireless flash systems. They are compatible with most camera brands, including Canon, Nikon, Sony (manual mode), Fuji, Panasonic Lumix, and Olympus, and are backward compatible with all FJ Wireless flashes.
Proper Pin Alignment
Because FJ wireless systems use a universal hot shoe mount, it's important to ensure the trigger is set to the appropriate camera manufacturer and that all pins are properly aligned.
Inspecting the Trigger's Locking Pin:
With the trigger detached and the LCD screen facing away, loosen and tighten the shoe lock.
Observe the pin closest to you moving up and down. This is the locking pin that matches a port on your camera's hot shoe.
Ensure this pin is aligned with the port on your camera's hot shoe.
Attaching the FJ Wireless Trigger or Flash
Follow these steps to properly attach your FJ wireless trigger or flash:
Fully loosen the shoe lock with the unit detached from your camera.
Slide the unit onto the camera's hot shoe.
Rotate the shoe lock about halfway to its fully locked position. The unit should still be slightly loose.
Slightly pull or push the unit to ensure the locking pin falls into place (you might hear a faint "click").
Fully tighten the shoe lock.
Checking The Quality of Connection
FJ-X2 M and FJ-X3 M
Fuji Cameras
With the trigger attached to your camera, both the camera and trigger are powered on and the trigger is set to Fuji, when autofocusing or metering with your camera you should notice a little LED light above the LCD screen flashing green. This signals you have a good connection between the trigger and your camera.
All Other Camera Manufacturers
With the trigger attached to your camera, both the camera and trigger are powered on and the trigger is set to your desired camera manufacturer, when autofocusing or metering with your camera you should notice a little LED light above the LCD screen is solid green. This signals you have a good connection between the trigger and your camera.
FJ80 & FJ80II
You will know if you have a proper connection between your flash and your camera when your selected manufacturer is green when autofocusing or metering for exposure.
FJ80II SE
You will know if you have a proper connection between your flash and your camera when you see a “link” icon (two circles intertwined) under the selected manufacturer when autofocusing or metering for exposure.
Camera Settings and Compatibility
Cameras are thoroughly tested to ensure proper synchronization and use of HSS and TTL features. Check your camera's compatibility with the FJ Wireless System Camera Compatibility page. Additionally, check these settings in your camera.
Flash: Enable
Shutter Mode: Mechanical if available otherwise E-Front Curtain Shutter
Flash Mode: Fill
Silent Shutter: Off/Disabled
Red Eye reduction-Off/Disabled
Wireless Flash: Off
Flash sync Auto FP 1/250 (Nikon and Fuji) to enable HSS
Firmware Updates
Keeping your trigger's firmware up to date is crucial. To check your current firmware version, look at the bottom right of the boot-up screen when powering on your Westcott equipment. For the latest firmware, visit the Westcott Firmware page. For guidance on when and how to update firmware, see the When to Update Firmware page.
If you've followed these steps and are still experiencing issues, please reach out to us via chat, email, or phone through the Contact Us page.
"},"name":"Properly Connecting FJ Gear to Your Camera (HSS and TTL)"},{"@type":"Question","acceptedAnswer":{"@type":"Answer","text":"
Our Pro Shallow Softboxes are a unique industry favorite. They offer extremely soft light output with a slimmer profile. They fit into smaller studio spaces or tight locations. Our Shallow Softboxes work best with a constant light source like the Spiderlite TD6, where the light source itself is already very diffused and non-directional. When using studio strobes there is a benefit to using the more traditional standard depth softboxes. The increased depth allows the harder, more directional light from a strobe to both spread across the diffusion panel and bounce around before exiting the softbox. This produces a softer light than the strobe emits initially. To avoid a hotspot at the center of our traditional Pro Softboxes there is an inner baffle option to further diffuse the light and create an evenly spread light output. Our Shallow Softboxes are not equipped with an inner baffle.
\n
"},"name":"Do Westcott Shallow Softboxes have the same effect as the more traditional style softbox?"},{"@type":"Question","acceptedAnswer":{"@type":"Answer","text":"
Yes, we currently offers softbox options for several sizes of Flex mats. You can find them here.
"},"name":"Are There Compatible Soft Boxes for the Flex Lights?"},{"@type":"Question","acceptedAnswer":{"@type":"Answer","text":"
No. Our Background Support System is designed to safely use a maximum of 3 poles at one time for a total length of 10.5'. You may eliminate the middle section and create a compact 7' pole. However, this system is not designed to use more than the 3 poles at a time. The crossbar's maximum weight load is 20 pounds at full extension.
"},"name":"If I combine multiple crossbars together, can I extend the length of the Background Support System?"},{"@type":"Question","acceptedAnswer":{"@type":"Answer","text":"
Our gold reflectors have a shiny finish. The shiny surface is more efficient, providing a greater percentage of reflected light. Reflection can be controlled by either adjusting your reflector's angle or distance from your subject.
"},"name":"Is the gold surface of the reflector shiny or dull?"},{"@type":"Question","acceptedAnswer":{"@type":"Answer","text":"
To get the most out of your FJ400 and ensure you're capturing every moment, consider these key factors that can enhance your available flash quantities:
Start with a Fully Charged Battery
Begin your shoot with a fully charged battery. This not only optimizes performance but also provides peace of mind during critical moments.
Lower Power Levels
Reducing the power level is a practical way to extend the number of available flashes and increase the recycle rate. This adjustment can help you maintain consistent lighting without running out of power too quickly.
Minimize Using the Modeling Light
While the modeling light serves to provide balanced output and is efficient, its usage can still consume power. Limiting its activation helps maximize the total number of flashes you can achieve and also lowers the possibility of overheating.
Use "Normal" Sync
For the greatest number of flashes, opt for “Normal” sync mode. This setting ensures that your flashes fire at optimal intervals, enhancing your shooting efficiency.
Utilize AC Power
Whenever possible, connect the FJ400 to an AC adapter. This setup allows you to charge the battery while using the unit, ensuring you have continuous power throughout your sessions.
"},"name":"How to Maximize FJ400 Battery Flashes"},{"@type":"Question","acceptedAnswer":{"@type":"Answer","text":"
"},"name":"FJ80 II Twist Lock Mount Installation Instructions"},{"@type":"Question","acceptedAnswer":{"@type":"Answer","text":"
You can earn Westcott Reward Points through various qualifying activities listed below. Tap on the Rewards tab in the bottom right corner of the website and select “Earn points” to get started.
Eligible purchases made using your account on the Westcott website
Subscribing to the Westcott email newsletter
Submitting approved product reviews
Following Westcott on Instagram
Sharing links to the Westcott website on social channels (from the Rewards tab)
Entering your birthday in your Westcott account profile
Referring new customers who make qualifying purchases
More information regarding the Westcott Rewards Program is available here.
"},"name":"How can I earn Westcott Rewards Points?"},{"@type":"Question","acceptedAnswer":{"@type":"Answer","text":"
What Documentation do I need for Warranty Claims?
To help ensure warranty claims are for genuine Westcott products, our technical support department requires a copy of your receipt or order confirmation to be submitted with your claim. Please attach it to the online form.
More information regarding our product warranty and repair policies is available here.
"},"name":"What documentation is required for warranty claims?"},{"@type":"Question","acceptedAnswer":{"@type":"Answer","text":"
Yes, we currently offer a compact portable battery for Flex lights up to the 1' x 1' mat. The larger Flex units, although far more efficient than other comparable constant lighting solutions, still consume more power than can be handled efficiently with current battery technology. As the technology evolves, Westcott will continue to innovate and introduce new battery options for all lighting solutions.
"},"name":"Is There a Battery Pack Available For The Flex Mats?"},{"@type":"Question","acceptedAnswer":{"@type":"Answer","text":"
Our Background Support System was built specifically for use with our backdrops. The Backdrop Support System’s crossbar has a maximum load of 20 pounds when fully extended. So, any paper rolls that weigh under 20 pounds can also be used with our system. We suggest using weight bags at the base of the stands for added stability.
"},"name":"Can I use the Backdrop Support System with a paper roll?"},{"@type":"Question","acceptedAnswer":{"@type":"Answer","text":"
Our silver reflectors have a shiny finish. The shiny surface is more efficient, providing a greater percentage of reflected light. Reflection can be controlled by either adjusting your reflector's angle or distance from your subject.
"},"name":"Is the silver surface of the reflector shiny or dull?"},{"@type":"Question","acceptedAnswer":{"@type":"Answer","text":"
Even Light Distribution
The extended placement of the flash tube ensures that light fills modifiers evenly, maximizing their softening capabilities. Other strobes with covered tubes often struggle to fill modifiers adequately, leading to uneven results.
Minimized Hotspots
Unlike strobes from other brands that can produce distracting hotspots and uneven light patterns, the FJ400 delivers consistent lighting that photographers can rely on.
By utilizing the FJ400, you can fully harness your modifier's larger surface area, achieving stunning, soft lighting that elevates your photography.
"},"name":"Why is the FJ400 Flash Tube Extended Out?"},{"@type":"Question","acceptedAnswer":{"@type":"Answer","text":"
"},"name":"FJ80-SE Twist Lock Mount Installation Instructions"},{"@type":"Question","acceptedAnswer":{"@type":"Answer","text":"
You can track the number of Points accumulated in your Westcott account by logging into your Westcott account and clicking the Rewards Tab in the bottom right corner of the website.
More information regarding the Westcott Rewards Program is available here.
"},"name":"Where can I find my earned Westcott Reward points balance?"},{"@type":"Question","acceptedAnswer":{"@type":"Answer","text":"
Westcott Product Warranties
Warranty terms can vary by product. Please consult the specifications section of specific product pages to see the warranty terms and conditions for those products.
In addition to product warranties, Westcott offers Extended warranties and Accidental Damage Protection on specified products for an additional fee. Again, consult the product page to determine if this is offered for a given product.
More information regarding our product warranty and repair policies is available here.
"},"name":"What warranty does Westcott Offer?"},{"@type":"Question","acceptedAnswer":{"@type":"Answer","text":"
A Guide to Using TTL Compensation
This article addresses why TTL compensation levels are different from the trigger to the unit along with the differences when moving from Manual power settings to using TTL and TTL compensation to adjust your lighting output for creating accurate exposures.
TTL compensation numbers on a FJ trigger, or FJ host speed light used as a triggering device, are not the same as those reflected by the client strobes and speed lights. When in Manual mode the power levels on the triggering device are consistent with the numbers shown on the client units. In TTL mode, the strobe and trigger do not reflect each other. In TTL mode, these numbers are completely independent of each other. Were you to set your strobe to -1 and your trigger to +1, the effective exposure compensation would be "0" (+1-1=0).
Using Manual Mode
In Manual mode (M), the photographer adjusts the power setting of the Westcott’s FJ strobes from level 9 to level 1. This power level will not change unless the photographer changes it, often making manual mode the best option for performance and consistency. Once you determine your desired camera settings you can adjust the power level on the FJ gear in full stops or tenths up or down to the output that provides the amount of light required to expose the image to your preferred exposure. If the maximum (9) power level does not provide an adequate amount of light, or the minimum (1) power level adds too much light, you may need to adjust your camera ISO or aperture. Shutter speed will not affect flash exposure when within normal sync speeds (around/under 1/200). When setting the shutter above normal sync speeds, High-Speed Sync (HSS) must be utilized to avoid “half frames” (when part of your photo is dark). When in HSS, flash exposure will be influenced by your shutter speed, similar to shutter speed adjustments using consistent light. Power level changes you make on the trigger or host FJ speed light show up immediately on the screen of the client (off-camera strobe or speed light).
Why use TTL Mode
TTL automates the lighting output process to allow photographers to concentrate on composition. TTL stands for Through-the-Lens. This means the metering (measured amount of light) for exposure is determined inside the camera, not from an external meter reading.
How does the camera determine a proper TTL exposure with flash?
TTL mode (TTL), takes data recorded by the camera’s sensor from a small pre-flash fired from the Strobe(s) immediately before the flash for the actual exposure. Working together, the camera and FJ trigger or host speed light, calculate and apply the final power level required for the exposure at your chosen aperture (f-stop) and ISO. Note that Auto ISO is not supported for most camera systems with off camera lighting. TTL exposure levels are mostly determined based on a scene where the tones are even or divided in even amounts between dark and light areas. Some camera systems will add algorithms (rules that commonly affect calculations) such as distance and contrast levels to provide a more accurate exposure calculation when the range of tones does not provide an even distribution. Note that because TTL uses multiple firings for each image, recycle time and frame capture rates can be reduced. This is true for all flashes that offer TTL regardless of make or model. Westcott recommends using manual mode when fast capture rates are needed.
When and why is TTL flash compensation required?
TTL compensation is a feature of the FJ triggers and strobes. This feature provides photographers an avenue to adjust the resulting TTL exposure predetermined by the camera. Most often compensation is used to address the tones in the composition captured being either darker or lighter than a medium (18%) gray level. For instance, a bride in white on a light background would likely be underexposed using TTL without compensation adjustments as the white and lighter areas would be rendered as medium gray. Similarly, the white spots on a mostly black dog being photographed on a black background would likely be overexposed as the TTL calculation tells the strobe to add more light to make the overall scene come out as medium gray. If a photographer’s camera provides consistent miscalculations of these scenes, the photographer can dial-in the estimated compensation amount based on the tones in the subject matter. Compensation can also be used to manipulate the exposure based on the photographer’s creative preferences or the tendencies of different camera models and lenses toward over or underexposure of TTL images.
Which FJ device should you use to adjust compensation settings in TTL mode?
Best practice is typically to keep your strobe/client at a zero-compensation level and make plus or minus adjustments via the trigger or host. There are however times when this is not the case. If you tend to prefer exposures to the right (slightly overexposed from medium levels) or have a camera or lens that consistently underexposes in TTL, photographers may want to set their client strobe to a plus compensation amount. This will calibrate the gear to the photographer’s preferences, while still allowing 3 stops of compensation via the trigger based on the tones in the scene. Some camera models not listed as compatible may be able to provide quality TTL exposure features using this method.
The variations in TTL compensation for both trigger and strobe can be displayed on the larger screen of the FJ400.
Here’s how:
Long-press the top (menu) button to get to menu 6 (settings menu).
Hit the select button and turn the TTL-M option to "ON."
Press the menu button to go back to menu 1.
When you’re in TTL mode, you’ll see three numbers on the display screen of the FJ400:
The large number shows the strobe compensation setting.
The first set of smaller numbers displays the trigger compensation setting.
The last number indicates the Manual equivalent power level of the last TTL exposure for group "A". This assumes the strobe was fired via a trigger or host FJ speed light using the camera's shutter release button.
Additional note to consider when using TTL
The power levels available for a TTL exposure are the same as those available in Manual power mode. Therefore, recording an image at a narrow aperture (f22) at a low ISO (ISO 50 or ISO 100) may result in underexposed images as the amount of power needed to achieve good exposure exceeds what the flash can produce. This is true even when positive compensation is applied if the strobe or speed light is already operating in TTL at a level equal to Power level 9 (maximum). Conversely, use of TTL with a wide aperture (F2) at a high ISO (3200 or 6400) may result in overexposed images. This is true even when negative compensation is applied if the strobe or speed light is already operating in TTL at a level equal to Power level 1 (minimum). Adding neutral density or diffusion material to the strobe or speedlight may provide a solution for reducing output further.
"},"name":"Why are TTL compensation levels different on the FJ trigger and FJ strobe?"},{"@type":"Question","acceptedAnswer":{"@type":"Answer","text":"
Use The Mechanical Shutter
One of the leading causes of what seems to be random over or under-exposure in your images is your camera setting choice of the shutter mode. If your camera has a “Mechanical” shutter option, that option should be selected when using flash. Use of the electronic shutter, electronic front curtain or auto settings may produce the occasional overexposed image even when using manual flash power levels and consistent exposure settings.
Manually Adjust the Shutter Mode
Use your camera’s menu system to select the proper Shutter mode. Some cameras models may automatically transition to use of the mechanical shutter mode when a flash or trigger is detected in the hot shoe. Many do not. This is an important step in your camera set up. Cameras that appear on the Westcott FJ compatibility list but do not have a mechanical shutter option should be set to electronic front curtain or auto.
Disable Silent Shooting
Even with the camera set to Mechanical, the electronic shutter will become active when using the silent shooting or silent shutter settings. When utilizing the strobes in the FJ system, turn off all silent shooting settings in the camera menus.
Save Custom Menu Settings
For convenient access, recent cameras allow you to store specific settings into a Favorites or Custom menu. Storing all your preferred settings will allow you to easily recall your Best Practice settings like Mechanical Shutter and Silent Shooting (OFF), when using the Westcott FJ gear.
In still and motion capture black surfaces subtract light. If your subject is too evenly lit and you want to add depth, you can come in close with the black panel and eliminate light coming from or reflecting from that direction. Creating depth and dimensions to your scene is achieved through highlights and shadows. A reflector kit offering multiple surfaces allows you to refine the existing light.
"},"name":"Will a black reflector reflect light?"},{"@type":"Question","acceptedAnswer":{"@type":"Answer","text":"
Purchases: When your items are shipped
Account Verification: When using the social login, points are awarded immediately. Otherwise, points are issued upon verifying your email.
Email Newsletter Subscribe: Immediately upon subscribing
Social Share: Within 24 hours
Following on Instagram: Within 24 hours
Birthday: Awarded once a year on your birthday
Product Reviews: Upon validation by customer service
Referrals: After your referred friend creates a Westcott account and their first qualifying purchase has shipped
Please note: There may be occasional delays in points processing due to high traffic or unforeseen circumstances.
We are dedicated to promptly resolving any issues to ensure a smooth rewards experience.
More information regarding the Westcott Rewards Program is available here.
"},"name":"When will I receive my reward points?"},{"@type":"Question","acceptedAnswer":{"@type":"Answer","text":"
Third-Party Products
Products sold through the Westcott Online Store that do not bear the Westcott brand name are serviced and supported exclusively by their manufacturers in accordance with any terms and conditions packaged with the products).
Westcott Limited Warranty does not apply to products that are not Westcott-branded, even if packaged or sold with Westcott products. Please contact the manufacturer directly for technical support and customer service.
More information regarding our product warranty and repair policies is available here.
"},"name":"Does Westcott provide warranty protection on third-party products?"},{"@type":"Question","acceptedAnswer":{"@type":"Answer","text":"
Overview
If you’re diving into combining your FJ system with Canon RT speedlites like the Canon EL-1, this article includes best practices to help provide smooth wireless triggering and control.
FJ Wireless and Canon RT
Canon RT (radio transmission) Mode
Tailored for Canon cameras and Canon branded RT speedlites. The Canon RT setup maintains great compatibility, However, recent changes in the wireless environment have reportedly impacted the RT system’s ability to maintain solid connections particularly in crowded wireless spots where many wireless devices are found.
FJ Wireless Canon RT
Allows communication between Canon branded RT devices and the Westcott FJ strobes, speed lights and triggers. The limitations on connection reliability within the Canon RT system remain. As of the date of this article, Oct 2024, all previous releases of Westcott FJ gear continue to support RT operations.
FJ Wireless Mode (TTL-ALL) Canon mode
Offers operation of the FJ gear along with your Canon cameras but will not communicate directly with any Canon branded flash gear. This mode, using the latest firmware and hardware from Westcott really shines, ensuring effective communication between devices, even in busy wireless environments. Use of this mode also allows the full power range (RT limits the output level to a minimum 1/128 power or level 2) and offers modeling light control not available in RT. The Westcott FJ-XR receiver may be used with most speed lights and strobes from other brands to provide reliable synchronized firing using the FJ system.
The RT/ID will need to be the same on your FJ strobes, speed lights, and triggers as well as your Canon RT flash.
Canon RT/IDs run from 0000 to 1000. Choose an entry between 0000 and 0099 as Westcott FJ RT/ID units go from 0000 to 0099.
Hint: matching the RT ID choice to your preferred channel may make it easier to recall that number as you set multiple devices. Additionally, best practice is to assign each flash/strobe a distinct group so you can individually control each unit. If, however, you know a number of flashes will be using the same exact manual output levels, you can connect those flashes using a singular group letter. On-camera FJ speed lights used as a host will automatically be assigned and remain in group “A”.
FJ200
Press the Command dial and scroll to RT ID in the Wireless sub menu.
Set the RT ID# inbetween 00 and 99 to match other FJ Wireless gear and Canon RT gear
Scroll to Group and assign the flash to your desired Group letter.
FJ80 & FJ80II
Press the home button and touch the settings button on the screen to enter the settings menu.
Turn on RT ID # on page one of the settings menu and input your desired ID number.
Confirm Canon is turned “On” on page 3 of the settings menu
Press the home button to then select “Host” or “Client”
Host: The speed light will be attached to the camera, sending the signal to other off camera flashes. Touch the camera manufacturer selection in the upper left of the screen until “Canon-RT” appears.
The attached speed light will be controlled within Group A.
Client: the speed light will be off camera, receiving signal from another unit. Touch the camera manufacturer selection in the upper left of the screen until “C-RT” appears.
The “GR” button in the upper right controls what group this unit will be connected to in client mode.
FJ400
Confirm TT/ALL is displayed in Menu 1.
Press the menu button to navigate to menu 2 then press and hold button 4, RT ID.
The ID box will appear at the top of the screen to the right of the GR box.
Use the Command dial to scroll to your desired RT ID and press the center of the command dial to lock in your choice.
In Menu 2 press the third button down, “GR”. Scroll the command dial to select your desired group letter.
FJ-X3M Triggers
Press and hold the menu button to enter the settings menu.
Press the center button of the circular directional pad to select the “Camera” Setting then press down on the directional pad until “Canon-RT” is selected. Not Canon. Press the center button again to lock in your selection.
Press down on the directional pad once to highlight the RT ID#. Press the center button to highlight the ID number and then the up and down on the directional pad to set the trigger to your desired RT ID#.
Press and hold the Sync-Manu button to exit the settings menu.
On the main screen of the trigger, confirm the groups you will be using are active. That they display TTL or M and not SLP (Sleep mode)
FJ-X2M Triggers
On the main screen, press the leftmost round button below the screen (camera) until Canon-RT appears in the upper left of the screen
Press the two rightmost buttons (C.Fn) at the same time to enter the settings menu
Use the scroll wheel to highlight the RT ID# box. Press the scroll wheel to highlight the numbering options and scroll to your RT ID# choice.
Press the button below OK to return to the main menu.
On the trigger main screen, make sure all group letters that will be used are active (set to M or TTL and not SLP “Sleep”).
Note: Exiting the Canon RT camera selection to change to "Canon" or other brand choices may require you to reboot (turn off and restart) the FJ strobes to disable the ID function and ensure connectivity in modes other than Canon RT.
Connecting Your Canon RT Speedlites
Activate RT Mode
Turn on the speedlite and press the double arrow link button until you see ETTL or M, along with "slave" and the wireless symbol. “slave” appears in the center of the screen, and the wireless symbol (not the lightning bolt) is in the upper right corner.
Channel and ID
Press "MENU 1" on the Canon speedlight twice to enter "MENU 3". Once in MENU 3, press the "CH" (channel) button and set the channel to the same as the other flashes and/or trigger. Press the "ID" button and set the RT/ID to the same as the one set on the other flashes and/or trigger.
Assigning Groups
For the Canon units, Use the “Gr” button to assign the speedlite to a group (A-E). As with the FJ gear, On-camera Canon speedlites used as a host (“master” on Canon Speedlites) will automatically be assigned and remain in group “A”.
Confirming Your Connection
After making these adjustments, look for green indicators: "Canon-RT" on the trigger and "ID/RT" on the strobe. If the green light doesn’t appear after a few seconds, press the ID/RT button on the strobe to refresh the connection.
Example Setup
Let’s say you’re using an FJ400 with a Canon RT speedlite. Here’s a quick rundown:
Set the FJ400 to Channel 10 and RT ID 10. (Note: Best practice for all wireless communication is to start above channel 5 to avoid communication issues from other wireless devices)
Set the speedlite channel to 10 and the RT ID to 0010.
Set the FJ trigger RT ID and Channel to 10
Make sure group A and group B are both active on the trigger (set to M or TTL)
Assign the FJ400 to Group A, and the Canon speedlight to group B, to ensure they are on different groups for individual power control.
The link LED on the speedlite should glow green. The FJ400 RT ID icon will also be green when a proper connection is made. If this is not the case, cycle the link button, press and fire a test shot from the camera to retest the connection. If a link does not occur, Adjusting the channel choice might be necessary.
Limitations and Troubleshooting
Testing Flashes
Firing test flashes from the trigger’s test button might not activate all flashes in Canon RT mode. It’s usually better to use your camera’s shutter for this.
Documentation of Canon RT Connectivity Issues
Canon RT users have reported connectivity issues in the RT wireless system, as seen in Canon Forum postings.
For the best results with your Canon RT speedlites, a solid setup and configuration are crucial. Starting with a reset can help prevent issues and improve connectivity. If you run into challenges, don’t hesitate to contact Westcott for help or to tap into online communities for support and solutions.
"},"name":"Using FJ Triggers with Canon RT Speedlites: Setup and Tips copy"},{"@type":"Question","acceptedAnswer":{"@type":"Answer","text":"
Having difficulty with your FJ Wireless equipment? This detailed guide includes key troubleshooting techniques and best practices to ensure that your FJ strobe system runs smoothly and efficiently. This article will help you optimize your gear for optimal performance, from checking firmware updates and ensuring appropriate installation to tweaking wireless channels and understanding placement quirks for various camera types. Follow the steps below to fix frequent difficulties and maintain continuous connection between your camera and FJ Wireless equipment, ensuring you receive the best results every time.
A Comprehensive Troubleshooting Guide
For our most up-to-date and detailed troubleshooting guide, please visit:
Check Camera Compatibility and Settings: Camera settings are crucial for optimal performance. Check additional articles in the FAQ section for brand and model-specific recommendations.
Consult User Manuals: Download the user manual for in-depth guidance on setup.
Adjust Wireless Channels: Start at channel 6 and adjust in increments of 5 channels to avoid interference. The settings menu on an FJ trigger lists 3 recommended channel options.
Confirm Wireless Channels and Groups: When using wireless FJ gear through a trigger like the FJ-X3m or and FJ80 flash, be sure the unit on your camera and the flash you wish to trigger are on the same Wireless channel. When both units are on the same channel, you can assign the flash(s) you are triggering to a group you desire. If all unites are on the same group, they will all fire at the same power level or mode dictated by the trigger on your camera. When using multiple flashes, its suggested each flash is on its own group within the channel selected. This way you can control each flash independently.
Firmware Updates
New camera models and firmware releases often require updates to FJ firmware to maintain compatibility. If your system is running well there is likely no need to install the update unless there are functionality improvements listed in the changelog that you would like to use. Check the changelog for updates and ensure all your FJ gear is updated simultaneously to avoid conflicts. If your camera's manufacturer releases an update, do not load it on day one. Allow Westcott to address potential issues with the camera manufacturers firmware. If conflicts arise, redownload and reinstall the firmware from the website. Previous firmware versions are available through Westcott Tech Support at support@fjwestcott.com.
Positioning In some instances the manufacturing of a particular model or camera unit, can result in the need for the user to pay special attention to the mounting process when attaching a FJ trigger or speed light to that camera's hot shoe
Fuji: A small lip at the hot shoe may need a little extra force forward to mount fully.
Canon R series: added pins at the front of the hot shoe may give the impression that the FJ gear is fully mounted when in fact a small nudge forward may be needed to assure a full mount and proper contact
Nikon Z series: Rarely have issues, but older DSLRs may need a backward nudge before locking down.
Sony: Align the pins at the base and the front of the hot shoe with the contacts and ensure they are clean. The Sony pins at the front of hot shoe can become dirty over time and prevent proper connections. Check that the pins are free of dirt and grime
Yes, all of our reflector arms require a light stand for proper mounting and usage. Each reflector mounting arm has a standard receptacle that fits atop most light stands. This receptacle features a locking knob for security.
\n
We typically recommend pairing our reflector arms with an 8' light stand that is adjusted to its lowest height. Taller light stands have a larger footprint or base, offering more stability when the reflector is attached.
"},"name":"Does a reflector arm require a stand?"},{"@type":"Question","acceptedAnswer":{"@type":"Answer","text":"
Yes. Additional Flex dimmers are available for purchase by contacting Westcott Customer Service.
"},"name":"Can I buy Extra Dimmer Units Separately From the Flex Kit?"},{"@type":"Question","acceptedAnswer":{"@type":"Answer","text":"
Reward points were automatically added to your account for orders processed on or before May 16, 2023. Participants who already had an existing account on the Westcott website or previously subscribed to our email newsletter will receive points automatically upon signing in.
Although we cannot issue points for purchases made before the program's launch, there are numerous other opportunities to accumulate points.
More information regarding the Westcott Rewards Program is available here.
"},"name":"Can I earn points for past purchases or already being subscribed to Westcott’s email newsletters?"},{"@type":"Question","acceptedAnswer":{"@type":"Answer","text":"
Product Registration
If you purchased your product directly through this website, you do not need to register your products. We already have all the necessary information.
If you purchased through an Authorized Westcott Retailer, use this form to register your Westcott products.
Please upload a copy of your receipt. Accepted formats include PDF, JPG, JPEG, PNG, and GIF. Common methods include scanning, printing a PDF, and taking a photo with a cell phone app or camera.
More information regarding our product warranty and repair policies is available here.
"},"name":"Do I need to register my products?"},{"@type":"Question","acceptedAnswer":{"@type":"Answer","text":"
Use The Mechanical Shutter
One of the leading causes of what seems to be random over or under-exposure in your images is your camera setting choice of the shutter mode. If your camera has a “Mechanical” shutter option, that option should be selected when using flash. Use of the electronic shutter, electronic front curtain or auto settings may produce the occasional overexposed image even when using manual flash power levels and consistent exposure settings.
Manually Adjust the Shutter Mode
Use your camera’s menu system to select the proper Shutter mode. Some cameras models may automatically transition to use of the mechanical shutter mode when a flash or trigger is detected in the hot shoe. Many do not. This is an important step in your camera set up. Cameras that appear on the Westcott FJ compatibility list but do not have a mechanical shutter option should be set to electronic front curtain or auto.
Disable Silent Shooting
Even with the camera set to Mechanical, the electronic shutter will become active when using the silent shooting or silent shutter settings. When utilizing the strobes in the FJ system, turn off all silent shooting settings in the camera menus.
Save Custom Menu Settings
For convenient access, recent cameras allow you to store specific settings into a Favorites or Custom menu. Storing all your preferred settings will allow you to easily recall your Best Practice settings like Mechanical Shutter and Silent Shooting (OFF), when using the Westcott FJ gear.
"},"name":"Overexposed Images with Flashes or Triggers copy"},{"@type":"Question","acceptedAnswer":{"@type":"Answer","text":"
Usage
The batteries for the FJ system are capable of several hundred full power flashes from a single charge. There are however a few things that can influence the total number of flashes.
Set the screen to level "1" (2 is the default) in the settings menu
Minimize use of the zoom feature
Do not overheat the unit
Power off the flash when not in use for an extended time.
Minimize the use of the modeling lamp
Use the flashes within normal sync speeds. HSS requires multiple rapid flashes at higher power levels and adds heat, both deplete battery life at a faster pace.
Use Manual power settings. TTL adds a pre-flash which has a minimal effect on battery life.
Charging
FJ system Lithium Polymer Batteries are rated for a lifespan of 300+ charge cycles. You can help maximize and increase that life by charging an FJ battery before it is empty.
Avoid Full Depletion: Lithium Polymers do not have a memory effect, so you should never fully deplete them as with Ni-Cad batteries. Westcott's FJ system has built-in protection to prevent total discharge when in use. If stored long-term after significant use and discharge, the remaining protective charge can dissipate, damaging the battery's ability to recharge.
Recharge Before 75% Depletion: Recharging the FJ battery before it is 75% depleted can prolong its life.
Optimal Charging Temperature: Avoid charging when the battery is below 10ºC/50ºF, as the chemistry in the battery is less efficient at lower temperatures.
Avoid Overheating: Hot Lithium Polymer batteries don’t take a charge well. Continued overheating of your FJ units will reduce the battery's life and functionality (frames per charge). Allow the batteries to cool after use before charging. If your FJ unit nears or reaches OH (overheating) status, allow additional cooling time. For the FJ400, you can use the AC power adapter to help cool the battery several minutes before powering off the unit for the remainder of the charge.
Storage
Avoid Long-term Full Charge: Lithium Polymer batteries should not be stored long-term with a full charge, as the chemistry can cause them to expand and may render them unusable.
Optimal Storage Level: Longer-term storage levels between 50% and 75% are suggested. Lithium Polymer batteries lose less than 1% of their charge each month when stored, so there is little chance they will discharge too far unless stored for a very long time at the lowest levels.
Caution
Avoid Significant Discharges: Continual significant discharges will affect the battery's lifespan. Regularly maintaining charge levels above 25% will enhance the battery's lifespan.
Follow Charging Directions: Follow the directions for charging that come with your FJ product manual.
Don't Attempt Additional Flashes: When your FJ strobe shuts down due to an exhausted battery, do not turn it off and back on to gain a few more flashes. This can deplete the battery's safety reserve charge and permanently damage the battery. If you need the strobe to provide near its maximum range of flashes regularly, consider purchasing a second backup battery.
"},"name":"Maximizing the Lifespan of Your Lithium Polymer FJ Batteries."},{"@type":"Question","acceptedAnswer":{"@type":"Answer","text":"
All of our reflectors fold down to 1/3 of their open size. You can calculate this size by simply taking the size of your reflector and dividing it by 3.
"},"name":"How small will a collapsible reflector fold down?"},{"@type":"Question","acceptedAnswer":{"@type":"Answer","text":"
Editing your order
If you need to update your shipping address or contact information, please contact our customer service team immediately after placing your order. In most cases, items can be added to or removed from an existing order as long as the order has not shipped from our warehouse.
Once your order ships no further changes can be made.
"},"name":"Can I edit or add anything to my order?"},{"@type":"Question","acceptedAnswer":{"@type":"Answer","text":"
No. We cannot offer points to the Westcott Loyalty program for purchases made outside of Westcott's website. Many of our retailers have their own reward programs and we are, and continue to be, supportive of our authorized retailers.
More information regarding the Westcott Rewards Program is available here.
"},"name":"Can I get rewards for purchases made at retailers/dealers?"},{"@type":"Question","acceptedAnswer":{"@type":"Answer","text":"
Overview
This article shares best practices to ensure proper cooling and avoid overheating while operating your FJ strobes and speed lights
All strobes and speed lights produce large amounts of heat and therefore are susceptible to overheating under certain conditions. This article offers advice on best practices to avoid these conditions.
For more in-depth information on the Overheating (OH) protection functions for each individual Westcott FJ unit please refer to the operating manual of the specific piece of FJ gear
Speed lights often have a Fresnel or front diffusion panel enclosing the flash tube. These features along with the fact that these units rarely have active fans for cooling can lead to overheating in situations where maximum power output and rapid frame rates are employed.
The Westcott FJ system speedlights employ a tiered overheating protection protocol in order to provide a quality imaging experience while preventing damage to the units when pushed past their maximum capacity.
FJ80ii
The FJ80ii features both an advanced thermal protection system and advanced passive cooling engineering. The passive cooling engineering keeps the unit from entering the OH (overheating protection) in all but the most extreme shooting conditions. The FJ80ii would be the recommended speed light if you continually want the highest power output with rapid frame rates.
FJ80SE
The value priced FJ80SE uses a three-step overheating protection protocol. The three-step process aids in allowing ongoing protection while slowing the recycle times for continued imaging.
Original FJ80
The FJ80 uses a two-step overheating protection with the OH icon appearing yellow when heat starts to impact the speed light operations. The yellow OH icon will slow the recycle time. As you continue to fire the speed light eventually a red OH icon will appear if the unit goes past the safe level for its maximum operating temp. When the red icon appears, firing the flash will be disabled.
Strobes
FJ Strobes offer tiered levels of OH (overheating) protection as well. Due to their open flash tube setup, overheating is not typically a concern despite their higher output levels.
FJ400
The FJ 400 offers OH protection as well as providing a fan to achieve active cooling to prevent overheating on this powerful strobe in all but the most extreme conditions. The fan is self-monitoring and will automatically become active when the FJ400 begins to heat up or anytime the modeling lamp is employed. In the rare instances the OH protection kicks in, the OH icon will occur, and you will need to wait for it to disappear before you can continue use of the flash.
FJ200
The FJ200 offers 2 tiered OH protection. The open flashtube allows ventilation around the flash tube, so overheating is rare. If the strobe begins to enter critical temperatures the screen will display a red [Bulb Icon] and the recycle time will increase to 2 seconds. If the strobe continues to heat up, the screen will eventually display a red [OH] icon and the unit will be inoperable for an estimated 10 minutes to allow cooling.
Tips to Avoid Overheating When Conditions Warrant Caution
Lower the Power
If you're indoors, try raising your camera’s ISO or opening up the aperture. This will allow the FJ gear to use less power to produce the proper exposure and thus produce less heat.
Slow your shooting pace
Allowing more time between exposures will allow the FJ unit to cool between images. Use high frame rates for only those situations requiring them. A slower, more deliberate approach to capturing some images will have the added benefit of maximizing the battery life and reducing time spent culling and editing.
Adjust the Beam Angle
Set the zoom of the speedlight to the maximum zoom that allows the beam to cover the area of the image being recorded by the camera. When choosing a long telephoto lens, the beam/zoom on speed lights should be narrow. Similarly, use of a long throw reflector on a strobe will allow a narrower more efficient beam to illuminate a scene recorded at a distance or with a telephoto lens.
Get Closer
Moving the light closer to the subject of the image will allow you to reduce the required output level of your FJ unit. Using a wider lens and avoiding the telephoto end of zoom lenses may allow you to do this without a significant impact on the composition. Caution: When considering wider or telephoto lens choices, always consider the impact of the Len's focal length on the subject matter.
Avoid direct Sun
When possible, Work in shade or provide a gobo or umbrella to eliminate sun hitting the strobe directly. Typically, this will not be necessary. However, in shooting scenarios such as rapid paced high volume outdoor sports portraits combined with clear skies and extreme air temperatures, implementation of this suggestion may make enough difference to prevent an OH shutdown.
Choose the right modifier
Small modifiers, grids and gels which can restrict airflow around the flash head or bulb should be used sparingly when OH is a concern.
Conclusion
Overheating, while not common in most shooting scenarios, should be avoided. Overheating has other negative factors outside of causing an interruption to your image capture process. Continually using any strobe gear in conditions and scenarios that require implementation of its OH protection will also impact both the life of the flash tube and the number of power cycles available from your battery. Choosing the right FJ unit to fit your shooting requirements along with the following the proper precautions listed above will help guarantee a quality imaging experience with your Westcott FJ gear for an extended period of time.
"},"name":"Avoid Overheating With your FJ Strobes and Speedlights"},{"@type":"Question","acceptedAnswer":{"@type":"Answer","text":"
Warranty Exclusions
Normal Wear and Tear: The warranty does not cover deterioration from normal use.
Damage from Abuse or Misuse: Excludes damage caused by:
Abuse, neglect, or misuse
Accidents or overloading
Improper installation or misapplication
Product alteration or unauthorized repairs
Improper operation, cleaning, handling, or maintenance
Incidental or Consequential Damages: Not covered unless Accidental Damage Protection has been purchased.
Self-Inflicted Damage: Any defect or malfunction resulting from user error, including:
Failing to follow operating instructions
Using improper or faulty equipment
Unauthorized Modifications: The warranty becomes invalid if the product is opened, disassembled, repaired, or modified by anyone not authorized by Westcott.
Customer Responsibilities
Shipping Charges and Taxes: Customers are responsible for return shipping fees, duties, and taxes.
Shipping Recommendations: It is strongly recommended to use delivery services like FedEx or UPS that provide tracking information and insurance for returns.
Additional Information
Warranty Validity:
The warranty is provided exclusively to the original purchaser.
It remains valid for the duration of the warranty period, provided that the customer continues to own the product and Westcott continues to manufacture it.
Do Not Attempt Repairs: Please do not try to fix anything yourself; unauthorized repairs or modifications void the warranty.
For more details, please refer to the full warranty documentation or contact Westcott Customer Support.
What Is Not Covered by Warranties
The warranty does not cover normal wear and tear; damage through abuse, neglect, misuse; or as a result of any accident, overloading, improper installation/misapplication, product alteration, improper operation, improper cleaning, improper handling, or improper maintenance and repair.
The warranty does not cover incidental or consequential damages, except in the case that Accidental Damage Protection has been purchased. (See below) The warranty will not cover product failure because you broke it (any defect or malfunction that is caused as a result of misuse, failure to follow operating instructions, abuse, or use with improper or faulty equipment). The warranty is no longer valid after anyone, not authorized by Westcott, opens up, disassembles, repairs, or modifies any product in a way that it isn't intended to be done by an end user. Please don't try to fix anything yourself.
Customers are responsible for return shipping charges, duties, and taxes. We strongly recommend shipping merchandise via FedEx, UPS, or other delivery service that provides tracking information and insurance.
A product warranty is exclusively provided to the original purchaser and remains valid for the duration of the warranty period, as long as they own the product and Westcott continues to manufacture it.
More information regarding our product warranty and repair policies is available here.
"},"name":"What is not covered under warranties?"},{"@type":"Question","acceptedAnswer":{"@type":"Answer","text":"
Westcott lighting gear, like your lights and triggers, sometimes receives firmware updates to improve performance, add new features, and ensure compatibility with newer camera systems. Keeping everything updated is key to getting the best results.
Do Firmware Versions Need to Match on all my Westcott Equipment?
No, firmware updates and versions will most likely not match. It is expected and normal for a trigger to have a different firmware version than a strobe and the strobe to be different from a speedlight.
Why should I update my Westcott gear?
Updating your firmware helps improve how your gear works, adds new features and makes sure it stays compatible with the latest camera systems. It’s a simple way to keep your equipment running at its best.
How do I check for firmware updates?
Just visit this article to find the most recent firmware updates for your lights and triggers. Double-check that every piece of gear is up to date to keep everything working together perfectly.
Do I need to update all my gear at the same time?
Yes, if you update one part, like the trigger, you’ll want to check for updates for all your other Westcott Gear. This way, all your gear works together without any issues. Always make sure everything has the latest firmware.
"},"name":"Firmware is Different Triggers and Strobes"},{"@type":"Question","acceptedAnswer":{"@type":"Answer","text":"
The 6-in-1 has 2 framed panels that provide you with more flexibility. The 1st panel is a 1-stop diffusion fabric. The 2nd is a 2-stop diffusion fabric which can double as a white reflector. The 3 additional reflective fabrics and black fabric are in the form of a reversible zippered cover that simply slips over either of the 2 diffusion panels.
"},"name":"Does the 6-in-1 Reflector Kit have 1 or 2 panels?"},{"@type":"Question","acceptedAnswer":{"@type":"Answer","text":"
If you cancel an order or return a product for which you have already earned points, the points earned for that purchase will be removed from your account.
More information regarding the Westcott Rewards Program is available here.
"},"name":"What happens to my points if I return a product or cancel an order?"},{"@type":"Question","acceptedAnswer":{"@type":"Answer","text":"
The FJ80 and FJ80ii speedlights come with a convenient screen lock feature to stop any accidental changes to your settings during a shoot. You can lock the screen, but still control key functions like power and compensation through an unlocked FJ-X trigger or another FJ speedlight.
How do I lock the touchscreen?
To lock the screen, just press and hold the home button on the FJ80 or FJ80ii until a lock icon shows up on the display. After that, the screen will be locked.
How do I unlock the touchscreen?
Unlocking is easy—just press and hold the home button again until the lock icon disappears. Now you can use the touchscreen to adjust settings again.
What does the locking feature do?
The lock disables the touchscreen on the FJ80 and FJ80ii so you don’t accidentally change anything. But even with the screen locked, you can still adjust power, compensation, and other settings using an unlocked FJ-X2 or another speedlight acting as a host for the locked unit.
"},"name":"Locking the Touch Screen on FJ80 Series Speedlights Old*"},{"@type":"Question","acceptedAnswer":{"@type":"Answer","text":"
Occasionally, it may be necessary to reset your FJ system lighting and triggering devices to the factory defaults. A reset will not affect the firmware version and may maintain other customized settings such as language choice. Channel, group, and camera brand choices will often need to be readjusted after a factory reset.
Press and hold the Sync.Menu button for approximately 3 seconds.
Press the down arrow on the control dial to highlight the RESET option near the bottom of the list.
Press the center button to select the NO option and use the up and down arrows to toggle between NO and YES.
Press the center button when YES is selected to apply the reset. You will be returned to the main menu.
Re-enter the Settings menu to adjust the camera choice (default is Canon) and other settings such as Canon RT-ID # for personal preferences.
Return to the main menu and adjust the channel choice (default is 1) and Sync (default is HSS).
FJ-X2m (s)
Locate the three round buttons under the LCD screen.
Press and hold both the 2nd (middle) and 3rd (far right) buttons (under the C.Fn) simultaneously for approximately 3 seconds to enter the settings menu.
Once in the settings menu, press the 1st (far left) button below the Reset button to perform the reset. The screen will flash briefly.
Press the 3rd (far right) button "OK" to return to the regular menu.
FJ200
Press the large center control dial once to enter the settings menu.
Rotate the Control Dial until the Factory Reset is highlighted.
Press the control dial to turn the box color blue and then rotate the dial to display the word YES.
Press the control dial again to initiate the reset. The display will return to the word NO.
Channel, group, and RT/ID may need to be adjusted while in the settings menu after a reset.
Press the small right-hand round button to exit settings and return to the main menu.
FJ400
Press and hold the top Menu button to the right of the screen, next to the test button, for approximately 3 seconds. This will take you to Menu 6 (Settings).
Press the select button (3rd down from the top) until you see the Factory Setting box and the corresponding box with the word NO highlighted.
Rotate the select wheel to display the word YES and then press the wheel's center OK button to initiate the reset. This process will power off the FJ400.
When powering back on, make sure to adjust the channel and group as the reset will default to channel 1 and Group A.
To exit the settings menu before the reset, press the menu button (1st button).
FJ80 and FJ80 II M (s)
Press the Home button and select settings.
Press the down arrow until you see Factory Reset.
Select it by touching it and then press OK.
When the reset is complete, you will be brought back to the home menu. Channel, group, and camera choice may need to be adjusted after a reset.
FJ80 SE M (s)
Simultaneously press both center buttons (settings button with a gear icon) just below the screen.
Press the leftmost button just below the screen reset icon. You will hear two soft beeps.
Reset your camera choice (default is Canon) as needed.
Press the rightmost button below the screen return icon.
Adjust your channel and group as needed. The reset will default to channel 1 and group A.
"},"name":"How to Factory Reset your FJ Gear"},{"@type":"Question","acceptedAnswer":{"@type":"Answer","text":"
The 6-in-1 does not have a white reflective panel. However, the included 2-stop diffusion panel works similarly to a white reflector due to the thickness of the material. You can either use it as a diffuser or use it to bounce light as you would with a white reflector.
"},"name":"Does the 6-in-1 Reflector Kit contain a white reflector?"},{"@type":"Question","acceptedAnswer":{"@type":"Answer","text":"
As is common when using a HSS strobe, the first jump in shutter speed settings from normal sync to HSS (High Speed Sync) on the FJ400 will reduce the light recorded on the image. The amount of that reduction will be dependent on how your camera handles HSS. Some systems will see less recorded light loss while others will record a more significant decrease.
Additional increases in shutter speed while in HSS may reduce the recorded output similarly to the light lost when adjusting the shutter speed in an ambient light setting. For instance, raising the shutter speed from 1/250 normal sync to 1/500 HSS may see a total drop in recorded output by as much as 2 stops or 1/4 the amount of the normal sync. Moving from 1/500 (HSS) to 1/1000 (HSS) could see an additional drop in light from the previous setting. Since HSS is typically employed to allow wider apertures using higher shutter speeds, the reduced recorded output may not have a significant impact on how end users use the HSS feature.
"},"name":"How will HSS settings affect the flash output?"},{"@type":"Question","acceptedAnswer":{"@type":"Answer","text":"
Earning points is limited to the following per account.
Purchases: Unlimited
Account Verification: 1 time
Email Newsletter Subscribe: 1 time
Social Sharing: 3 total
Following on Instagram: 1 time
Birthday: 1 time/year
Product Reviews: 15 total
Referrals: Unlimited
More information regarding the Westcott Rewards Program is available here.
"},"name":"Is there a maximum on how many points I can earn?"},{"@type":"Question","acceptedAnswer":{"@type":"Answer","text":"
Many flashes in the FJ system provide accurate colors with their white balance of 5500K (+- 150K). The FJ strobes and speedlights produce consistent color output over their power range, thus selecting the appropriate white balance settings is critical for the best results.
Recommended White Balance Settings
Custom White Balance
For maximum accuracy, Westcott recommends utilizing a custom white balance.
Fixed Settings
You can also set your camera to 5500K or use the Daylight icon to get reliable results.
Why Skip Auto White Balance (WB)
Because Auto WB adapts to the hues in your scene, it may cause color inconsistencies. Although newer Auto WB systems have improved, they still cannot compete with the dependability of FJ system strobes.
When to Make Exceptions?
If ambient light is your major source and the FJ gear is only filling in the shadows, you can set your white balance to match it.
Flash White Balance Settings:
When utilizing a FJ strobe or trigger, many cameras will default to the "Flash" white balance preset. This can result in a somewhat warmer fill, which can be useful in certain instances.
Custom White Balance for Tint Issues:
If you're shooting under specific lighting settings, such as the green tint from flora, a particular white balance is required to neutralize color shifts. The default "Flash" setting will not allow this.
Modifier Considerations
Although Westcott modifiers are intended to be color-neutral, off-brand choices may cause color shifts. Using a custom white balance will help keep your output neutral.
"},"name":"What is the suggested White Balance when using the FJ system?"},{"@type":"Question","acceptedAnswer":{"@type":"Answer","text":"
Points will be posted to your account within two (2) business days after the referred friend creates a Westcott account and their qualifying purchase has shipped.
A referred friend must be a new Westcott customer without a prior account, email subscription, or any purchase made on the Westcott website.
If your friend returns their purchase, the points will be invalidated.
More information regarding the Westcott Rewards Program is available here.
"},"name":"I referred my friend, but I don't see any reward points?"},{"@type":"Question","acceptedAnswer":{"@type":"Answer","text":"
Westcott lighting gear, your strobes and triggers, sometimes receive firmware updates to improve performance, add new features, and ensure compatibility with newer camera systems. Keeping everything updated is often the key to getting the best results.
Important Instructions Before Updating
Use the Correct USB Cable: Always use the USB-A to USB-C cable included with your strobe and trigger for firmware updates. Using other connectors may result in error messages.
Check Firmware Compatibility: Ensure you are loading the correct firmware version for your specific FJ system product. Using incorrect firmware can lead to errors.
Troubleshooting Errors: If the latest firmware update causes malfunctions, try the following steps:
Re-download the firmware from the Westcott website.
Firmware version numbers are found in the lower right corner of the gear’s opening screens when you power the units on.
How do I check for Westcott firmware updates?
Visit our Firmware Page to find the most recent firmware updates for your Westcott strobes, speed lights and triggers. Double-check that every piece of gear is up to date to keep everything working together perfectly.
Make sure that you are installing the right firmware (.bin file) to the matching piece of gear. If you accidentally copy the wrong file into a device, typically, installing the proper firmware will correct any issues.
Can I roll back my FJ firmware?
Yes, you can roll back your firmware. Westcott provides the prior version of the firmware on the firmware page. Also, if you save your firmware updates to your computer, you can roll back to any version you have on file. Additionally, you can contact support@fjwestcott.com and request a previous version of the firmware.
Will Firmware Versions Across Different Gear Match?
No, firmware updates and versions will most likely not match. It is expected and normal for a trigger to have a different firmware version than a strobe and the strobe to be different from a speedlight. Firmware releases can be for an individual piece of gear. Major updates may involve firmware releases for several pieces of gear at the same time.
Do I need to update all my gear at the same time?
Yes, when visiting our Firmware Page you should check the latest versions available for all your Westcott Gear. Often updates involve multiple pieces of gear. Using older firmware on a strobe, combined with the new firmware on a trigger may result in less than optimum performance.
Best Practices for handling Camera Firmware updates
Camera companies often have firmware updates as well. Westcott recommends that you delay any except those camera firmware updates labeled “critical” for a few weeks. This will give Westcott engineers an opportunity to provide updates should the camera’s update conflict with your current FJ firmware. Most camera firmware does not offer a rollback option. Once you install that camera firmware you will be unable to return to your earlier functioning version.
Quick Links
Click the link below to jump to your desired section.
Unzip the file and open the extracted folder. (Note: Various browsers may automatically unzip the ZIP file.) IMPORTANT: Read ALL FILES located in the extracted folder (i.e. README, Changelog).
Ensure the FJ80 II is OFF and cooled before installing the firmware.
Remove the FJ80 II battery.
Connect the USB-A to USB-C cable to the FJ80 II’s USB-C port.
Common operating systems will present the strobe as an external drive device. (Note: MacOS may display the external device on the desktop or in the Finder window.)
Locate the .BIN file on your computer and drag the file to the FJ80 II (external device). Do not attempt to open the file directly.
(Note: The file ending in .BIN will be the ONLY file copied to the FJ80 II.)
Once the file has been completely copied to the FJ80 II, EJECT the FJ80 II from the computer. Remove the USB-C cable from the FJ80 II and reattach the battery.
Long press the Power | Test button on the FJ80 II, tap the blue power logo on the screen to initiate the firmware update.
Finally, confirm installation was successful by locating the firmware text in the bottom right corner of the opening screen during the start-up process.
IMPORTANT
If the FJ80 II doesn’t display as an external device after being connected to the computer, disconnect the USB cable from both devices, restart the computer, and restart the firmware installation process.
It’s recommended that the firmware update installation process be completed only when the connected computer’s power level is ≥ 50%. Loss of power of any type during this process could render the FJ80 II inoperable and require professional repair.
Removing the USB-A to USB-C cable from the FJ80 II without properly ejecting the FJ80 II from your computer could render the speedlight inoperable and require professional repair.
Depending on the operating system and the applications running, copying the firmware from your computer to the FJ80 II may take a few minutes and/or halt the copying process. Should this happen, close the copy progress window and try again. Further copying issues may require the computer to be restarted.
Unzip the file and open the extracted folder. (Note: Various browsers may automatically unzip the ZIP file.) IMPORTANT: Read ALL FILES located in the extracted folder (i.e. README, Changelog).
Ensure the FJ80-SE is OFF and cooled before installing the firmware.
Remove the FJ80-SE battery.
Connect the USB-A to USB-C cable to the FJ80-SE’s USB-C port.
Common operating systems will present the strobe as an external drive device. (Note: MacOS may display the external device on the desktop or in the Finder window.)
Locate the .BIN file on your computer and drag the file to the FJ80-SE (external device). (Note: The file ending in .BIN will be the ONLY file copied to the FJ80-SE.)
Once the file has been completely copied to the FJ80-SE, EJECT the FJ80-SE from the computer.
Remove the USB-C cable from the FJ80-SE and reinsert the battery.
Slide up the Power button on the FJ80-SE to initiate the firmware update.
Finally, confirm installation was successful by locating the firmware text in the bottom right corner of the opening screen during the start-up process.
IMPORTANT
If the FJ80-SE doesn’t display as an external device after being connected to the computer, disconnect the USB cable from both devices, restart the computer, and restart the firmware installation process.
It’s recommended that the firmware update installation process be completed only when the connected computer’s power level is ≥ 50%. Loss of power of any type during this process could render the FJ80-SE inoperable and require professional repair.
Removing the USB-A to USB-C cable from the FJ80-SE without properly ejecting the FJ80-SE from your computer could render the speedlight inoperable and require professional repair.
Depending on the operating system and the applications running, copying the firmware from your computer to the FJ80-SE may take a few minutes and/or halt the copying process. Should this happen, close the copy progress window and try again. Further copying issues may require the computer to be restarted.
Unzip the file and open the extracted folder. (Note: Various browsers may automatically unzip the ZIP file.) IMPORTANT: Read ALL FILES located in the extracted folder (i.e. README, Changelog).
Ensure the FJ80 is OFF and cooled before installing the firmware.
Connect the USB-A to USB-C cable to the FJ80’s USB-C port.
Common operating systems will present the strobe as an external drive device (Note: MacOS may display the external device on the desktop or in the Finder window.)
Locate the .BIN file on your computer and drag the file to the FJ80 (external device). (Note: The file ending in .BIN will be the ONLY file copied to the FJ80.)
Once the file has been completely copied to the FJ80, EJECT the FJ80 from the computer.
Remove the USB-C cable from the FJ80 and reattach the battery.
Long press the Power | Test button on the FJ80, tap the blue power logo on the screen to initiate the firmware update.
Finally, confirm installation was successful by locating the firmware text in the bottom right corner of the opening screen during the start-up process.
IMPORTANT
If the FJ80 doesn’t display as an external device after being connected to the computer, disconnect the USB cable from both devices, restart the computer, and restart the firmware installation process.
It’s recommended that the firmware update installation process be completed only when the connected computer’s power level is ≥ 50%. Loss of power of any type during this process could render the FJ80 inoperable and require professional repair.
Removing the USB-A to USB-C cable from the FJ80 without properly ejecting the FJ80 from your computer could render the speedlight inoperable and require professional repair.
Depending on the operating system and the applications running, copying the firmware from your computer to the FJ80 may take a few minutes and/or halt the copying process. Should this happen, close the copy progress window and try again. Further copying issues may require the computer to be restarted.
Unzip the file and open the extracted folder. (Note: Various browsers may automatically unzip the ZIP file.) IMPORTANT: Read ALL FILES located in the extracted folder (i.e. README, Changelog).
Ensure the FJ400 is OFF and cooled before removing the battery from the strobe.
Connect the USB-A to USB-C cable to the FJ400’s USB-C port found on the back of the unit once the battery is removed.
Common operating systems will present the strobe as an external drive device (Note: MacOS may display the external device on the desktop or in the Finder window.)
Locate the .BIN file on your computer and drag the file to the FJ400 (external device). (Note: The file ending in .BIN will be the ONLY filed copied to the FJ400.)
Once the file has been completely copied to the FJ400, EJECT the FJ400 from the computer.
Remove the USB-C cable from the FJ400 and reattach the battery.
Press the Power | Model button on the FJ400 to initiate the firmware update and confirm the firmware version. The firmware version can be found at the bottom right of the opening screen when powered on.
IMPORTANT
If the FJ400 doesn’t display as an external device after being connected to the computer, disconnect the USB cable from both devices, restart the computer, and restart the firmware installation process.
It’s recommended that the firmware update installation process be completed only when the connected computer’s power level is ≥ 50%. Loss of power of any type during this process could render the FJ400 inoperable and require professional repair.
Removing the USB-A to USB-C cable from the FJ400 without properly ejecting the FJ400 from your computer could render the strobe inoperable and require professional repair.
Depending on the operating system and the applications running, copying the firmware from your computer to the FJ400 may take a few minutes and/or halt the copying process. Should this happen, close the copy progress window and try again. Further copying issues may require the computer to be restarted.
Unzip the file and open the extracted folder. (Note: Various browsers may automatically unzip the ZIP file.) IMPORTANT: Read ALL FILES located in the extracted folder (i.e. README, Changelog).
Ensure the FJ200 is OFF and cooled before removing the battery from the strobe.
Connect the USB-A to USB-C cable to the FJ200’s USB-C port.
Common operating systems will present the strobe as an external drive device (Note: MacOS may display the external device on the desktop or in the Finder window.)
Locate the .BIN file on your computer and drag the file to the FJ200 (external device). (Note: The file ending in .BIN will be the ONLY file copied to the FJ200.)
Once the file has been completely copied to the FJ200, EJECT the FJ200 from the computer.
Remove the USB-C cable from the FJ200 and reinsert the battery.
Long press the Power/Test button on the FJ200 to initiate the firmware update and confirm installation was successful by locating the firmware text in the bottom right corner of the screen during the start-up process.
IMPORTANT
If the FJ200 doesn’t display as an external device after being connected to the computer, disconnect the USB cable from both devices, restart the computer, and restart the firmware installation process.
It’s recommended that the firmware update installation process be completed only when the connected computer’s power level is ≥ 50%. Loss of power of any type during this process could render the FJ200 inoperable and require professional repair.
Removing the USB-A to USB-C cable from the FJ200 without properly ejecting the FJ200 from your computer could render the strobe inoperable and require professional repair.
Depending on the operating system and the applications running, copying the firmware from your computer to the FJ200 may take a few minutes and/or halt the copying process. Should this happen, close the copy progress window and try again. Further copying issues may require the computer to be restarted.
Unzip the file. Open the extracted folder. (Note: Various browsers may automatically unzip the ZIP file.) IMPORTANT: Read ALL FILES located in the extracted folder (i.e. README, Changelog).
Ensure the FJ-X3 is OFF.
Connect the USB-A to USB-C cable to the FJ-X3’s USB-C port. See step 6 before connecting the USB-A end to the computer.
On the FJ-X3, press and hold the SYNC•MENU button below the screen.
While holding the button, connect the USB-A end of your cable to your computer’s USB-A port. The Wireless Signal Indicator light on FJ-X3 will illuminate red when your computer has recognized the connection to the FJ-X3. You may release the button at this time. Most operating systems will present the FJ-X3 as an external device. MacOS may display an icon on the desktop or in a Finder window.
Locate the .BIN file on your computer and drag the file to the FJ-X3 (external device).
Once the file has been copied to the FJ-X3, EJECT the external device from the computer.
Unplug the USB-A to USB-C cable from your computer and the FJ-X3.
Long press the Power button on the FJ-X3 to initiate the firmware update. Confirm installation was successful by locating the firmware text in the bottom right corner of the opening screen during the start-up process.
IMPORTANT
If the FJ-X3 doesn’t display as an external device after connecting to a computer, disconnect the USB cable from both devices and restart the computer and firmware update process.
It’s recommended that the firmware update installation process be completed only when the connected computer’s power level is ≥ 25%. Loss of power of any type during this process could render the FJ-X3 inoperable and require professional repair.
Removing the USB cable from the FJ-X3 without properly ejecting the device from your computer could render the trigger inoperable and require professional repair.
Copying the firmware from your computer to the FJ-X3 may take a few minutes and/or halt the copying process. Should this happen, close the copy progress window and try again. Further copying issues may require the computer to be restarted.
FJ-X2 M
Step by Step Instructions
Download the latest firmware ZIP file IMPORTANT There are two versions of the FJ-X2m firmware. The beginning letter of Your trigger’s serial number will determine which version is correct for your unit. The serial number is found on the back side of the tilter mechanism. Make sure to load the correct version as indicated on the download page. If you incorrectly load the wrong version, reinstallation with the correct version will correct the error.
Unzip the file. Open the extracted folder. (Note: Various browsers may automatically unzip the ZIP file.) IMPORTANT: Read ALL FILES located in the extracted folder (i.e. README, Changelog).
Ensure the FJ-X2m is OFF.
Connect the USB-A to USB-C cable to the FJ-X2m’s USB-C port. See step 6 before connecting the USB-A end to the computer.
On the FJ-X2m, press and hold the far-right round button below the screen just under the C.Fn text. While holding the button, connect the USB-A to USB-C cable into your computer’s USB-A port. The Wireless Signal Indicator light on FJ-X2m will illuminate red when your computer has recognized the connection to the FJ-X2m. You may release the button at this time. Most operating systems will present the FJ-X2m as an external device. MacOS may display an icon on the desktop or in a Finder window.
Locate the .BIN file on your computer and drag the file to the FJ-X2m (external device).
Once the file has copied to the FJ-X2m, EJECT the external device from the computer.
Unplug the USB-A to USB-C cable from your computer and the FJ-X2m.
Long press the Power | Menu button on the FJ-X2m to initiate the firmware update. Confirm installation was successful by locating the firmware text in the bottom right corner of the opening screen during the start-up process.
IMPORTANT
If the FJ-X2m doesn’t display as an external device after connecting to a computer, disconnect the USB cable from both devices and restart the computer and firmware update process.
It’s recommended that the firmware update installation process be completed only when the connected computer’s power level is ≥ 25%. Loss of power of any type during this process could render the FJ-X2m inoperable and require professional repair.
Removing the USB cable from the FJ-X2m without properly ejecting the device from your computer could render the trigger inoperable and require professional repair.
Copying the firmware from your computer to the FJ-X2m may take a few minutes and/ or halt the copying process. Should this happen, close the copy progress window and try again. Further copying issues may require the computer to be restarted.
The FJ400 has an optical Cell for triggering the FJ400 from another flash or strobe unit fired in near proximity. This sensor can be found near the mini plug and air intake on the bottom of the unit. The Optical triggering is only available in Manual mode and will turn off all wireless radio signal reception for firing. It will also disable group and channel choice, power adjustment and HSS capabilities. If choosing Optical cell for triggering, an Eye icon will show up on the screen. After using optical triggering, remember to resume TTL-All in menu 1 of the FJ400 to restore Wireless Radio Transmission from FJ wireless triggers. When you power off the FJ400 the Eye icon will disappear and Optical cell triggering will be disabled. You must still activate the TTL- All function in menu 1 to resume standard radio controlled wireless triggering.
IMPORTANT: To avoid the FJ400 entering SLP (sleep mode) based on the Auto-off settings of the FJ400, while using the optical cell, enter the settings menu (menu 6) by long pressing the top menu button. Change the Auto-off setting to "OFF". Early firmware did not offer an "OFF" option so make sure to check your firmware version for updates if the "OFF" option is not given.
If this article was helpful, please click the thumbs up icon below.
"},"name":"Operating the FJ400 with Optical Cell Triggering"},{"@type":"Question","acceptedAnswer":{"@type":"Answer","text":"
The FJ-X3 triggers and the FJ400 strobe has extremely reliable communication. If you’re using the older FJ-X2m trigger and are having issues, consider the following:
Why is the FJ-X2m trigger is not connecting?
Your FJ-X2m trigger and FJ400 strobe might not connect for a few reasons:
Channel and Group do not match
Low battery in the camera or trigger
Incorrect camera settings
The trigger or adapter isn’t plugged in properly
Too much wireless traffic on the current channel
How can I fix wireless traffic problems?
If wireless traffic is the issue, try changing the channels on both the trigger and strobe. Adjust the channel up or down by 5.
What’s the Auto channel feature? How do I use it?
The Auto channel feature helps find a less crowded channel. Here’s how to use it:
Set both the FJ-X2m trigger and FJ400 strobe to channel "0."
Press and hold the "CH" button on the trigger for about 3 seconds.
The strobe will then show "AU" instead of "0."
After that, do a test shot to check the connection. Keep in mind that in busy areas, this feature might lead to frequent changes, which could cause misfires. Also, it does not work with Canon RT setups.
Can I get channel suggestions?
Yes! You can find recommended channels in the trigger’s menu by selecting "CH recommended." This helps you choose the best channels for a stable connection.
Should I upgrade to the FJ-X3 trigger?
If you often shoot in crowded areas, especially with 5G networks becoming more common, upgrading to the FJ-X3 trigger could be a good choice. It’s built with better connections over all especially in busy environments.
To submit a review for a Westcott product that you’ve purchased, log into your account and visit this page.
More information regarding the Westcott Rewards Program is available here.
"},"name":"How can I add product reviews for past purchases?"},{"@type":"Question","acceptedAnswer":{"@type":"Answer","text":"
Price Adjustments
A price adjustment is permitted only when an item has been marked down. A price adjustment request must be made within 14 days of purchase from this website. Complete this form and select Order Assistance to submit your request.
More information regarding refunds and exchanges is available here.
"},"name":"Do you offer price adjustments?"},{"@type":"Question","acceptedAnswer":{"@type":"Answer","text":"
The X-sync setting is for use with film cameras, leaf shutters, and some cameras not listed as compatible but using a center pin firing option for synchronizing the flash with the camera's shutter.
X-Sync (early firmware uses the term Sync-X) needs to be set to "OFF" (default) to enable the FJ system triggers to communicate HSS and TTL information between the camera and the trigger. When using the FJ-X3 or FJ80ii, setting X-sync to ON will not allow toggling mode options to TTL or allow the sync function to toggle to any other function. When using X-Sync, users need to return the setting to "OFF" to enable HSS and TTL communication.
For some camera models, setting X-Sync to "ON" will allow faster frame rates for continuous capture when the camera system typically slows capture rates to accommodate slower recycling rates on some speed lights.
Please click the thumbs up icon below if this article was helpful.
"},"name":"What does X-sync do and why is it defaulted to OFF?"},{"@type":"Question","acceptedAnswer":{"@type":"Answer","text":"
Overview Westcott has introduced the FJ80iiS and FJ-X3S models, specifically designed for Sony users. These devices connect directly to Sony hot shoes, ensuring seamless integration and enhanced functionality tailored for Sony camera systems.
Key Features and Functionality
Sony-Specific Models: The FJ80iiS and FJ-X3S are crafted for direct connection to Sony hot shoes, making setup a breeze and optimizing performance for photographers using Sony gear.
Using FJ80iim or FJ-X3m with Sony Cameras: For those with the FJ80iim or FJ-X3m, a FJ Wireless Adapter is your best bet for full functionality of the FJ-X2m trigger. Without this adapter, you can still use the trigger, but keep in mind that the High-Speed Sync (HSS) and TTL features won’t be accessible.
High-Speed Synchronization (HSS): To get HSS up and running, remember that it needs to be activated on both the FJ trigger and the Speedlight. If you skip this step, your sync speed will default to the camera's regular sync range, usually between 1/160 to 1/250.
Specific Camera Settings for Sony: When it comes to in-camera settings for your Sony model, here are the specifics you should adjust:
Silent Shooting: Set this to "Off" for optimal performance.
E-Front Curtain: Ensure this is also "Off."
Red Eye Reduction: Turn this setting "Off."
Flash Mode: Set this to "Fill-Flash" to guarantee effective lighting.
Wireless Flash: Make sure this is turned "Off" to prevent the camera from defaulting to TTL mode.
For rear curtain sync, remember to enable this setting in the camera menu, as it may not activate automatically.
Conclusion With the FJ80iiS and FJ-X3S, Westcott has made great strides in enhancing the experience for Sony camera users. If you’re using the FJ80iim or FJ-X3m, don’t forget to grab the FJ Wireless Adapter to unlock the full potential of HSS and TTL. Remember, fine-tuning your in-camera settings is crucial for getting the best results. For a comprehensive list of tested compatible cameras, be sure to check out the FJ Wireless System Camera Compatibility page. Happy shooting!
"},"name":"Sony Camera Compatibility and Setup For FJ Wireless"},{"@type":"Question","acceptedAnswer":{"@type":"Answer","text":"
If you believe your Westcott Points were not properly credited to your Account, you should contact Westcott customer service at (419) 243-7311 within thirty (30) days.
More information regarding the Westcott Rewards Program is available here.
"},"name":"What should I do if I believe my points were not properly credited to my account?"},{"@type":"Question","acceptedAnswer":{"@type":"Answer","text":"
A factory reset of the FJ units will not roll back firmware and will only apply to return the settings to the factory defaults. Individual setting preferences, including camera choice, channel, group. and RT-ID (canon RT users) will need to be readjusted after a reset. Power on the units and follow the directions below.
FJ-400
Long press the top vertical hard button (menu listing) to the right of the screen to enter menu 6 (settings menu). Press the third vertical button (select) to highlight the Factory Setting choice. Scroll the dial to change from "NO" to "YES". Press the center of the scroll dial (OK) to initiate the reset. Turn the Strobe back on and change the default settings as needed to match your camera system, channel, group and sync function.
FJ-80
Press the HOME hard button to the left of the screen. Press the settings bar on the touch screen. Press the Factory Reset touch screen bar at the bottom. Once highlighted, hit OK. Press the Home button to choose your operating mode. Change the default settings as needed to match your camera system, channel, group and sync function.
FJ-200
Press the large center control dial to enter the settings menu. Scroll the dial to the bottom of the second page (Factory Reset). Short press the dial to outline the words in blue. Turn the dial to "YES". Press the Dial to initiate the reset. The display will turn to "NO" after the reset is done. Short press the modeling light button to return to the main menu.
FJ-X2m
At the same time, press the two right most hard round buttons just below the screen (C.Fn) to enter the settings menu. Once in the settings menu, press the left button just below the screen (below the word RESET). The green light at the top will flash once and you can press the right most button (below the word OK) to return to the main menu. Change the default settings as needed to match your camera system, channel and sync function.
"},"name":"How do I do a Factory reset on my FJ strobes and triggers?"},{"@type":"Question","acceptedAnswer":{"@type":"Answer","text":"
The FJ-X2m controls many functions available with the FJ400 strobe including:
Switching modes from TTL to Manual
Setting individual power levels or TTL exposure compensation for up to 6 groups
First Curtain, Rear Curtain, or HSS synchronization
Audible beep and modeling light on/off (highlight the applicable group on the trigger to enable function)
TTL to Manual Mode output conversion (Group A)
** Please note: some functions may be limited by the camera model. FJ-X2m firmware updates may add additional functionality.
"},"name":"Controlling the FJ400 With The FJ-X2m"},{"@type":"Question","acceptedAnswer":{"@type":"Answer","text":"
Yes, all points in a member's account will expire if no qualifying purchase or Reward program activity is made through the member's account for a period of one (1) year from the last date of qualifying activity.
More information regarding the Westcott Rewards Program is available here.
"},"name":"Do Westcott Reward points have an expiration date?"},{"@type":"Question","acceptedAnswer":{"@type":"Answer","text":"
The FJ Wireless System is compatible with the following cameras using the latest firmware updates. Additional camera models are likely compatible and will be added to this list as they are tested and confirmed.
CANON
FUJI
NIKON
OLYMPUS
PANASONIC LUMIX
SONY (with Adapter)
TTL, HSS & MANUAL
TTL, HSS & MANUAL
TTL, HSS & MANUAL
TTL, HSS & MANUAL
TTL, HSS & MANUAL
TTL, HSS & MANUAL
EOS-1D X
GFX100†
D500
OM-D E-M1 MARK II
GH5
A1†
EOS-1D X Mark II
XH-2†
D750
OM-D E-M5 MARK II
S1
a7
EOS-1D X Mark III
XT-2
D800*
S1r
a7 III
EOS 5D Mark III
XT-3
D810
MANUAL ONLY
S5ii
a7 IV
EOS 5D Mark IV
XT-4*
D850
OM-D E-M1 MARK III
a7R II
EOS 5
Z5
OM-D E-M1X
MANUAL ONLY
a7R III
EOS 5DS R
MANUAL ONLY
Z6
OM-D E-M5 MARK III
G85
a7R IV
EOS 6D*
GFX50R†
Z6 II
OM-D E-M10 MARK III
G9
a7R V
EOS 6D Mark II
GFX50S†
Z7
OM-D E-M10 MARK IIIS
G95
a9
EOS 7D Mark II*
GFX100S†
Z7 II
OM-D E-M10 MARK IV
GH5M2
a9 II
EOS 80D
X-A5
Z9
GH5s
a99 II
EOS R
X-A7
Z50
S1H
a6500
EOS R3
X-E3
S5
EOS R5
X-E4
MANUAL ONLY
MANUAL ONLY
EOS R6
X-H1
D3500
a7II
EOS R6 MKII
X-Pro3
D5600
a7C
EOS R7†
X-Pro2
D6
a7S III
EOS R8†
X-S10
D610
EOS RP
X-T20
D780
X-T30
D7500
MANUAL ONLY
X-T100
Zfc
EOS 90D
X-T200
EOS M50
EOS Ra
EOS Rebel SL3
EOS Rebel T7
EOS Rebel T8i
Updated 08/14/2023
*Compatible camera with minor HSS, TTL, and/or performance limitations that can often be offset with adjustments within the camera and/or FJ Wireless equipment settings.
†Used with the FJ-X3 and FJ80 II only. Due to mechanical considerations, the FJ-X2m should not be mounted directly to the Fuji GFX50, GFX50R, GFX50S, GFX100 or GFX100S camera hot shoes.
"},"name":"old* FJ Wireless System Camera Compatibility"},{"@type":"Question","acceptedAnswer":{"@type":"Answer","text":"
To provide industry-leading features, both the FJ400 and FJ-X2m are built with advanced hardware. Both are equipped with a USB Type-C connector for updating firmware.
"},"name":"Will There Be Firmware Updates for the FJ400 and FJ-X2m"},{"@type":"Question","acceptedAnswer":{"@type":"Answer","text":"
The number of Points needed for redemption can be found on the Westcott Rewards page or within the Rewards Tab in the bottom right corner of the website.
More information regarding the Westcott Rewards Program is available here.
"},"name":"How many points do I need before I can redeem?"},{"@type":"Question","acceptedAnswer":{"@type":"Answer","text":"
A lag in the firing of the camera shutter when in TTL is seen on some systems if you are using Back button auto focus and have your in-camera exposure metering tied to your autofocus point. You may need to disable the setting temporarily while using the FJ system. Setting a custom menu item in your camera's menu system may enable you to toggle the setting on and off when using FJ strobes to allow proper synchronization.
If this article was helpful, Please click the thumbs up icon below.
"},"name":"TTL Not Synching with Back Button Focus"},{"@type":"Question","acceptedAnswer":{"@type":"Answer","text":"
Reward gift card codes will be emailed to you when you redeem your points.
They can also be found by tapping on the Rewards tab in the bottom right corner of the website, then selecting “Get Rewards” from the menu or by accessing the rewards page in your user account.
"},"name":"How can I find my redeemed rewards?"},{"@type":"Question","acceptedAnswer":{"@type":"Answer","text":"
FJ Wireless triggers and speedlights are available in two options to control the FJ Wireless Flash System. Choose a Multi-brand hot shoe mount (e.g. FJ-X3 M) for pairing with virtually any camera brand, or our dedicated Sony version (e.g. FJ-X3 S).
Camera Compatibility
Cameras are thoroughly tested to ensure proper synchronization and use of HSS and TTL features.
If your specific camera is not on the list, either fully compatible or manual mode only, it has either not yet been tested or did not meet all requirements for approval. For cameras not within the list, we encourage you to visit our social media Lighting Community as someone may have your specific camera and is using the FJ lighting gear with success.
Firmware Updates
Keeping your trigger's firmware up to date is crucial. To check your current firmware version, look at the bottom right of the boot-up screen when powering on your Westcott equipment. For the latest firmware, visit the Westcott Firmware page. For guidance on when and how to update firmware, see the When to Update Firmware page.
"},"name":"Camera Compatibility with FJ Wireless System"},{"@type":"Question","acceptedAnswer":{"@type":"Answer","text":"
To use your Panasonic S1r in TTL, in either HSS or normal sync speeds, go into the camera’s flash settings and make sure you are not in FP mode in the camera menu. To enable HSS using non-TTL /manual power levels make sure that you are in that FP mode.
"},"name":"How does the Panasonic Lumix S1r work in TTL and HSS?"},{"@type":"Question","acceptedAnswer":{"@type":"Answer","text":"
Combining multiple accounts to accumulate more reward points is not permitted. Please contact customer service or +1 (419) 243-7311 if you need further assistance or have questions regarding this.
"},"name":"Can I transfer points or combine points from multiple accounts?"},{"@type":"Question","acceptedAnswer":{"@type":"Answer","text":"
Overview
Mechanical shutter Frame rates as fast as 10fps to 20fps (camera dependent) can be supported if the power level on the FJ strobe is level 4 (1/32 Power) or below. Based on the strobe’s distance from the subject or the Ws (Watt second) rating, you may need to raise your camera ISO and/or open/widen your aperture (f-stop setting) to accommodate the lower power levels required to maintain the fast frame rates.
It’s important to understand how power levels, recycle times and Camera settings work together to provide consistent proper exposures when using flash with high frame capture rates.
How fast is too fast?
Westcott FJ gear provides industry-leading recycle times to allow you to record images at the fastest rates available when using flash. Still, you need to practice caution when choosing settings to avoid a conflict between your frame capture rate and the recycle times of the strobes.
Not considering the recycle time at a given power level can cause underexposed images as the strobe may be unable to recycle at the rate of capture. A strobe requiring a second to fully recycle, cannot provide full power at frame rates of 10 per second.
Reducing the manual output level of the FJ strobe will decrease the amount of time required to recycle the unit for the next exposure. At full power, FJ strobes recycle within a second or two (model dependent).
Use of TTL and High Speed continuous capture.
As stated above, maintaining a power-level of 4 or less will provide recycling times at, or near the maximum mechanical shutter drive speeds (approximately 20fps).
When using TTL (through-the-lens) metering to set your flash output level, working with a low ISO or narrow apertures (larger F number) may require the strobe to automatically produce a higher output than the level 4 (1/32) power levels required to maintain the fastest frame rates.
As with manual strobe power settings, choosing a higher ISO or wider aperture may be necessary to provide the fastest recycle rates. Typically, you will want to set your camera’s TTL flash exposure menu to First shot metering or the rate of capture may be slower than you expect.
Tips to Maintain Quick Recycling
Moving the light closer to the subject will allow you to reduce the output of the strobe while maintaining your exposure. Halving the distance of the light to subject will give you four times the amount of light on your subject. This will allow you to reduce the output by 2 levels. Power 7.0 (¼ power) at 8 feet = power 5.0 (1/16 power) at 4 feet.
Each doubling of the ISO will allow you to reduce the output level by a factor of 1 stop (½ the amount). Power 7.0 at 200 ISO = Power 6.0 at 400 ISO = power 5.0 at 800 ISO
Moving to a wider aperture will allow you to reduce the power output by a factor of 1 for each stop of adjustment. Power 7.0 at f5.6 = power 6.0 at f4.0
Each time you set the manual power lower or cause the strobe to fire at one level less in TTL, you reduce the recycle time by at least 1/3.
Set your in-camera TTL metering to first shot
"},"name":"FJ Strobes with High-Speed Continuous Shooting"},{"@type":"Question","acceptedAnswer":{"@type":"Answer","text":"
Most Camera system will require you to set HSS directly on the FJ-X2m trigger in order for the camera to enter shutter speeds above the standard sync of the camera which is typically between 1/160 and 1/250 second. To set this simply press the third horizontal button (just below the word "Sync") to cycle the choice from front curtain, rear curtain and to HSS (lighting bolt next to H). When returning to normal synchronization, you will want to return to front curtain operation. Most Nikon cameras will automatically adjust the trigger to the in-camera setting when adjusting the shutter speed but you will need to make sure to enable Auto FP 1/250 in the Nikon menu system.
"},"name":"HSS High Speed Sync with the FJ-X2m"},{"@type":"Question","acceptedAnswer":{"@type":"Answer","text":"
No, reward points must be applied towards a gift card before placing an order and cannot be used retroactively on prior purchases. This policy helps ensure a smooth and fair process for all customers.
"},"name":"Can I use my points on prior purchases?"},{"@type":"Question","acceptedAnswer":{"@type":"Answer","text":"
(Notes for when this goes live. This article will replace: Maximizing the Lifespan of Your Lithium Polymer FJ Batteries How to Maximize FJ400 Battery Flashes)
Properly using and caring for your FJ batteries can help prolong their lifespan and performance. This article discusses different steps to help your batteries last during a shoot and over time.
Topics in this article: (These links will be clickable once complete)
Charging
Usage
Storage
Specific Flash Unit Battery Information
Charging
Recharge Before 25%
Recharging the FJ battery before it reaches 25% can prolong its life.
Optimal Charging Temperature
Avoid charging when the battery is below 10ºC/50ºF, as the chemistry in the battery is less efficient at lower temperatures.
Avoid Overheating
Hot Lithium Polymer batteries don’t take a charge well (100ºF/37ºC and higher). Continued overheating of your FJ units will reduce the battery's life and functionality (frames per charge). Allow the batteries to cool after use before charging. If your FJ unit nears or reaches OH (overheating) status, allow additional cooling time. For the FJ400, you can use the AC power adapter to help cool the battery for several minutes before powering off the unit for the remainder of the charge.
Usage
Avoid Full Depletion
Lithium Polymers do not have a memory effect, so you should never fully deplete them as with Ni-Cad batteries. Westcott's FJ system has built-in protection to prevent total discharge when in use. If stored long-term after significant use and discharge, the remaining protective charge can dissipate, damaging the battery's ability to recharge.
Longevity During a Session:
Lower the screen brightness
Set the screen brightness to the lowest possible setting that still allows you to see what you need to see. With the FJ400 and FJ200, most of your control will be through the attached trigger, and seeing the strobes LCD may not be a necessity in your shooting situation.
Power off the flash when not in use for an extended time
Even with auto-off features, power off your flashes if you know you will not be photographing for 30 minutes or more.
Avoid Auto Zoom features on FJ speed lights
Use the manual zoom feature in your speed lights when possible. When the Zoom is set to auto and you are using a zoom lens, the flash barrel will continue to zoom as your lens zooms in and out.
Minimize the use of the modeling lamp
The modeling lamp can cut down the number of flashes when not using AC power and can create heat possibly causing your unit to engage its overheating safety features, slowing down performance.
Use the flashes within normal sync speeds
HSS (High-Speed Sync) requires multiple rapid flashes at higher power levels and adds heat, both depleting battery life at a faster pace.
Use Manual power settings
TTL adds a pre-flash which has a minimal effect on battery life.
Use lower power levels whenever possible and raise your ISO. This adjustment can help you maintain consistent lighting without running out of power too quickly.
Use AC power when possible
The FJ400 charger can be used as AC power and will also charge the battery when idle.
Storage
Avoid Long-term Full Charge
Lithium Polymer batteries should not be stored long-term with a full charge, as the chemistry can cause them to expand and may render them unusable.
Optimal Storage Level
Longer-term storage levels between 50% and 75% are suggested. Lithium Polymer batteries lose less than 1% of their charge each month when stored. Recharge to 50%~75% capacity at least every 3 months when not being used.
Specific Flash Unit Battery Information
FJ400
The FJ400 Lithium-Polymer Battery is capable of 480+ full-power flashes with the modeling lamp disabled.
In order to operate the FJ400 with the AC power supply, the FJ400 battery must have a remaining charge of ≥ 25% capacity
The average charge time is 2.5 hours from complete discharge. The FJ400 Lithium-Polymer Battery (14.8V 65Wh, 4400mAh) will achieve at least 300 complete charge cycles. Continued usage beyond the expected charge cycles will result in diminished performance and the ability to hold a charge. Avoid charging and using the battery outside of the stated operating temperatures (32~104°F / 0~40°C) as it will affect the overall performance of the battery and strobe.
FJ200
The FJ200 was designed to achieve 450+ full-power flashes with every battery charge. Achieving this requires that the screen intensity be set to MIN
The average charge time is 2 hours from complete discharge. The FJ200 Lithium-Polymer Battery (14.8V 37Wh, 2500mAh) will achieve at least 300 complete charge cycles (@80% after 300). Continued usage beyond the expected charge cycles will result in diminished performance and the ability to hold a charge. Avoid charging and using the battery outside of the stated operating temperatures 50~113°F / 10~45°C as it will affect the overall performance of the battery and strobe.
FJ80II M (FJ80II S)
The FJ80 II is designed to achieve 500+ full-power flashes with every battery charge. Achieving this burst count requires that the touchscreen screen intensity be set to MIN
The average charge time is ~2 hours from complete discharge. The FJ80 Lithium-Polymer Battery will achieve at least 300 full charge cycles (@80% after 300). Continued usage beyond the expected charge cycles will result in diminished performance and the ability to hold a charge. Avoid charging and using the battery outside of the stated operating temperatures (14~122°F / - 10°~50°C) as it will affect the overall performance of the battery and speedlight.
FJ80SE (FJ80SE S)
The FJ80-SE Lithium-ion Battery is capable of 550+ full-power flashes with the modeling lamp disabled and screen brightness set to Minimum Brightness
The average charge time is ~3 hours from complete discharge. The FJ80-SE Lithium-ion Battery will achieve at least 200 full-charge cycles (@80% capacity after 200). Usage beyond charge cycles may result in diminished performance and the ability to hold a charge for extended periods. Avoid charging and using the battery outside of the stated operating temperatures (14~131°F / - 10°~55°C) as it will affect the overall performance of the battery and Speedlight.
FJ80 Original
The FJ80 was designed to achieve 400+ full-power flashes with every battery charge. Achieving this requires that the screen intensity be set to MIN
The average charge time is ~2 hours from complete discharge. The FJ80 Lithium-Polymer Battery will achieve at least 300 full charge cycles (@80% after 300). Continued usage beyond the expected charge cycles will result in diminished performance and the ability to hold a charge. Avoid charging and using the battery outside of the stated operating temperatures (14~122°F / -10°~50°C) as it will affect the overall performance of the battery and speedlight.
"},"name":"Battery Care and Information"},{"@type":"Question","acceptedAnswer":{"@type":"Answer","text":"
The Optical sensor allows the FJ400 to be triggered remotely via the flash from another strobe or speed light. The sensor is only available when the FJ400 is set to manual mode as no TTL data can be transmitted. Using the FJ400 with its companion FJ-X2m trigger is ideal, however, in the event the trigger is not available, damaged, or not charged, the optical sensor or a 3.5 input cord connection can be utilized. For Optical triggering, Simply go to Menu 1 of the strobe and make sure Mode is set to "Manual". Enter Menu 3 of the FJ400 and enable the optical sensor by pressing the button next to the eye icon. Provided the initial flash has adequate output and the sensor on the FJ400 is positioned to see the signal, the FJ400 will fire synchronized with the flash.
"},"name":"What is the purpose of the Optical Sensor on the FJ400?"},{"@type":"Question","acceptedAnswer":{"@type":"Answer","text":"
Creative Mask Mode lets you capture multiple unique lighting setups quickly, giving clients more looks in less time. It’s perfect for high-volume, fast-paced photography or maximizing variety in a single session.
What Is Creative Mask Mode?
Creative Mask Mode is a feature that allows you to program different strobes or lights to fire in specific sequences across multiple frames. By assigning your lights to fire in different frames, you can change the look or background quickly without adjusting your setup between shots.
Why Use Creative Mask Mode?
Save Time
Capture multiple unique styles in one quick session.
Increase Sales
Offer clients more options, from varied backgrounds to distinctive lighting, boosting final product appeal.
Adaptability
Whether you’re shooting sports teams with limited access to athletes or high-volume portrait sessions, it provides a range of looks efficiently.
How To Set Up Creative Mask Mode
1. Dial-In Exposures
Pre-set each light’s power in manual mode "M" and confirm correct exposure before assigning them to sequences.
Creative Mask Mode is only available when the strobe is set to manual "M"
Adjust exposures from your trigger, any power adjustments made on the strobe itself will be overwritten by the connected trigger.
2. Activate Creative Mask
Press the menu button on the top right of the touch screen until "Menu 3" is displayed. You will also see “Mask” at the top of the listed settings.
Turn on Creative Mask by touching the "Mask" setting then select "On".
If the option is Grayed out double-check that the strobe is set to manual "M"
You will know the setting is activated when you can select "Frames" and "SEQ". Additionally, when you press the Home button the Creative Mask icon will be displayed on the bottom left of the touch screen (a box with a silhouette).
3. Select the Number of Frames
Under the "Frames" tab in Menu 3, choose how many frames or scenes you want. For example, set 6 frames if you plan to use 6 different lighting variations.
4. Assign Lights to Frames
All: If you need a light to fire every time, set it to fire in all frames.
1-6: Tell each strobe which frames to fire in (e.g., a background light fires only on frames 1, 2, and 3; an edge light fires on frames 4, 5, and 6).
5. Take Photos!
Now that you have your lights placed, and exposures dialed in, the amount of frames is designated on each strobe, and each strobe is assigned to a frame sequence, your strobes will now fire in the order and sequence you assigned.
Your first photo will be frame 1, the second will be frame 2, and so on until frame 6 when the cycle will repeat. Getting you the different looks you set up in seconds!
Shooting Tips
Posing Changes: Ask your subject to change expressions or poses after a set of frames to maximize variety.
Background vs. Subject Lighting: You can switch backgrounds (gels or patterns) or alter main lights for a different look each time. Consider using a white background and lights with colored gels to get different colored backgrounds.
Recycle Times: Spacing out the usage of high-power lights across frames can help avoid misfires due to recycling delays.
Do Not Skip Individual Light Setup: Always confirm exposure and power levels separately before assigning sequences.
Always Use The Trigger for Adjustments: Rely on your FJ wireless trigger for power changes to streamline workflow.
Optical Triggering Will Be Disabled: When using Creative Mask mode, optical triggering will not be available.
The battery for the FJ80 is capable of several hundred full power flashes from a single charge. There are however a few things that can influence the total number of flashes.
To achieve a maximum number you should:
Set the screen to level "1" (2 is the default) in the settings menu
Use the FJ80 in speed light mode.
Minimize use of the zoom feature
Do not overheat the unit
Power off the flash when not in use for an extended time.
Do not use the Modeling lamp for an extended time.
Use the FJ80 within normal sync speeds. HSS requires multiple rapid flashes at higher power levels and adds heat, both deplete battery life at a faster pace.
Use Manual power settings. TTL adds a pre-flash which has a minimal effect on battery life.
The following firmware versions allow for Canon RT functionality within FJ Wireless Gear.
For new camera firmware released after the FJ Wireless firmware posting date, listed next to the firmware below, we cannot guarantee TTL or HSS compatibility.
"},"name":"Firmware Compatible with Canon RT"},{"@type":"Question","acceptedAnswer":{"@type":"Answer","text":"
Set the FJ-X2m trigger to "Nikon". To enable HSS for Nikon cameras, use the in-camera menu system to set the Flash Sync Speed setting to “1/250s (Auto FP)” or "1/200 (Auto FP)". Your Nikon camera will then automatically adjust your trigger and strobe into the High-Speed Sync setting when you advance the shutter speed above normal synchronization speeds.
Standard in-camera menu settings apply. Silent shutter, e-front curtain off, red eye reduction off and ensuring that your FJ-X2m is aligned properly to the Nikon hot shoe and engaging the multi-pin mechanism is critical for proper communication and preventing misfires. Make sure the in-camera flash menu has the flash activated and not set to "No Flash". Some Nikon bodies will require you to toggle the menu "apply settings to live view" to "off" to allow your on camera screen to brighten as a standard optical view finder when the FJ-X2m trigger is attached.
Initial communication for some Nikon bodies (not model related) experiencing connection issues may be solved with a small adjustment to the hotshoe mounting position for your FJ-X2m. On these bodies, nudge the trigger slightly back from the front of the camera's hotshoe to allow the locking pin of the FJ-X2m to engage properly. Engaging the Nikon creative lighting system may override and control the FJ-X2m trigger settings.
"},"name":"How does the FJ-X2m Wireless Radio Trigger work if I own a Nikon camera?"},{"@type":"Question","acceptedAnswer":{"@type":"Answer","text":"
When using an FJ Wireless trigger—such as the FJ-X3 M (S), FJ-X2 M, or the FJ80 (II and SE) in Host Mode—you can adjust TTL exposure compensation by ±3 stops (±5 stops on Fuji).
Total TTL Exposure Compensation Value
The FJ Wireless system offers a unique feature that allows TTL exposure compensation to be adjusted both on the trigger and on the flash unit itself. These two adjustments are combined to produce a total compensation value.
For example:
If you set a +3 adjustment on your trigger, your strobe will output 3 stops more power.
If you then add a +3 adjustment directly on the strobe/flash unit while the +3 on the trigger is still active, the result will be a total adjustment of +6 stops.
Please note: When using TTL, the camera and host unit communicate with each other to automatically determine the optimal flash power for the scene. If your TTL photo appears too dark—even with the flash already firing at a high level (e.g., power level 6)—the maximum effective adjustment available may be limited. A +3 compensation might bring the unit to its maximum of power level 9 (full power). In cases like this, if you attempt a combined +6 adjustment (e.g., +3 on the trigger and +3 on the flash), the system will only reflect a 3-stop increase in exposure—because the unit cannot exceed full power (level 9 or 1/1).
How to View TTL Exposure Compensation on Your Strobe
Westcott’s TTL to Manual feature allows you to see TTL exposure compensation values from the host unit, along with the actual power output used during the last TTL exposure. This is especially helpful for monitoring power levels, as lower output can lead to faster recycling times.
FJ400
Press and hold the Menu button to enter Menu 6.
Press the Select button until "OFF" next to M=TTL is highlighted.
Press the Set button to change "OFF" to "ON."
Press the Menu button once to exit the settings menu.
When in TTL mode, two new sets of numbers will appear in the lower-left corner of the screen above the sync icon:
The top number (e.g., +0.0) is the TTL exposure compensation set by the host unit.
The number below it (e.g., 1.0 to 9.0) shows the manual power equivalent of the previous TTL flash.
The largest number on the screen represents the additional TTL adjustment made directly on the strobe.
FJ400 II and FJ800
Touch and hold the Menu button to open the settings menu.
Use the up and down arrows to navigate to the TTL to Manual setting.
Tap to change the setting from "OFF" to "ON."
Press OK to confirm.
Press the Home button to exit the menu.
When in TTL mode, two new sets of numbers will appear on the left side of the screen under the TTL text:
The top number (e.g., +0.0) indicates TTL compensation from the host unit.
The number below it (e.g., 1.0 to 9.0) is the manual power equivalent from the last TTL exposure.
The largest number shows the additional TTL adjustment applied directly on the strobe.
TTL to Manual with FJ200, FJ80iiM(S) and FJ-X3m
When enabling TTL to Manual mode on the FJ200 and FJ80, exposure compensation adjustments from the host unit will not be displayed. However, the manual equivalent of the previous TTL exposure will be shown.
FJ200
Press the center control wheel to enter the settings menu.
Rotate the wheel until "TTL→M" is selected.
Press the control wheel and rotate it to change the setting to "On."
Press the Return/Model button to exit the settings menu.
Once enabled, an “M = 0.0” (or another value) will appear on the right side of the screen. The number under the new "M" icon represents the manual power output equivalent of the previous TTL exposure.
Once enabled, on the right side of the screen there will be an M = 0.0 (or a number). The number under the new "M" icon is the manual power out put equivalent of the previous TTL exposure.
FJ80iiM(S)
The TTL to M feature on the FJ80iiM(S) is only available in Host mode when attached to a camera. It displays the manual power equivalent of the previous TTL exposure.
Press the Home button and select Host mode.
Set Group A to TTL mode.
Note: Group A not only controls other flashes assigned to that group but also controls the FJ80 itself.
Take a photo.
Touch the "A" of Group A once to select it.
Touch and hold the "A" of Group A for about 4 seconds.
Group A will switch from TTL to Manual mode and automatically assign a manual power output that matches the previous TTL exposure.
FJ-X3M
The TTL to M feature is only available in group A
Set Group A to TTL mode.
Take a photo while Group A is in TTL.
Press and hold the button on the left side of the trigger that corresponds to Group A.
Group A will switch from TTL to Manual mode and automatically assign a manual power output that matches the previous TTL exposure.